![]() Fongang Rodrique
Fongang Rodrique
How to Test and Replay Checkout Webhook Events on localhost with Hookdeck
Checkout is a payment processing platform that allows businesses to accept online payments from customers. It accepts various payment methods and includes features like fraud detection and subscription management. It is intended to be simple to use and to integrate with other platforms.
Using Checkout Notifications, you can configure webhooks into your application.
Hookdeck is a webhook infrastructure service that helps developers receive webhooks, manage events and troubleshoot any issues quickly. It offers features such as automatic retries, rate limiting, transformations, and signature verification, as well as a user-friendly dashboard and workflow to develop locally.
With Hookdeck, you can test and relay your Checkout webhooks locally. Upgrade your Checkout webhooks experience with Hookdeck and get the most out of your webhooks.
In this guide, I’ll show you how to connect Checkout webhooks through Hookdeck to an application running on localhost. We will cover:
- How to set up a localhost webhook endpoint
- How to create a Hookdeck connection
- How to create a Checkout webhook notification
- How to test a Checkout webhook event with localhost app
Set up a localhost webhook endpoint
For this example, we are going to use the sample Node.js code from Hookdeck's repository. Feel free to follow up with any application or code you might have.
- Open up your terminal and clone the repository by running
git clone https://github.com/hookdeck/nodejs-webhook-server-example.git
- Change into the cloned directory and install the dependencies
cd nodejs-webhook-server-example
npm install
- Start the server by executing
npm start
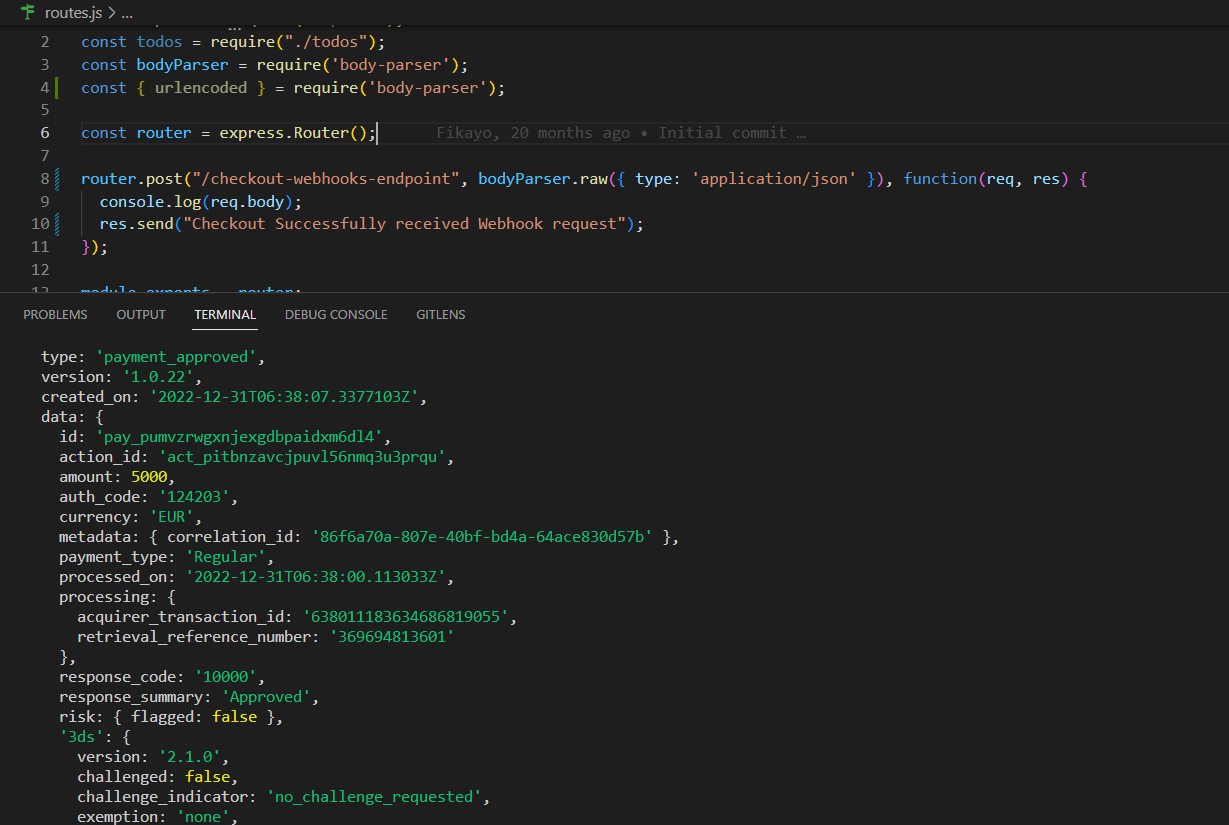
The Node.js server starts up on
http://localhost:1337. See the list of endpoints in thesrc/routes.tsfile. We will make use of the/checkout-webhooks-endpoint.
Create a Hookdeck connection
There are several ways of creating a Hookdeck connection. For our guide to Connections, click here.
Create Hookdeck Connection with Hookdeck CLI
- Install the Hookdeck CLI
- Open up your terminal and expose the localhost port with
hookdeck listen 1337
- The Hookdeck CLI initiates the creation of a guest account that will be used
- You get prompted to do some basic setup
- Create a new source (ex. checkout)
- Set the path to be forwarded to as
/checkout-webhooks-endpoint - Name the connection label (ex. localhost-app)
- The connection is created and you are given
- A login URL to use for your Hookdeck dashboard
- The webhook URL needed
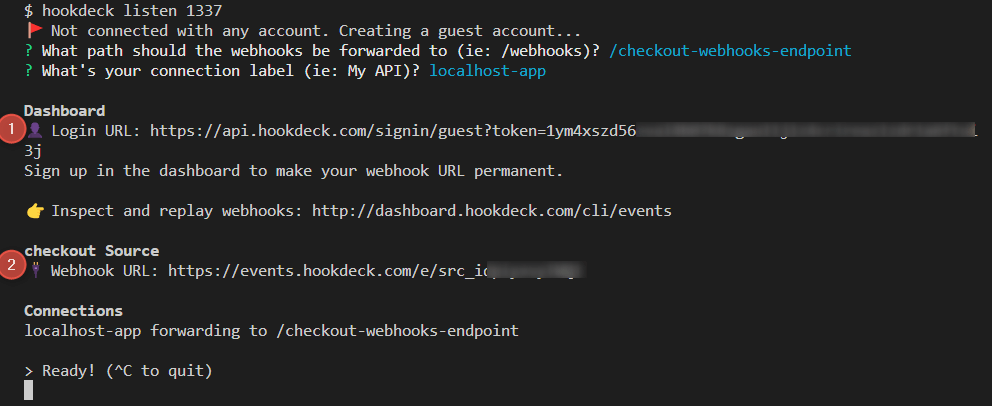
- The same connection can be seen on your Hookdeck online dashboard after following the link
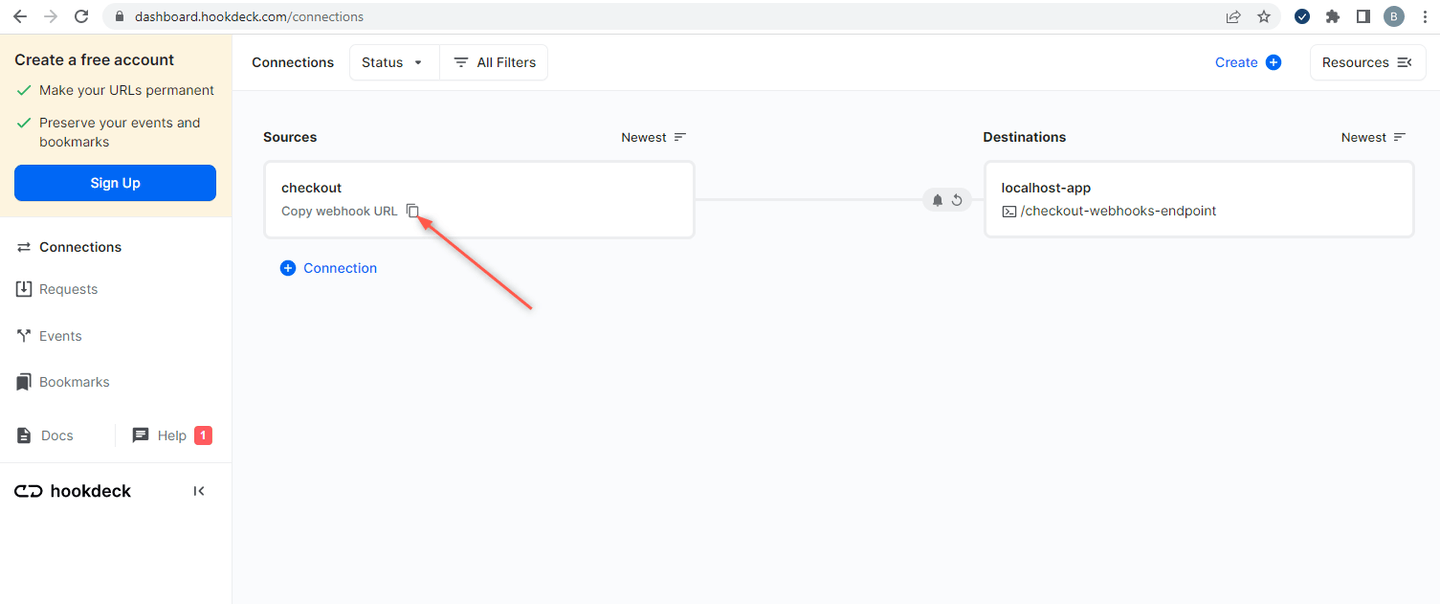
- Copy the Checkout Source webhook URL (it will be used later when creating the Checkout webhook)
Create a Checkout webhook
- Sign up or log in to your Checkout Dashboard
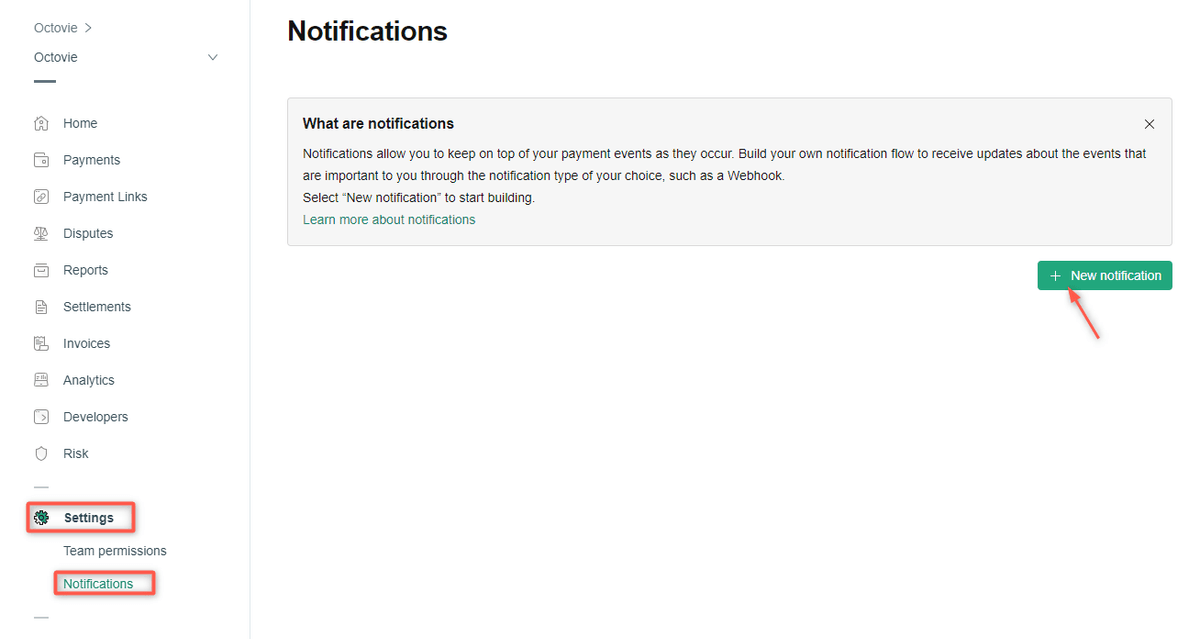
- Navigate to Settings > Notifications and click on New notification to create a new notification
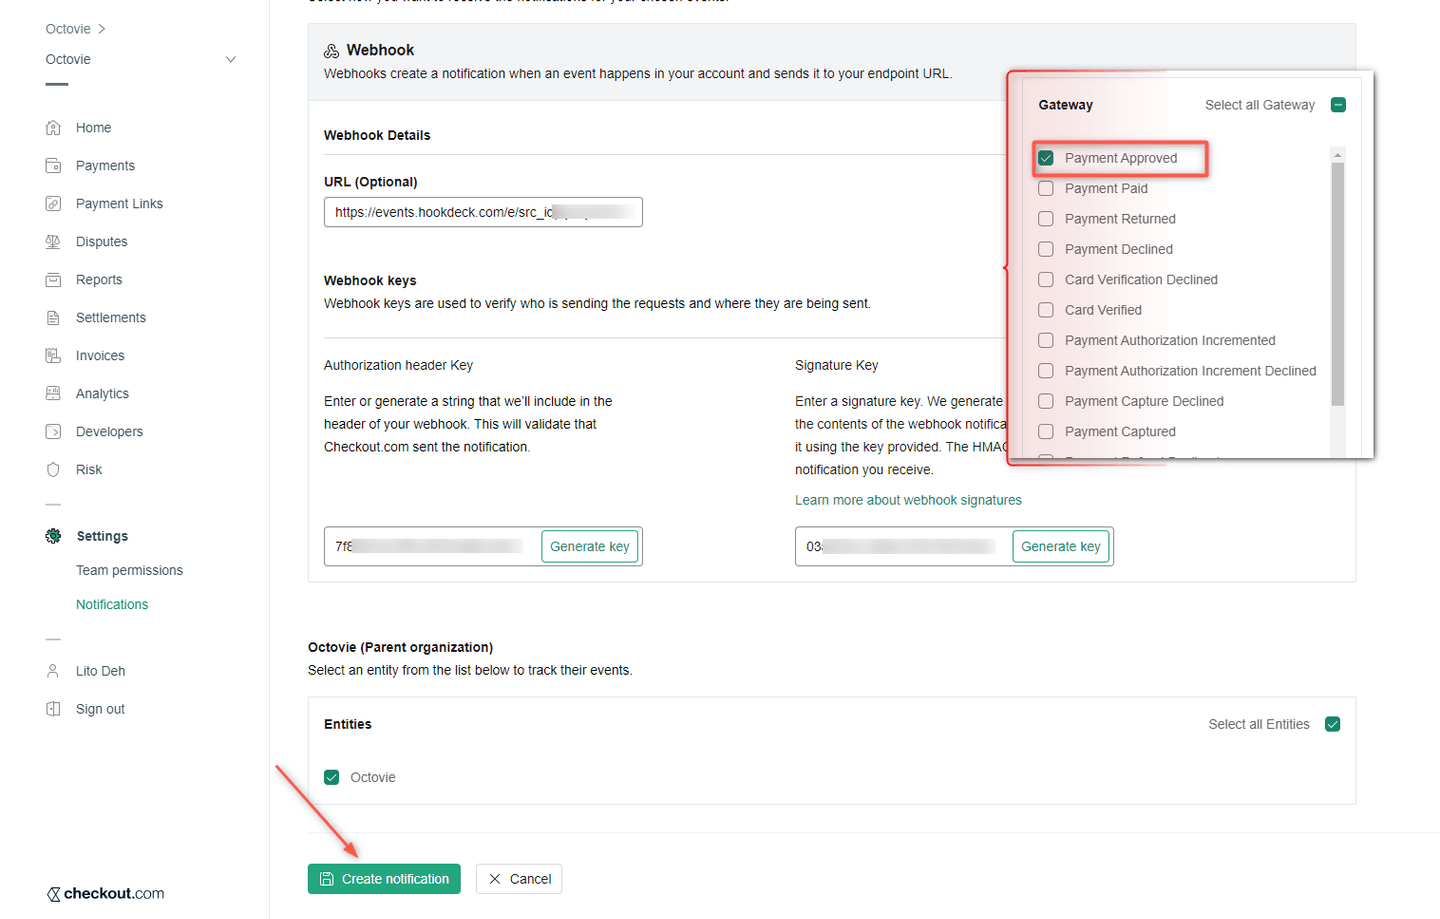
- Set the notification name and select the
Payment Approvedevent under Gateway as the event to listen to - Configure the webhook setting while providing the Webhook URL gotten from Hookdeck
- Generate Authorization Header Key and Signature Key then Create notification
Test a Checkout webhook event with local app
To test the checkout Payment Approved webhook event configured above, we need a means of triggering the event. This can be done by:
- Creating a payment link
- Initiating a payment
Create a Checkout payment link
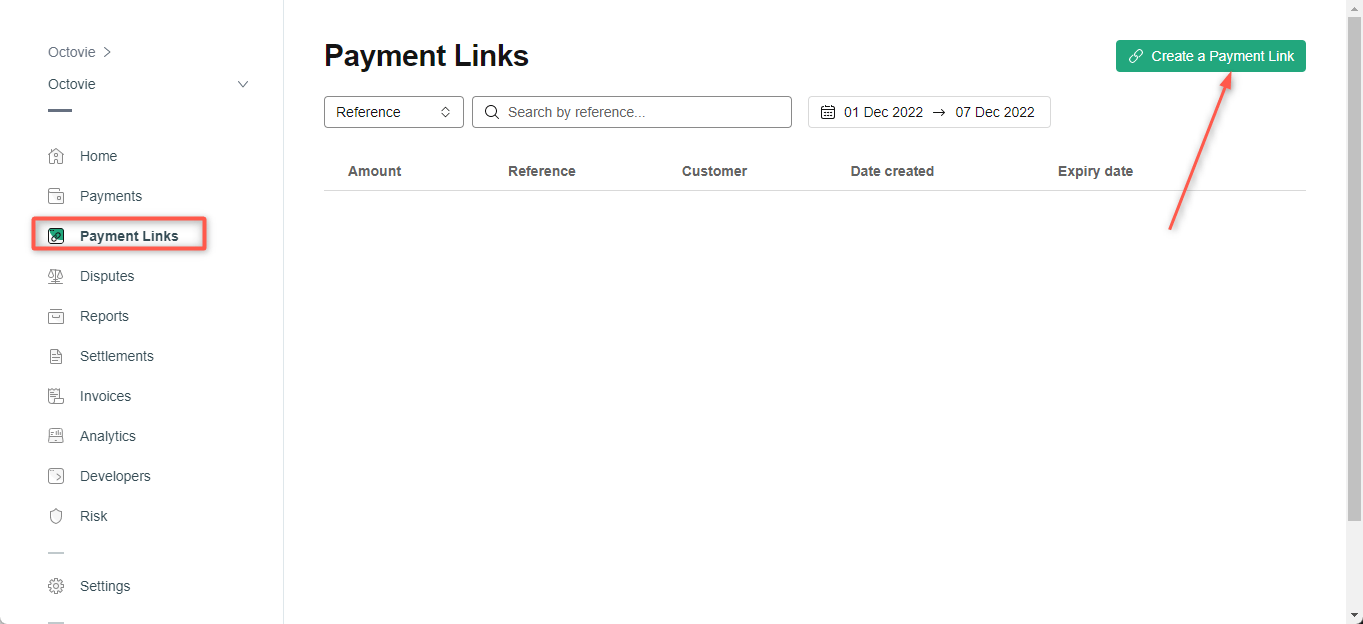
- Navigate to Payment Links on your Checkout dashboard and Create Payment Link
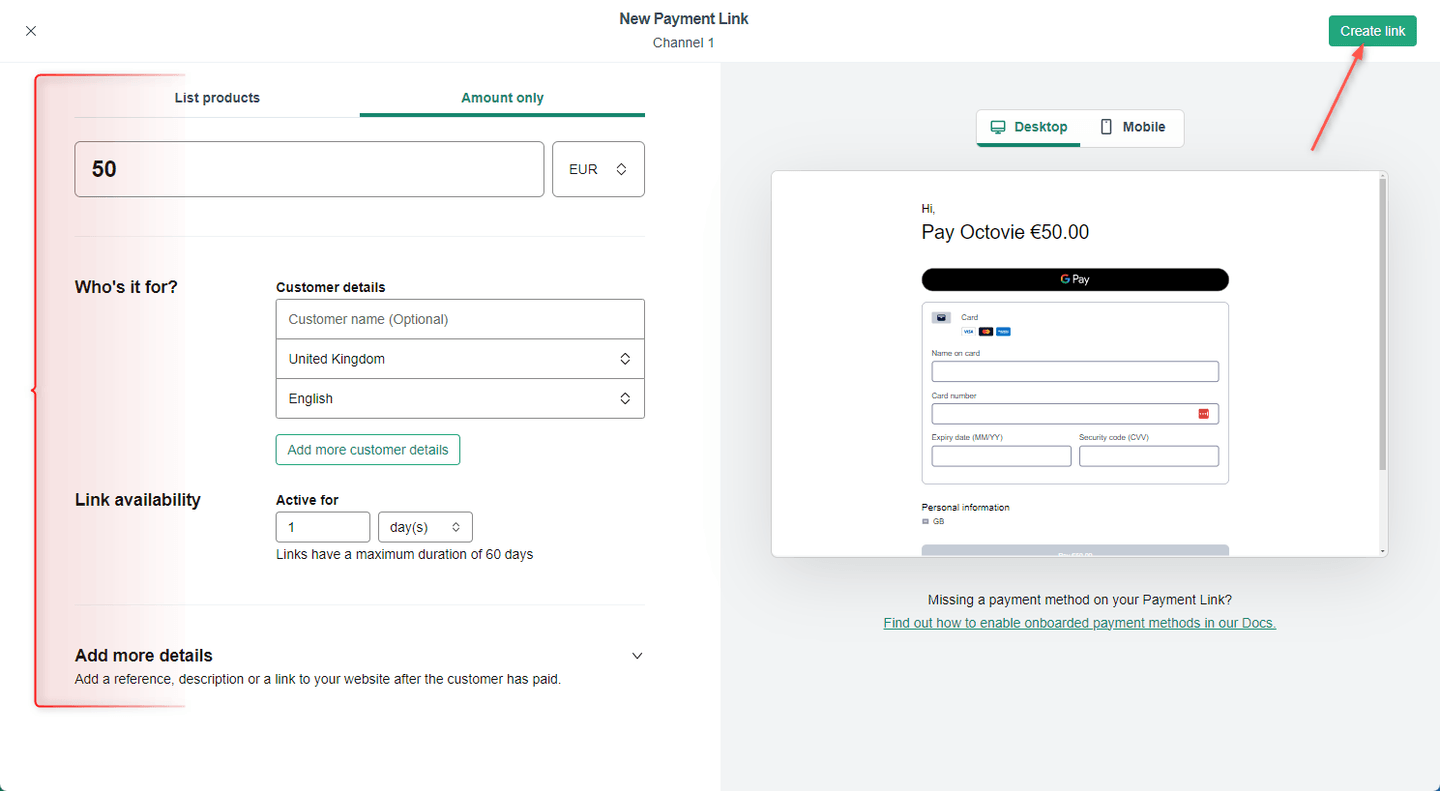
- A new page opens up, switch to the Amount only tab
- Specify the amount to be charged and Create link
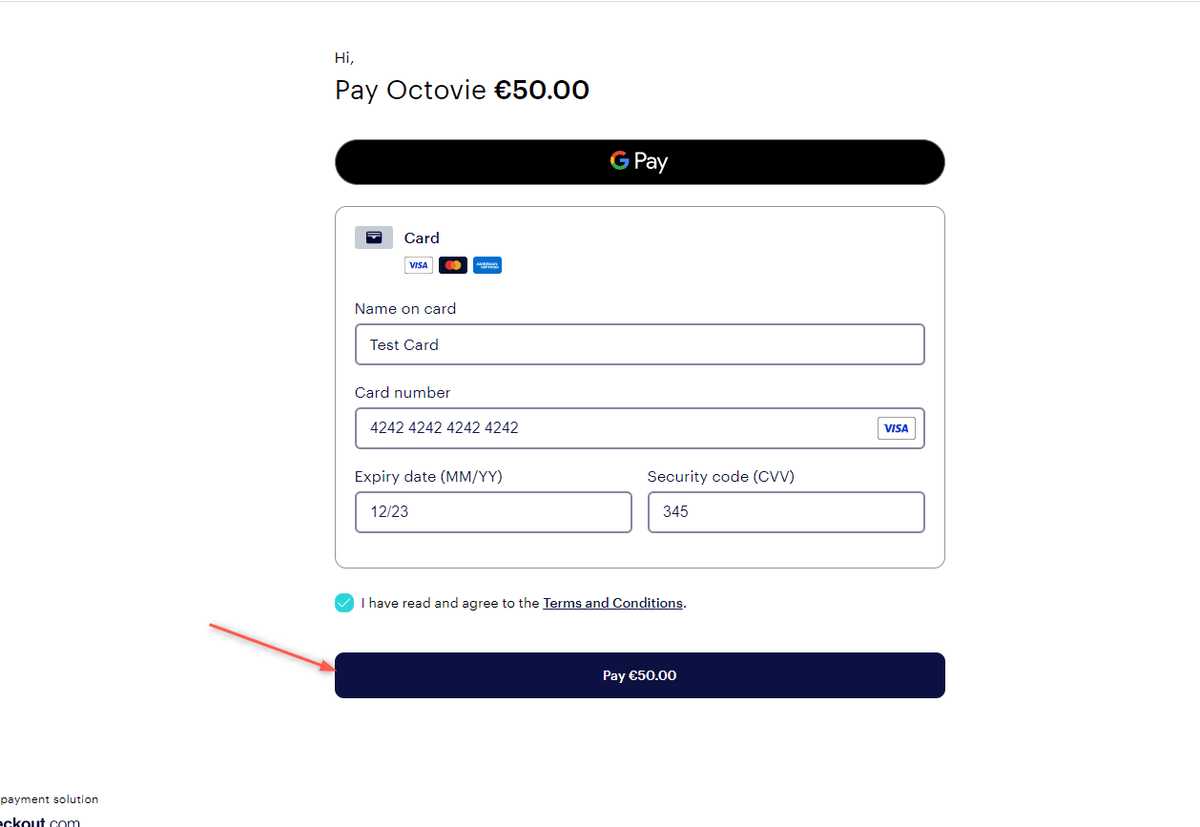
- Copy the newly created payment link and open it on a new tab
- Get a test credit card details provided by Checkout from here and Pay
- After the payment is successful, the
Payment Approveevent gets triggered and relayed by Hookdeck directly to the localhost application - On your Hookdeck Request dashboard, you should see the requests received with a
200status code
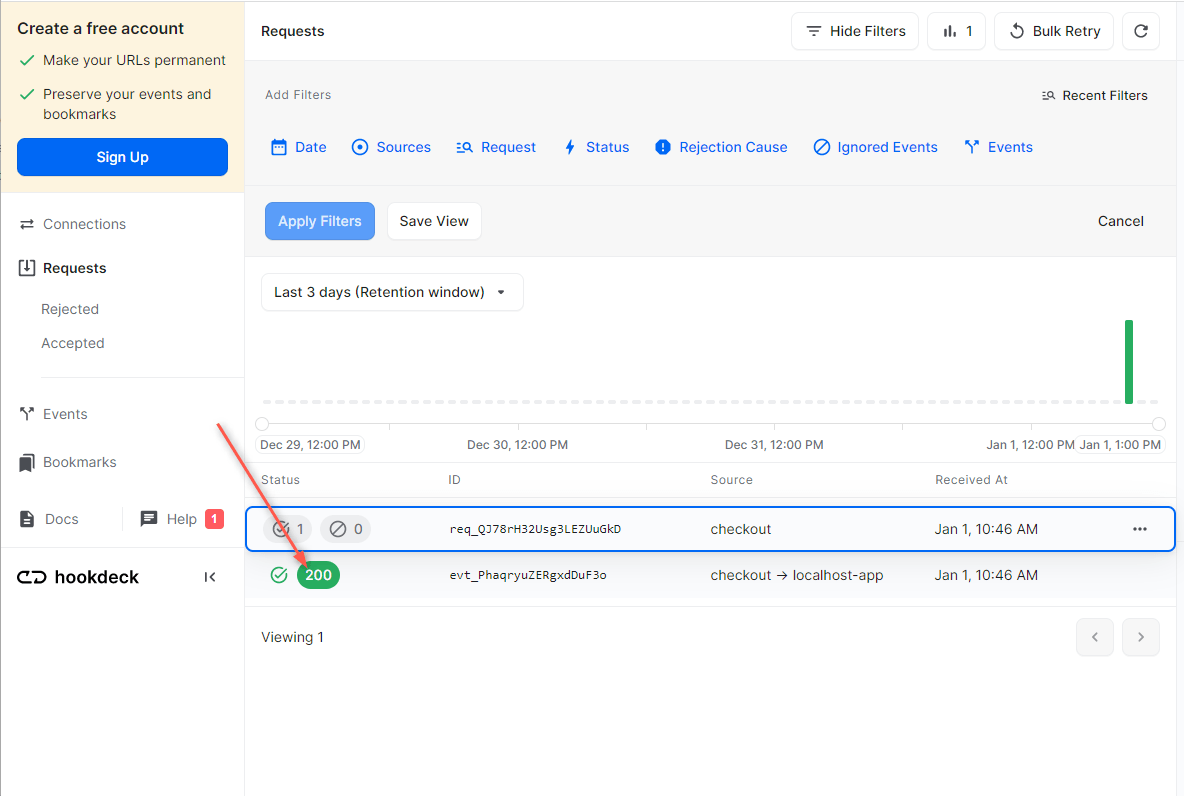
Hookdeck provides a reliable uptime webhook endpoint and queues all incoming webhook requests that can be modified and replayed.
- Back in the terminal of the localhost application, the successful payload from the webhook is received and printed
Retrying error or failed webhook events
In case there are any failed events that don’t make it to your destination, Hookdeck gives you the ability to retry any attempts to deliver any failed or error event.
To retry a failed event:
- Open the Hookdeck dashboard and navigate to the Events tab on the sidebar of your connection and filter as per your Destination
- Click on the Retry icon to retry the webhook
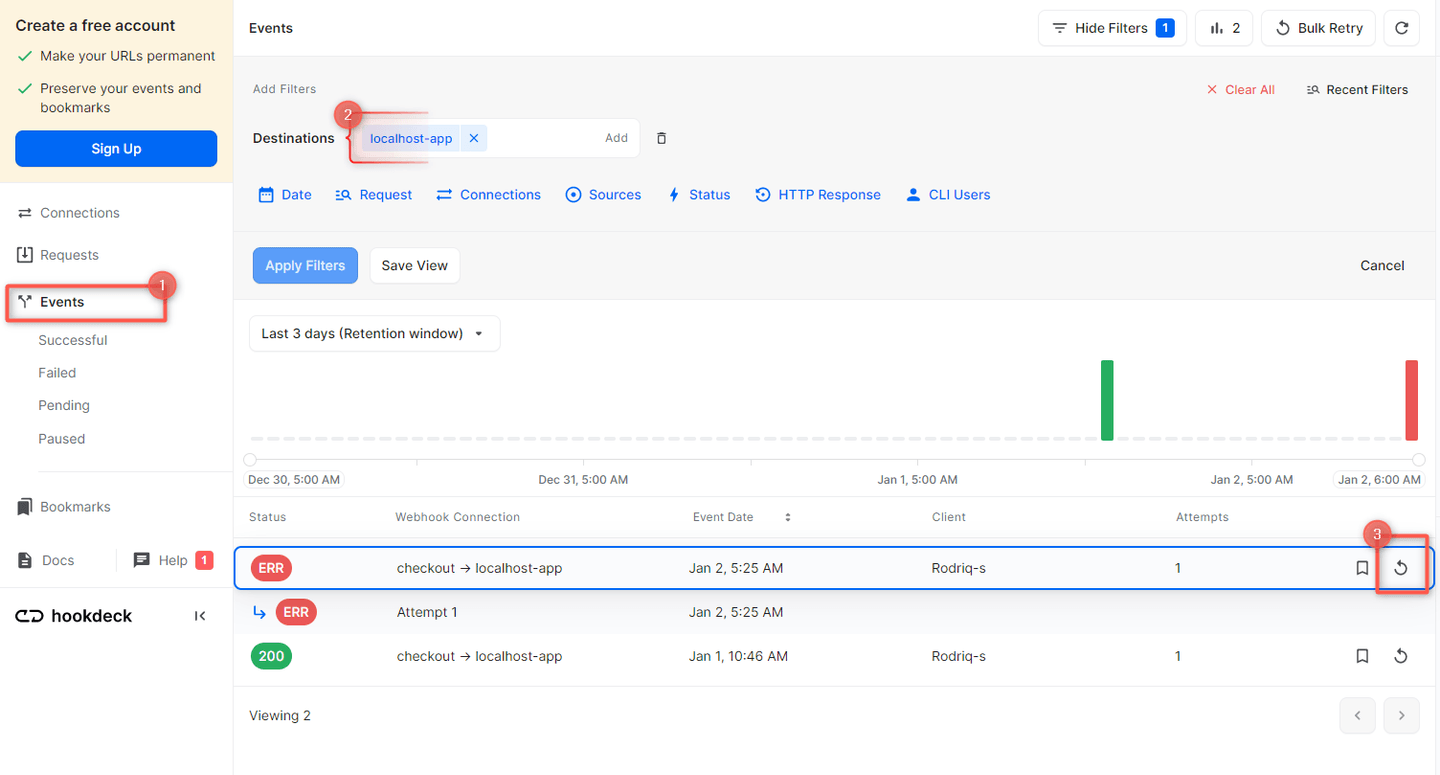
- This will replay the event again from Hookdeck to the local application
A Hookdeck Request is an incoming webhook that Hookdeck receives from an external source. It contains the data that was sent by the external source as is (ex. from Checkout).
A Hookdeck Event is the webhook delivered by Hookdeck including configurations or filters applied to a destination (ex. to localhost app).
See more details on managing Hookdeck requests and events in the Hookdeck documentation.
In this tutorial, you have learned how to receive Checkout webhook events through Hookdeck, a reliable webhook provisioning platform, to an application running on localhost.
Hookdeck can be used safely to consume, monitor, and troubleshoot your Checkout webhooks.
