How to Test and Replay Exivity Webhook Events on localhost with Hookdeck
Exivity is a cloud cost management and optimization platform that helps organizations gain visibility and control over their cloud infrastructure costs. It offers tools for cost forecasting, cost allocation, and optimization recommendations, and it integrates with popular cloud providers such as Amazon Web Services, Microsoft Azure, and Google Cloud Platform.
Hookdeck is a webhook management platform that helps developers reliably receive webhooks, manage events and troubleshoot any issues quickly. This guide will show you how to receive your Exivity webhook events to your local application using Hookdeck. We will cover:
- How to write a simple Express.js local application
- How to create a Hookdeck connection
- How to set up and trigger an Exivity webhook notification
Testing your Exivity webhooks with Hookdeck provides an overall view and keeps track of every event that occurs.
Create a simple Node.js Express app
The local application is going to act as the API consumer that receives the webhook payload sent.
To create a simple Express.js app on port 8000, follow the steps outlined below.
Make sure you have Node.js and npm (Node Package Manager) installed on your machine.
You can check if you have them installed by running the following commands in your terminal:
node -v
npm -v
- Create a new directory for your project and navigate to it with the terminal
- Create a new file named
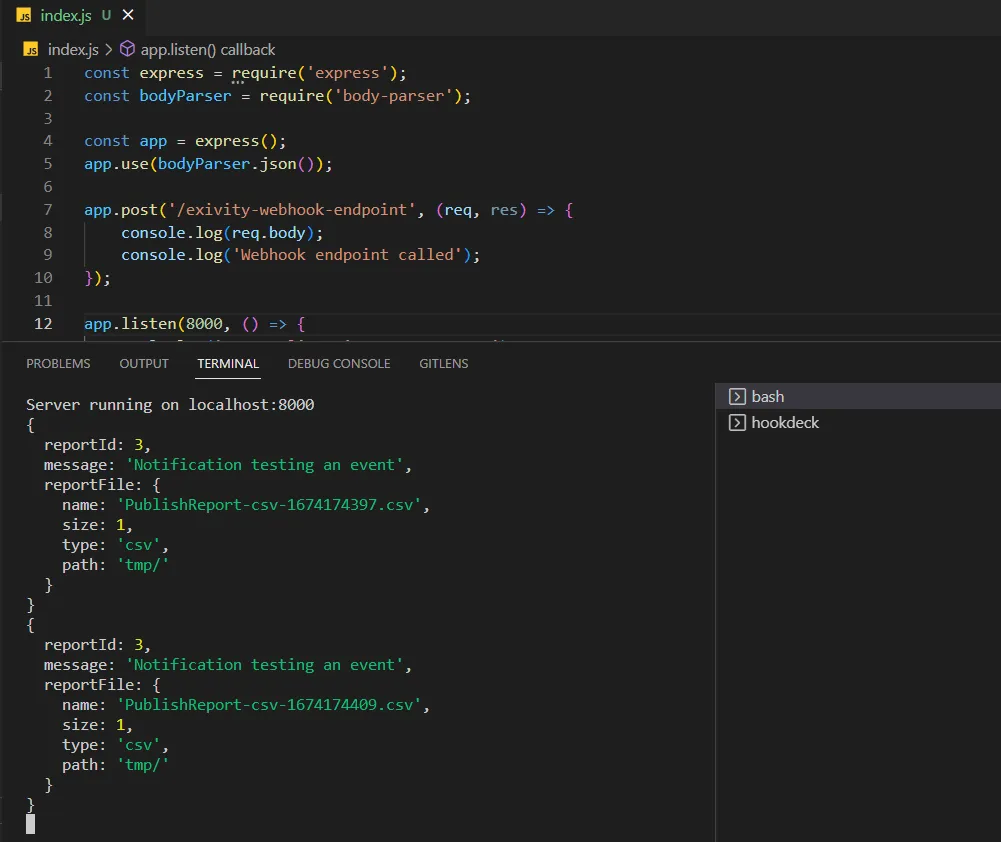
index.jsin the project directory containing the following code:
const express = require("express");
const bodyParser = require("body-parser");

const app = express();
app.use(bodyParser.json());

app.post("/exivity-webhook-endpoint", (req, res) => {
  console.log(req.body);
  console.log("Webhook endpoint called");
});

app.listen(8000, () => {
  console.log("Server listening on port 8000");
});
- Install the required dependencies by running the following command in the project directory:
npm install express body-parser
- Run the code by using this command:
node index.js
You should see the message "Server listening on port 4000" in the terminal.
This will create a simple Express application running on port 8000 and we are using /exivity-webhook-endpoint as the receiving endpoint.
Create a Hookdeck connection
There are several ways of creating a Hookdeck connection (see the guide here). We are going to use the Hookdeck CLI which can be used for free without creating an account.
Create a Hookdeck connection with Hookdeck CLI
- Install the Hookdeck CLI.
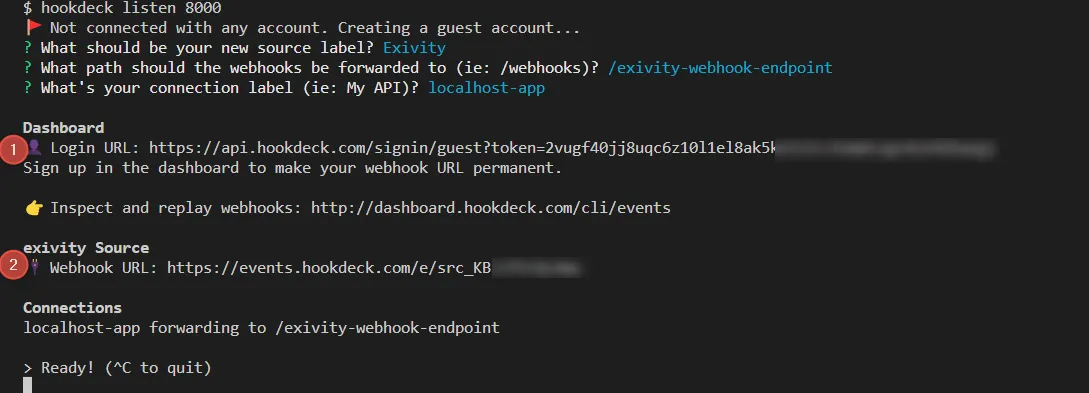
- Open up your terminal and expose the localhost port with:
hookdeck listen 8000
- The Hookdeck CLI initiates the creation of a guest account that will be used.
- You get prompted to do some basic setup:
- Create a new source (ex. Exivity)
- Set the path to be forwarded to as
/exivity-webhook-endpoint - Name the connection label (ex. localhost-app)
- The connection is created and you are given: a. A login URL to use for your Hookdeck dashboard b. The webhook URL needed .
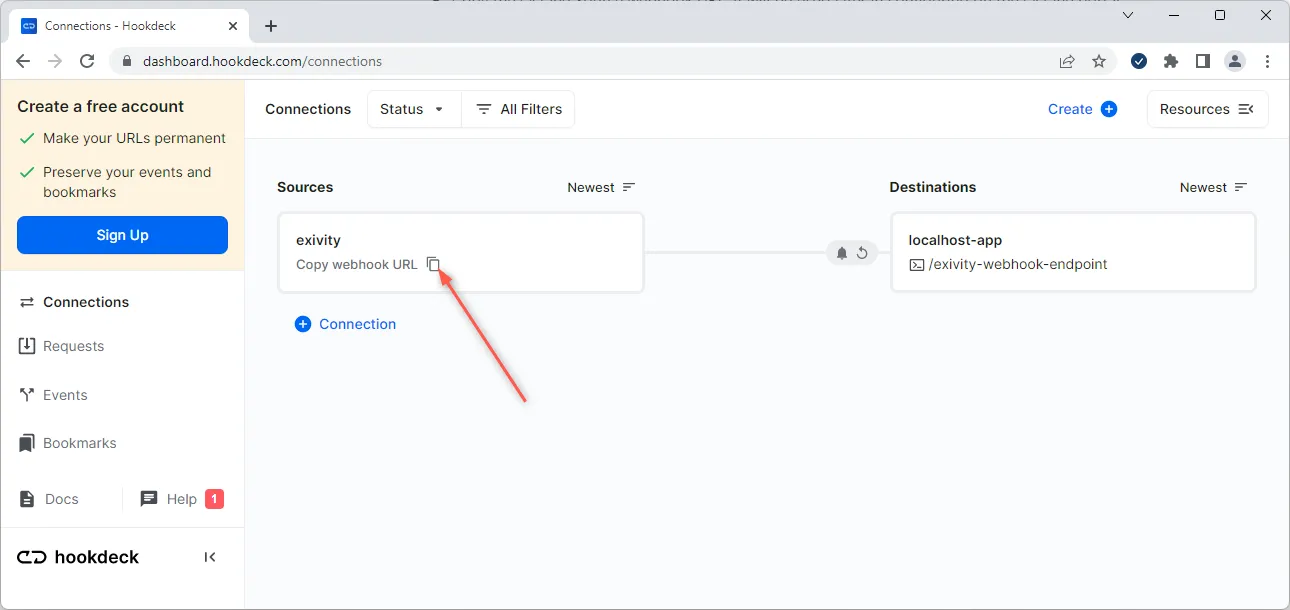
- The same connection can be seen on your Hookdeck online dashboard after following the link
- Copy the Exivity source webhook URL (it will be used later in configuring on the Exivity dashboard)
Set up and trigger an Exivity webhook notification
In this section I will show you how to set up and trigger an Exivity webhook notification.
Exivity provides a feature that allows you to set up notifications for certain events or thresholds. Using Exivity Workflows, you can trigger webhook events notification.
Create an Exivity notification channel and notification
To create an Exivity notification, it is required to have a notification channel, in this case a webhook channel to the webhook URL provided by Hookdeck. We go through the steps below.
Create an Exivity notification channel
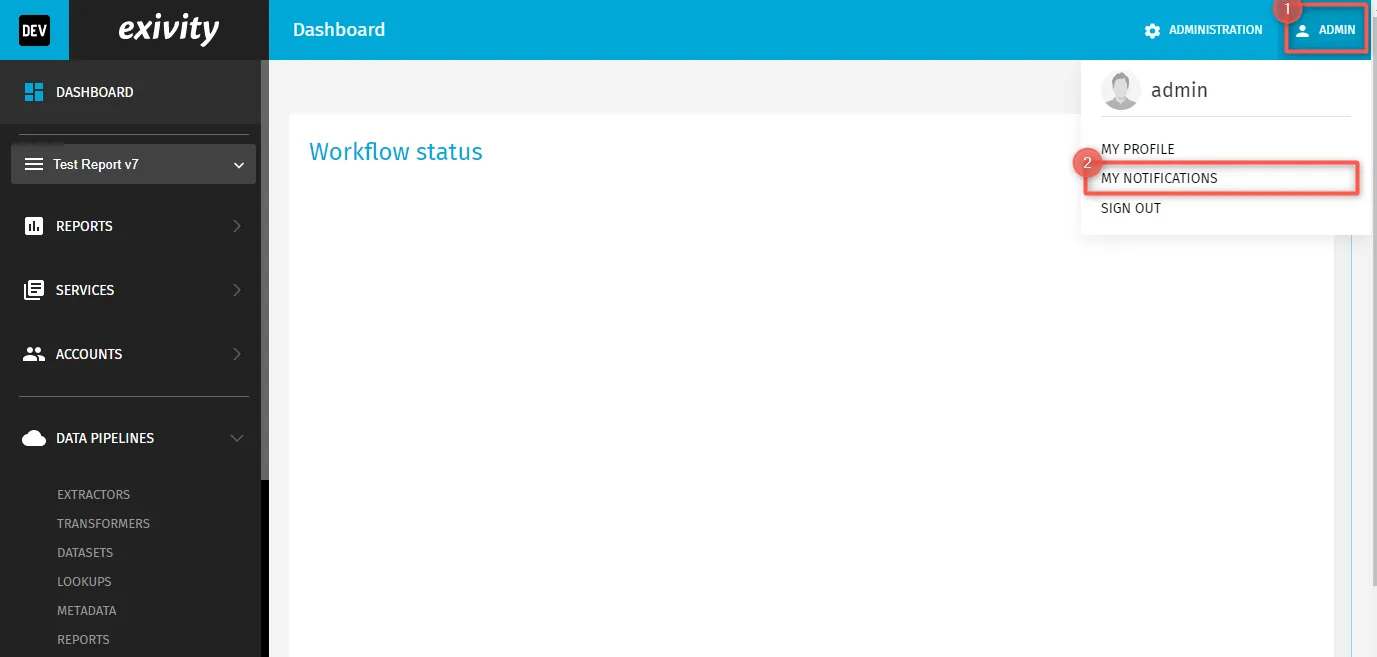
- Log in to the Exivity web interface.
- Navigate to Profile > My Notifications.
- Switch to the Channels tab then Add Channel.
- Fill in the channel name and paste the URL provided by Hookdeck in the webhook URL field, then Create.
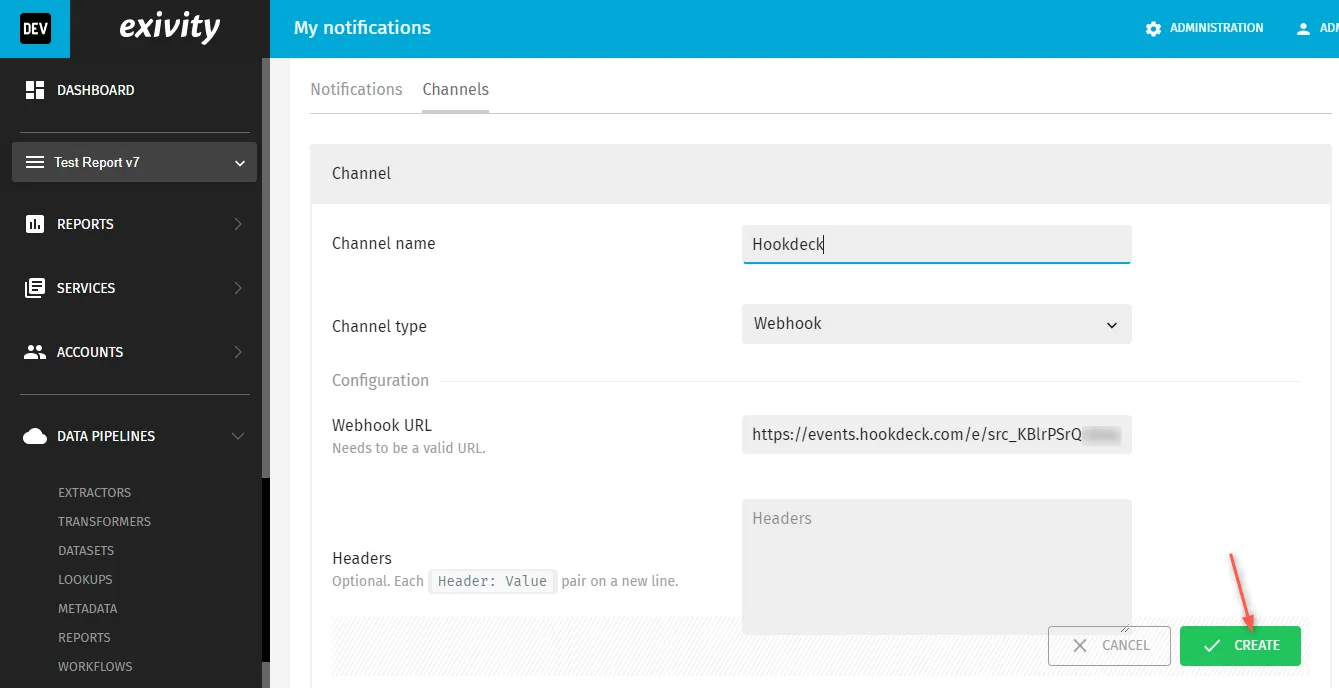
The webhook channel is successfully created and ready to use.
Create an Exivity notification
- On the same page, switch to the Notifications tab and Add Notification.
- Fill out the form to define the notification's settings. This may include selecting the event or threshold that will trigger the notification, so make sure to select the Hookdeck channel we created above as the notification channel.
- Click the Create button to create the notification.
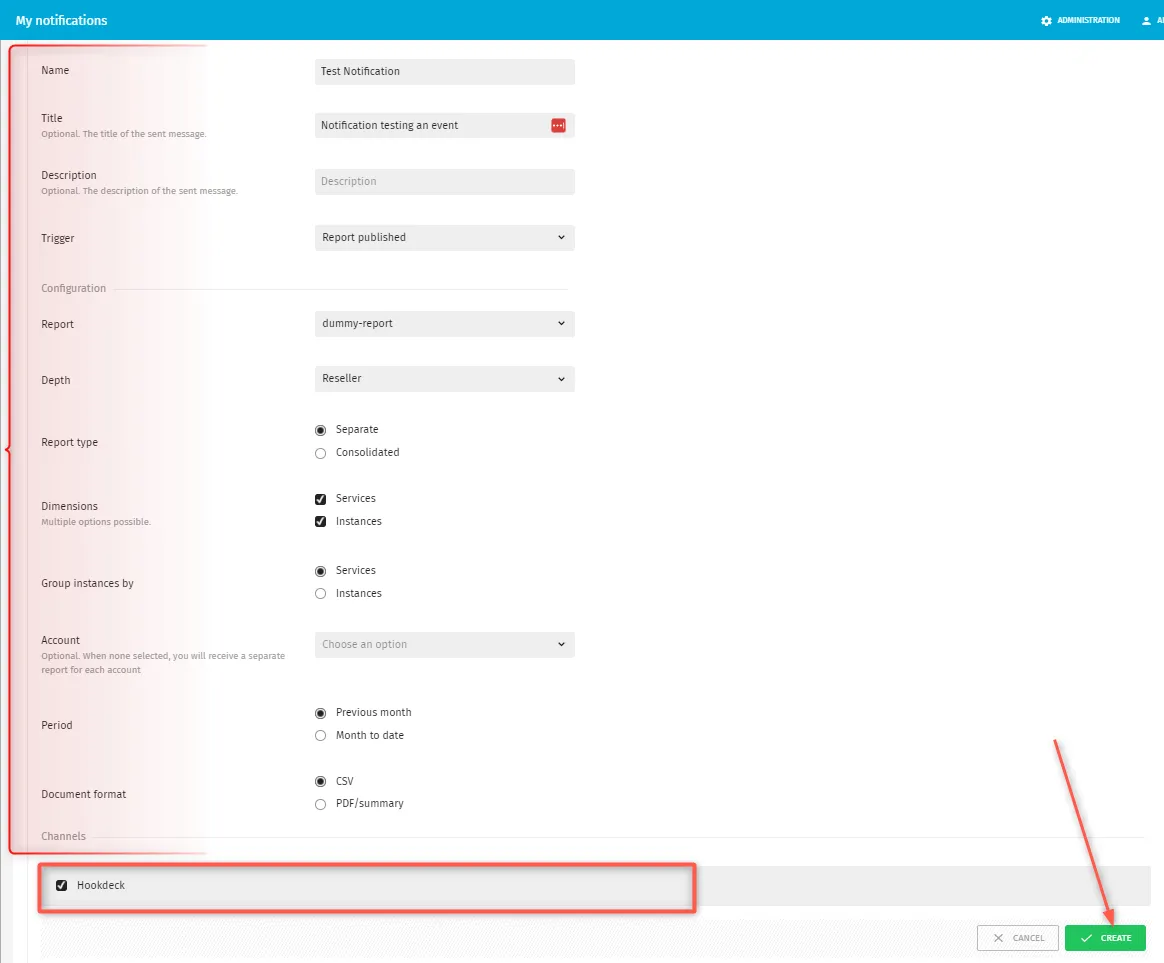
After creating, the specified trigger (in this case Report published ) will be trigged when a report matching the conditions are met.
Test Exivity webhook notifications
To test the webhook we just configured:
- From your Exivity dashboard, navigate to Data pipelines > Workflows.
- Configure the workflow to match the notification conditions, then Create.
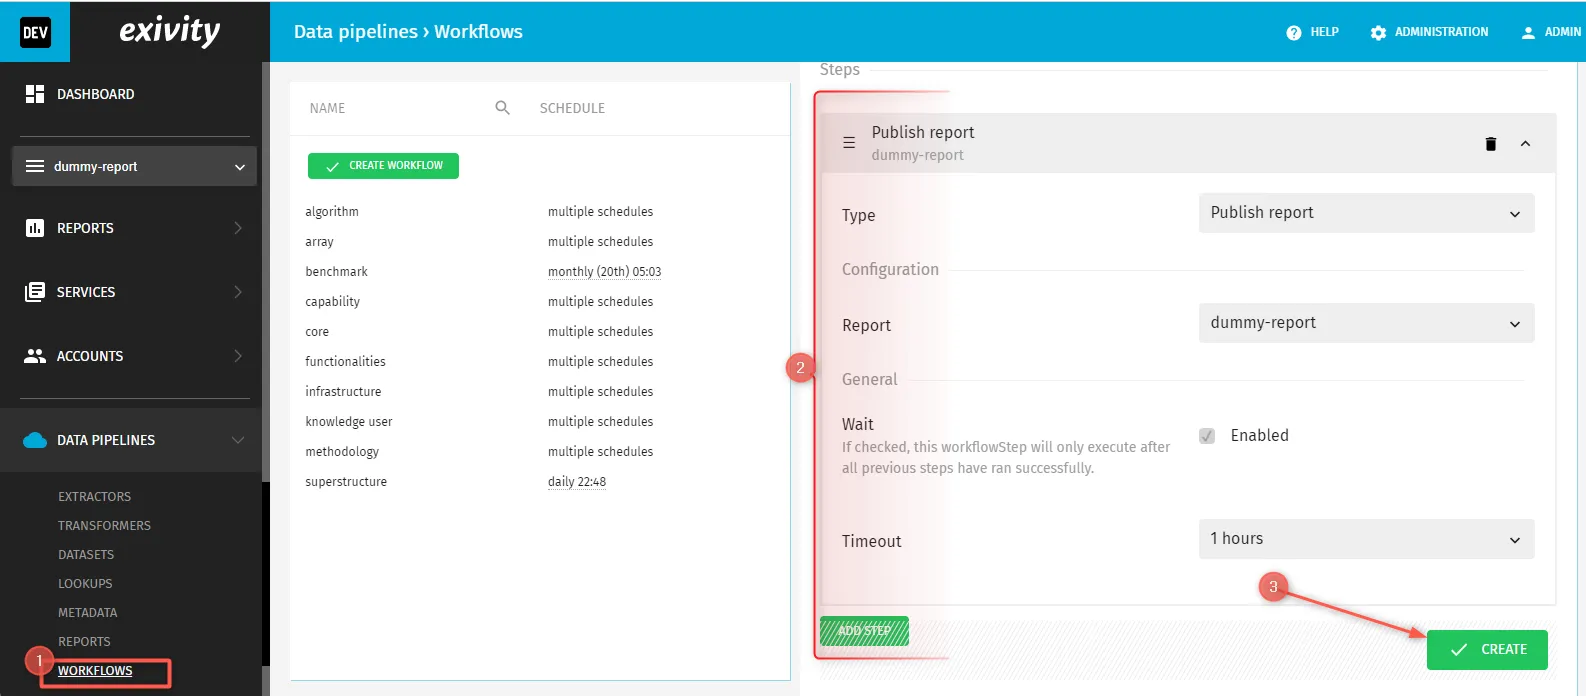
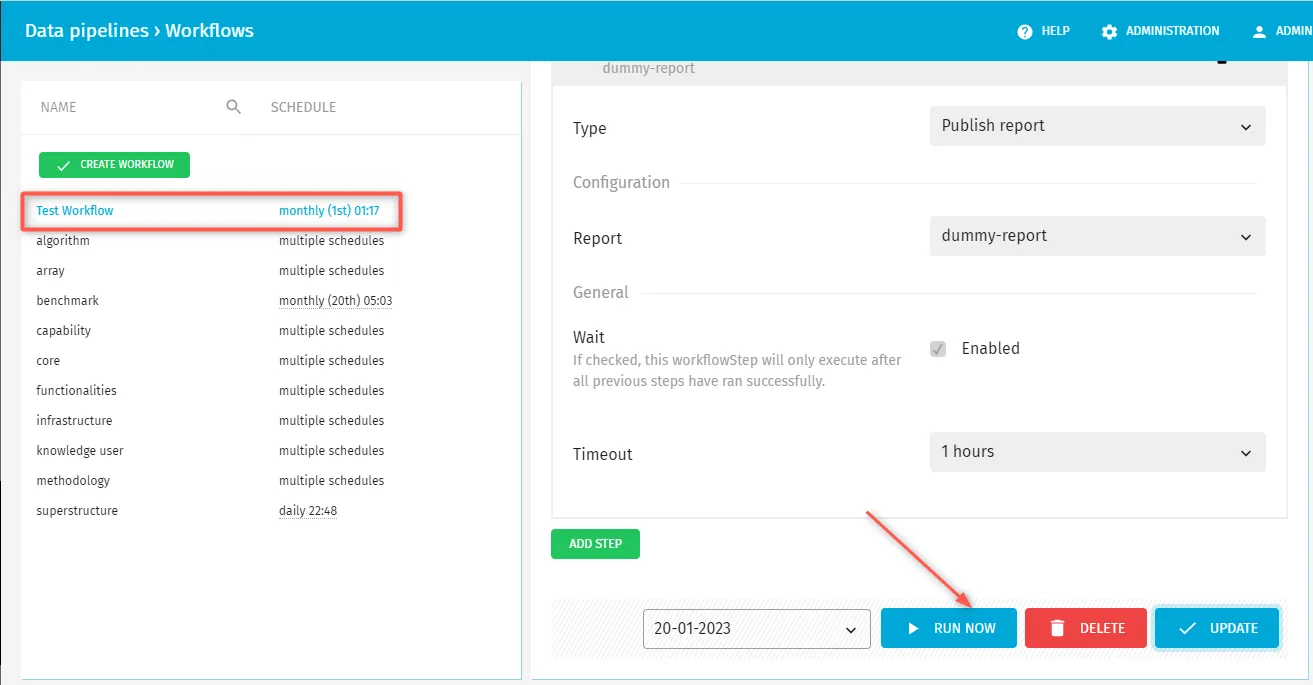
- After creating, select the created workflow.
- Hit Run Now to run the workflow, which will cause the notification to be triggered.
Verify webhook consumption
The Exivity webhook event triggered gets relayed through Hookdeck to the local application.
A Hookdeck Request is an incoming webhook that Hookdeck receives from an external source. It contains the data that was sent by the external source as is (ex. from Exivity).
A Hookdeck Event is the webhook sent by Hookdeck with configurations such as transformation or filters delivered to your destination
- On your Hookdeck Request dashboard, you should see the requests received with a
200status code.
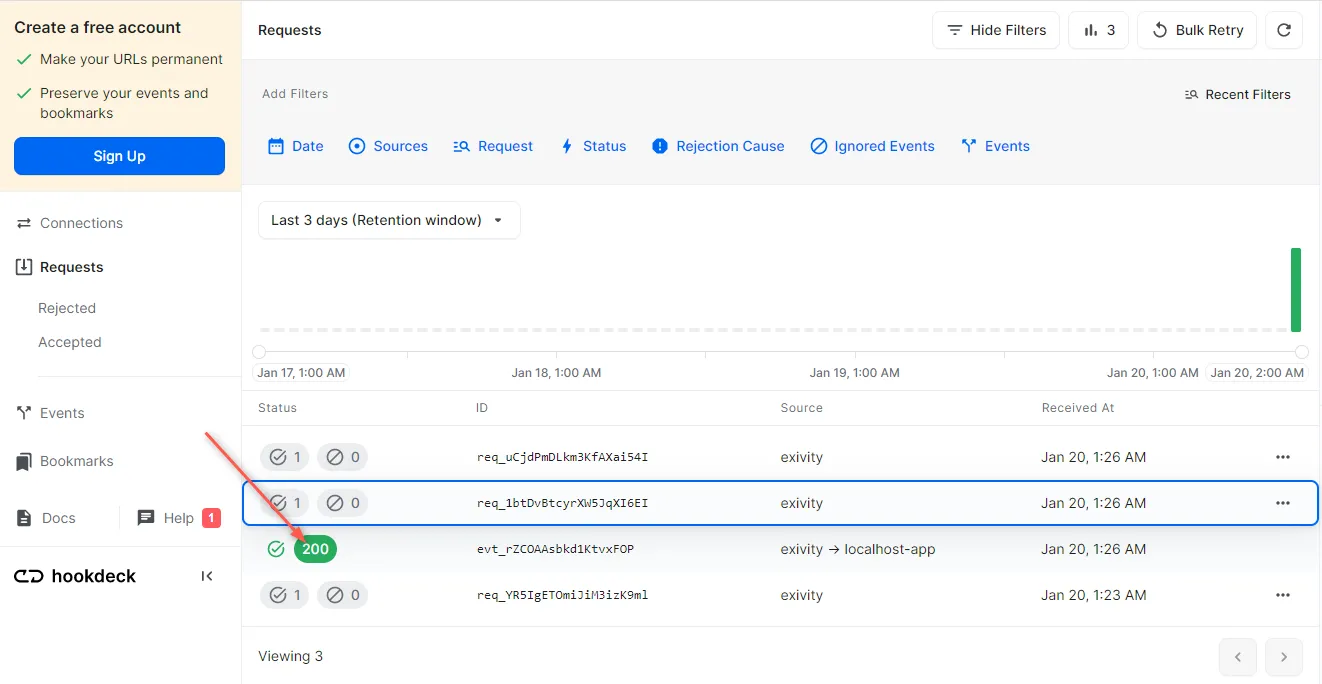
- Back in the terminal of the localhost application, the successful payload from the webhook is received and logged.
Retrying error or failed events
In case any failed events don’t make it to your destination for some reason, Hookdeck provides you with the ability to retry failed events.
To retry a failed event,
- Navigate to the Events tab on the sidebar of your Hookdeck dashboard and filter as per your Destination then hit the Retry across the failed event.
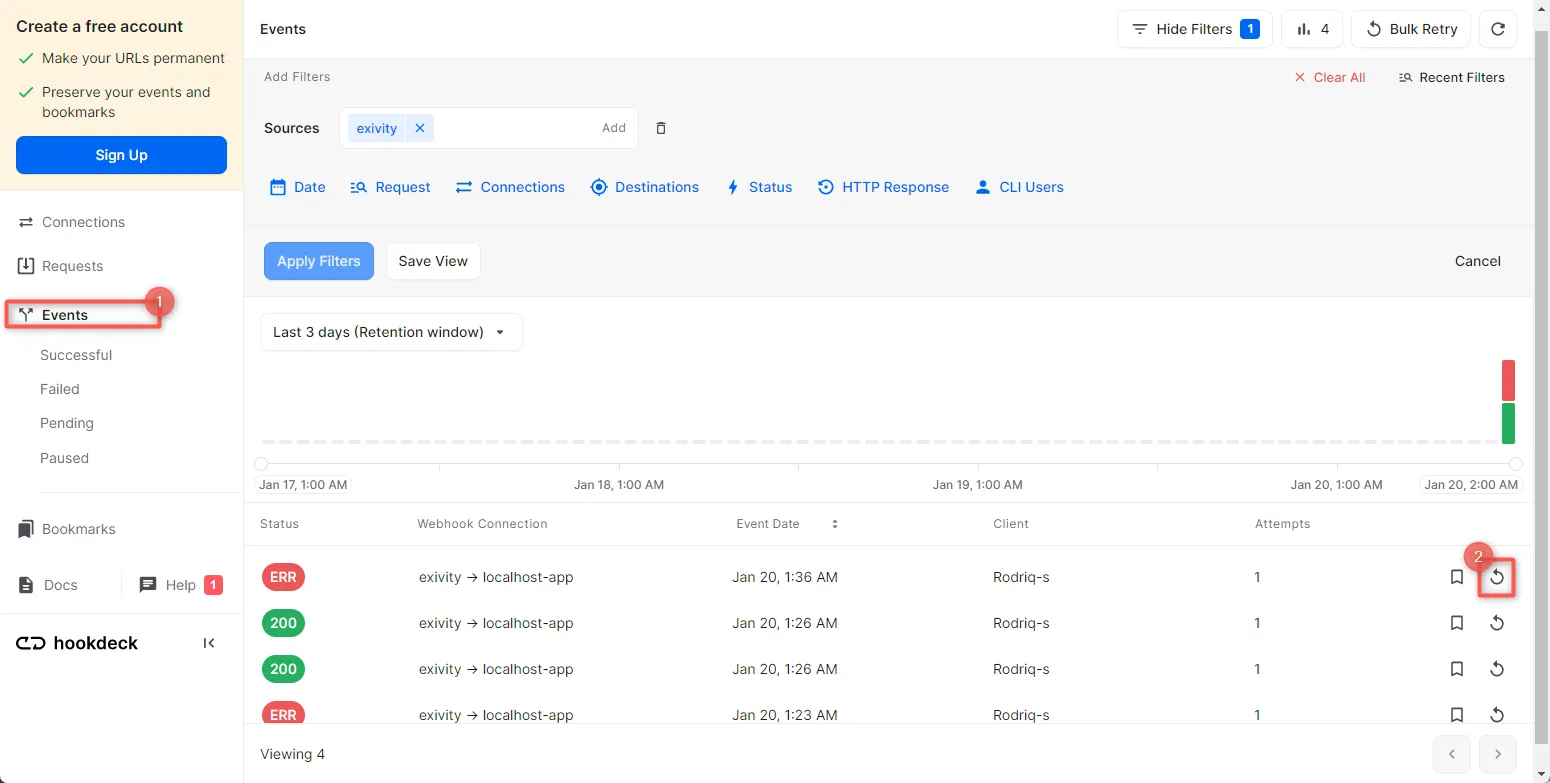
- This will replay the event again from Hookdeck to the local application.
See more details on managing Hookdeck requests and events on the Hookdeck documentation.
Conclusion
In this tutorial, you have learned how to receive Exivity webhook notifications through Hookdeck to an application running on localhost.
Try Hookdeck to safely consume, monitor, and troubleshoot your Exivity webhooks.
