![]() Fongang Rodrique
Fongang Rodrique
How to Test and Replay Monday Webhook Events on localhost with Hookdeck
Monday.com is a project management platform that helps teams collaborate. Its Work OS provides you with all of the no-code building blocks so that you can shape your workflows in the way you want. With its webhooks features, you can configure it to receive real-time notifications about events and changes in your account.
Hookdeck is a webhook management platform that helps developers reliably receive webhooks, manage events, and troubleshoot any issues quickly. It also provides the ability to expose a localhost server to the internet. This is useful for testing webhooks, as it allows developers to receive webhook requests from a service like Monday.com on their local development environment.
This article shows you how to test Monday webhooks with a localhost Node.js Express application using Hookdeck.
Relaying your Monday webhooks through Hookdeck provides an overall view and keeps track of every event that occurs.
We are going to cover how to:
- Inspect a webhook using Hookdeck Console
- Create a Monday webhook
- Receive the webhook event on your localhost
- Retry webhook events
How to inspect Monday webhook events with Hookdeck Console
Hookdeck provides a console to test samples and predefined events for popular services like Monday, Stripe, GitHub, and more. This console is very helpful in testing and evaluating the header and payload structure of a platform’s webhook event without having to do any setup.
You can skip this step and go directly to the next section to set up your Monday webhooks.
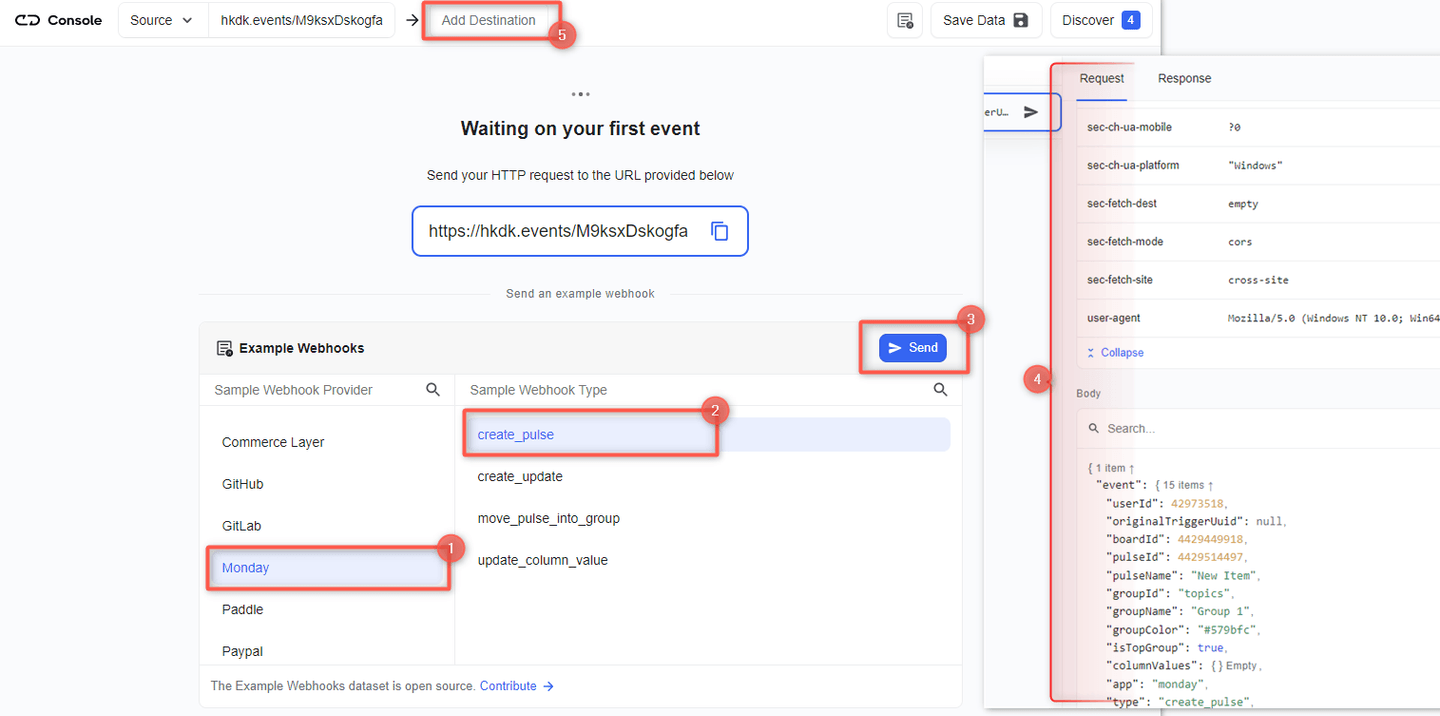
Click to open the Test Webhooks widget at the bottom right of this screen or use the embed below.
- On the drawer, select Monday from the list of Example Webhooks. A list of sample webhook event types is visible.
- Select
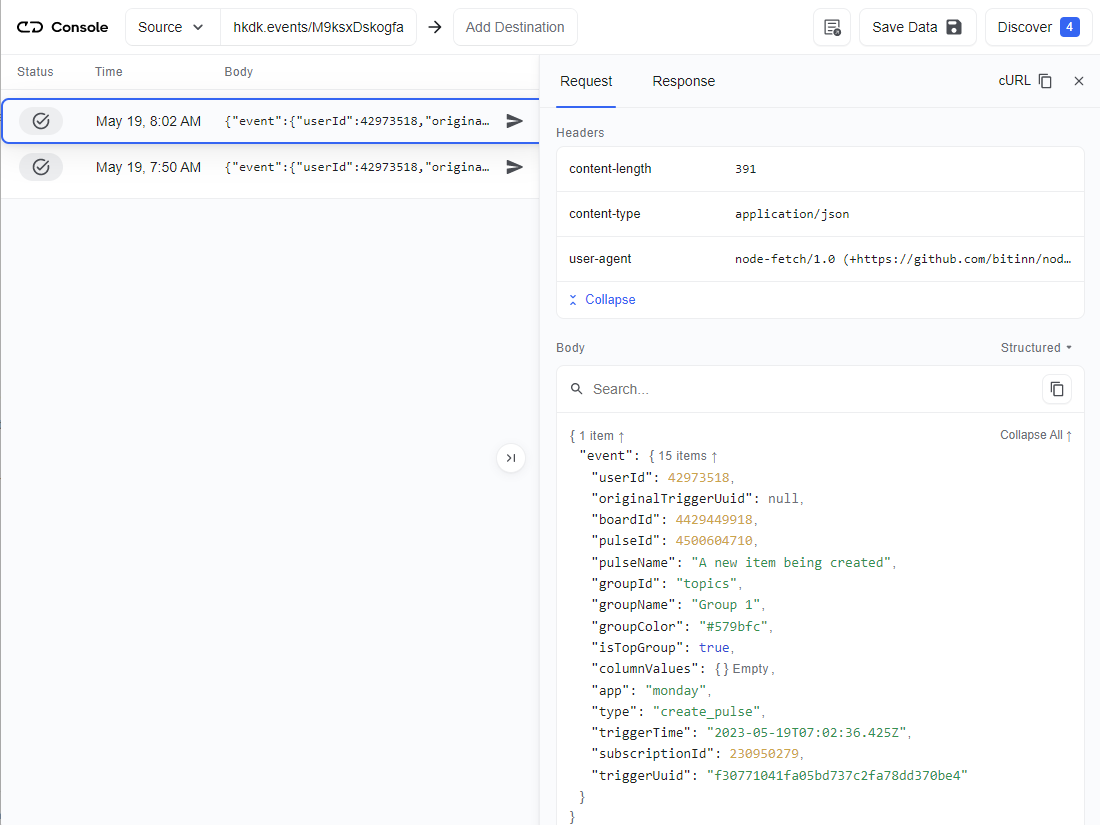
create_pulsefor example. - Click Send. The sample payload from a Monday
create_pulseevent is seen. - Inspect the request on the Request tab on the side panel containing the payload.
- You can Add a Destination and choose Localhost. This will be completed in Step 3 of the Tutorial.
You have seen how to test a sample Monday webhook event. To demonstrate live events, we need to create a Monday webhook using the URL provided on the console. Copy the URL and proceed.
Create a Monday webhook
To create a Monday webhook:
- Create an account or log in to your Monday dashboard.
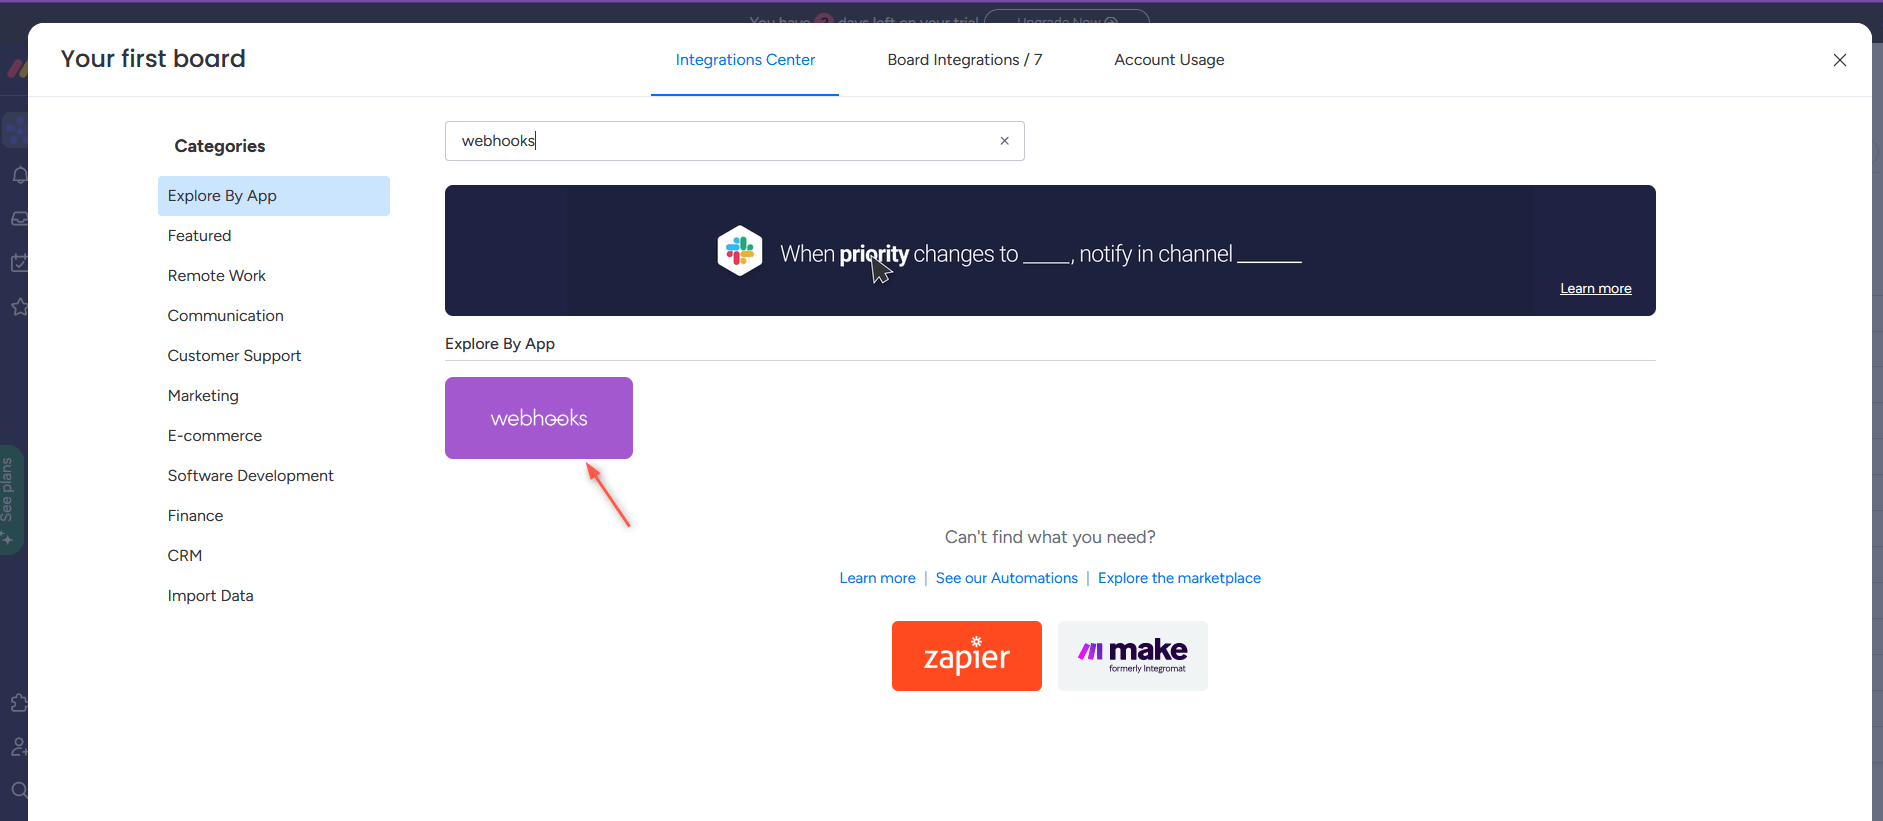
- On your desired board, click on Integrate and search and select Webhooks in the Integration Center.
- Choose the action you want to get notified about. In this example, When an item is created, send a webhook.
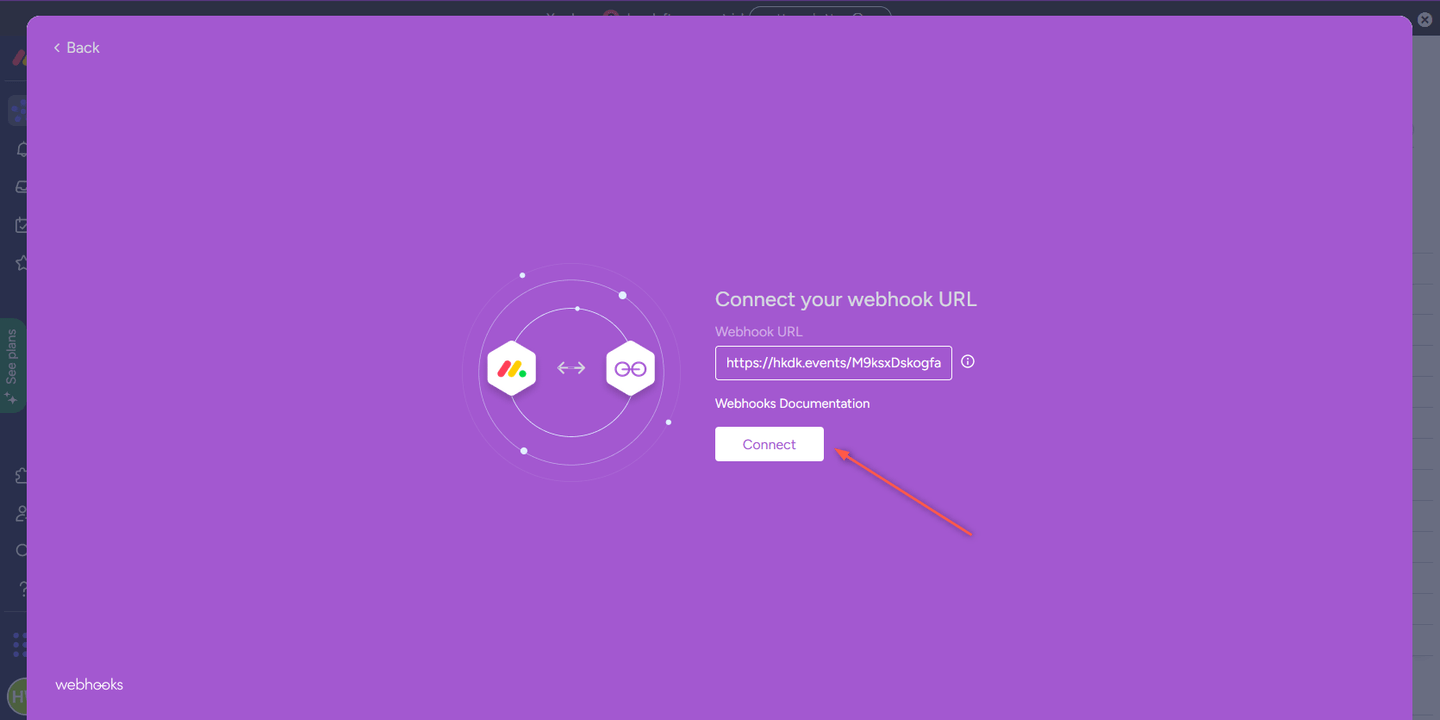
- Fill in the Webhook URL received from the Hookdeck Console and Connect and Add to Board.
This completes the creation of the webhook. Read more about Monday webhooks here.
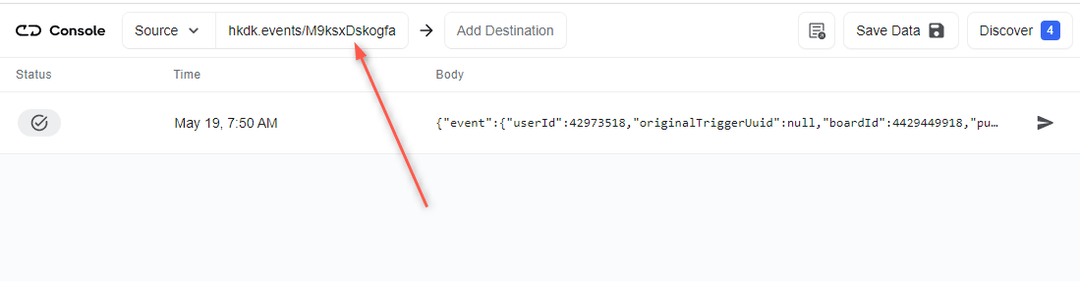
With the webhook created successfully, each time an event matching the item is created, a payload is sent to the console with the URL specified. To test and make sure it is being received in our localhost application:
- Back on your Monday dashboard, create an item under any group.
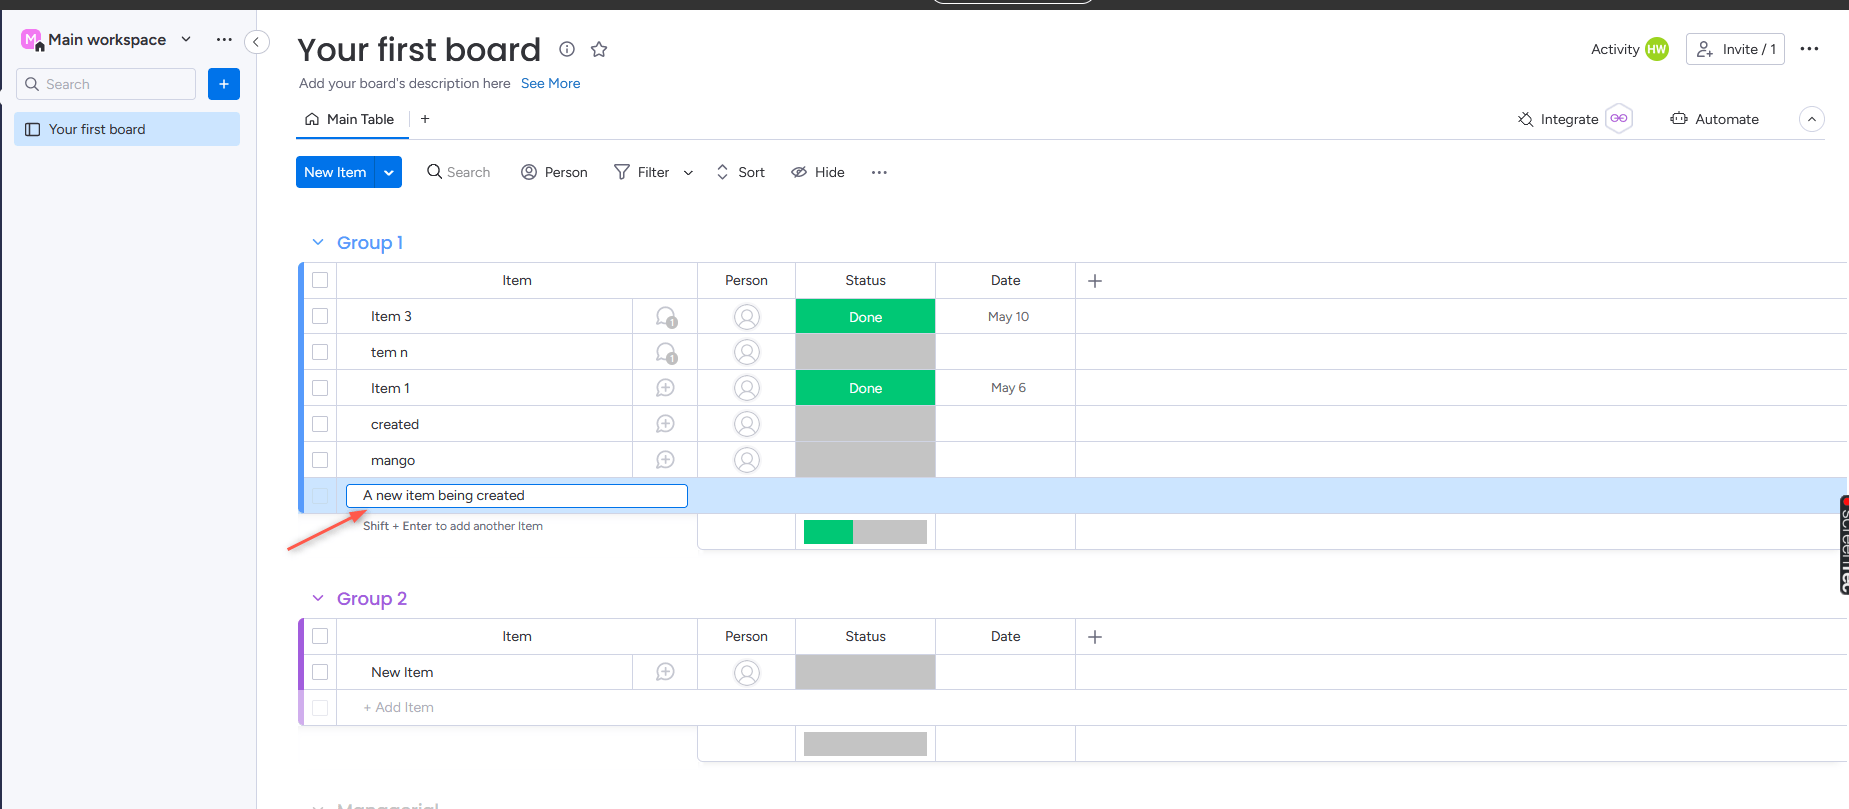
- This triggers the
create_pulseevent specified and the webhook payload is received on the Hookdeck console and can be inspected.
This guide aims to show you how to capture these live events in an application running on localhost. To do that, you need to add a Localhost webhook destination to the Hookdeck console.
How to receive Monday webhooks to your localhost
To set a localhost destination, you are required to:
- Have an application running on localhost with a webhook endpoint listening.
- Create a Hookdeck connection to link the destination.
For this example, we are going to use the sample Node.js code from Hookdeck's repository; feel free to follow up with any application or code you may have.
Clone and set up the repository.
After setting up the application, the Node.js server starts up on
http://localhost:1337.Note the
/monday-webhooks-endpoint.See the list of endpoints in thesrc/routes.tsfile.
With the localhost application up and running, let’s see how to link it as a destination.
From the Hookdeck console, you can initiate adding an HTTP or Localhost destination.
- Click Add Destination from the top bar.
- Select Localhost as the destination and follow steps 1-3 to set it up.
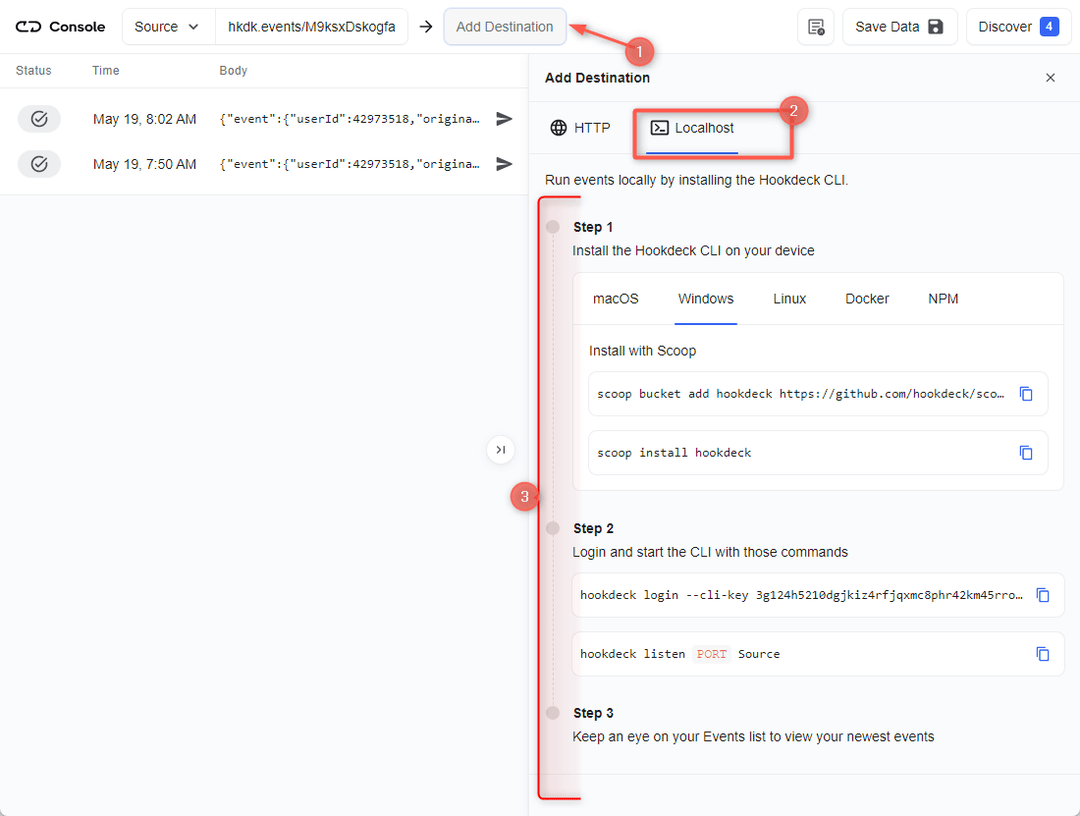
- Set the webhook path to
/monday-webhooks-endpointwhen prompted. With the destination set, any incoming request gets received on localhost.
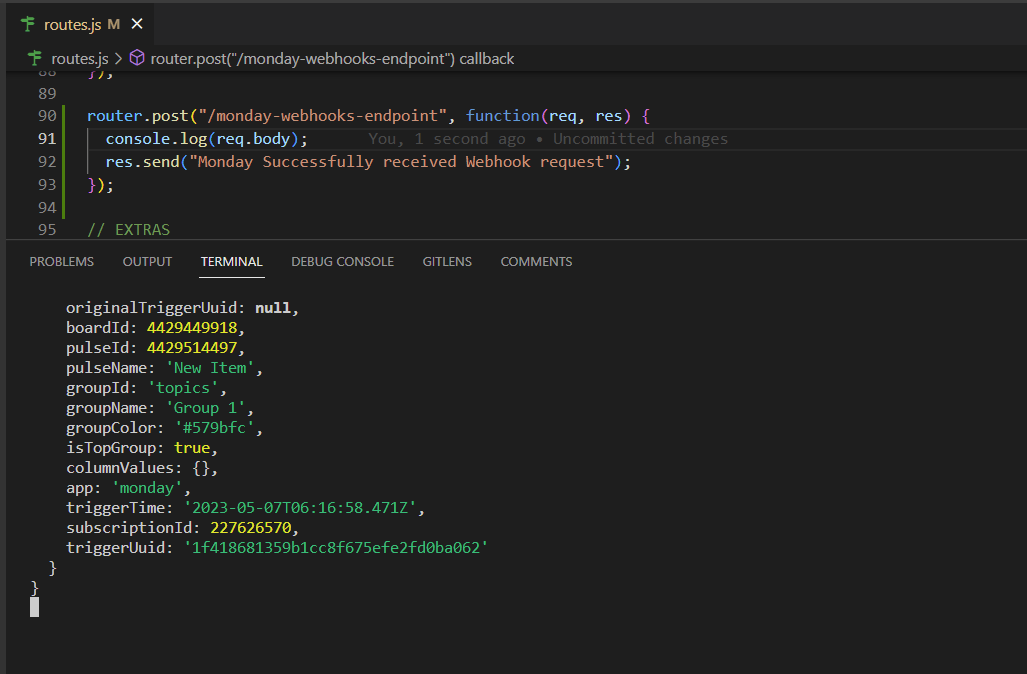
After setting the localhost destination, any webhook event sent to the URL gets relayed to the localhost application.
Back in the terminal of the localhost application, the successful payload from the webhook is received and logged.
How to replay failed Monday webhook events and errors
In case any failed events don’t make it to your destination, Hookdeck provides you with the ability to retry and attempts to deliver any failed or error event.
To retry a failed event, hit the Retry icon across the failed event.
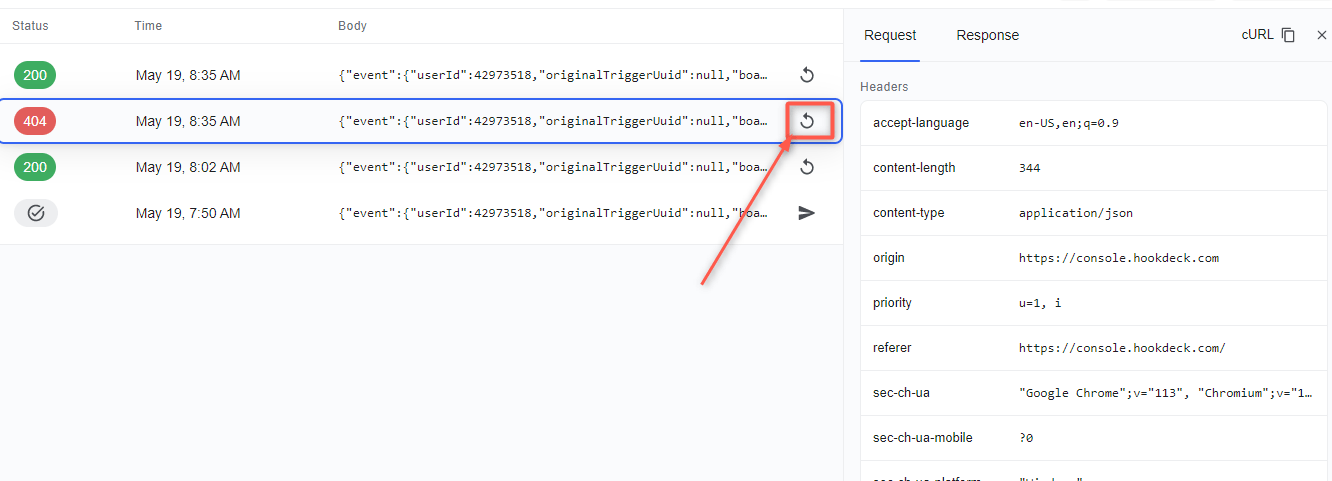
This replays the event again from Hookdeck to the localhost application.
See more details on managing Hookdeck requests and events in the Hookdeck documentation.
In this guide, you learned how to receive Monday webhook events through Hookdeck, a reliable webhook provisioning platform, to an application running on localhost.
Try Hookdeck to safely consume, monitor, and troubleshoot your Monday webhooks.
