![]() Fongang Rodrique
Fongang Rodrique
How to Test and Replay Octane Webhooks Events on localhost with Hookdeck
Octane is a metered billing system that helps SaaS companies create plans, monitor usage, and charge users.
Octane offers a set of webhook APIs and events that can be triggered when specific actions happen, like when a user signs up or when an invoice is generated.
Hookdeck is a webhook management platform that helps developers reliably receive webhooks, manage events and troubleshoot any issues quickly. This guide will show you how to receive your Octane webhook events to your local application using Hookdeck.
We will cover:
- How to write a simple Express.js application
- How to create a Hookdeck connection
- How to configure and trigger an Octane webhook
Testing your Octane webhooks with Hookdeck provides an overall view and keeps track of every event that occurs.
The local application is going to act as the API consumer that receives the webhook payload sent.
To create a simple Express.js app on port 4000, follow the steps outlined below.
Make sure you have Node.js and npm (Node Package Manager) installed on your machine.
You can check if you have them installed by running the following commands in your terminal:
node -v
npm -v
- Create a new directory for your project and navigate to it using the terminal.
- Initialize a new npm project by running the following command:
npm init
- Install Express.js by running the following command:
npm install express
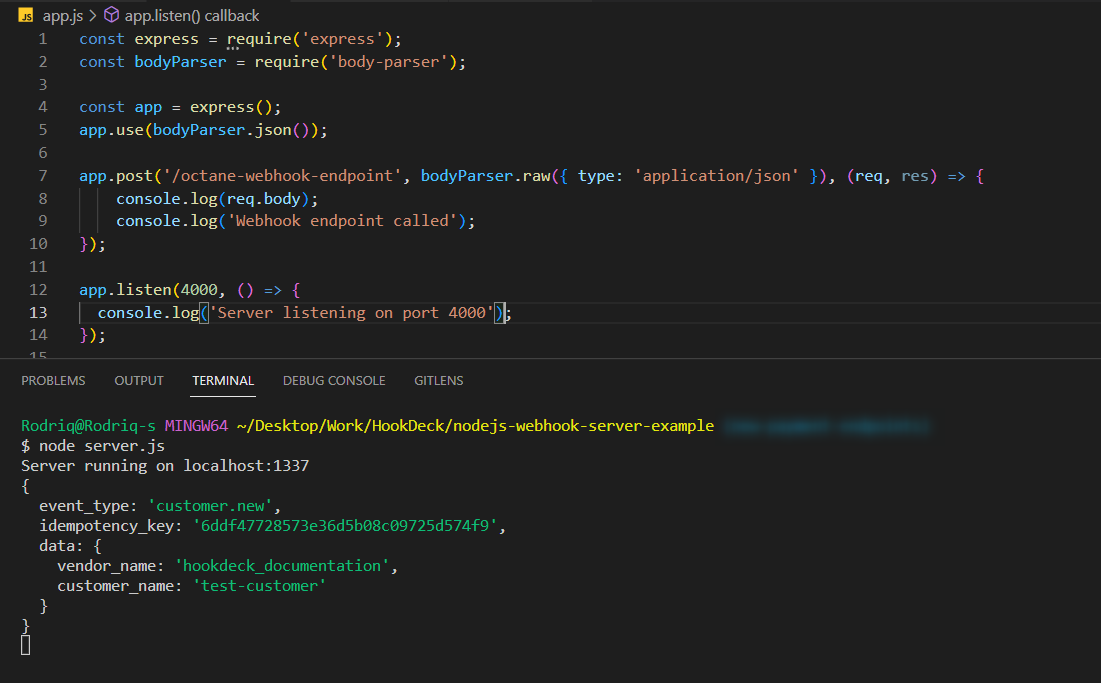
- Create a new file called "app.js" in your project directory and add the following code:
const express = require("express");
const bodyParser = require("body-parser");

const app = express();
app.use(bodyParser.json());

app.post(
  "/octane-webhook-endpoint",
  bodyParser.raw({ type: "application/json" }),
  (req, res) => {
    console.log(req.body);
    console.log("Webhook endpoint called");
  },
);

app.listen(4000, () => {
  console.log("Server listening on port 4000");
});
- Install the dependencies by running the following command in your project's root directory:
npm install
- Run the app by using the following command:
node app.js
This will create a simple Express application running on port 4000 and we are using /octane-webhook-endpoint as the receiving endpoint.
There are several ways of creating a Hookdeck connection (see the guide here). We are going to use the Hookdeck CLI, which can be used for free without creating an account.
Create a Hookdeck connection with Hookdeck CLI
- Install the Hookdeck CLI.
- Open up your terminal and expose the localhost port with:
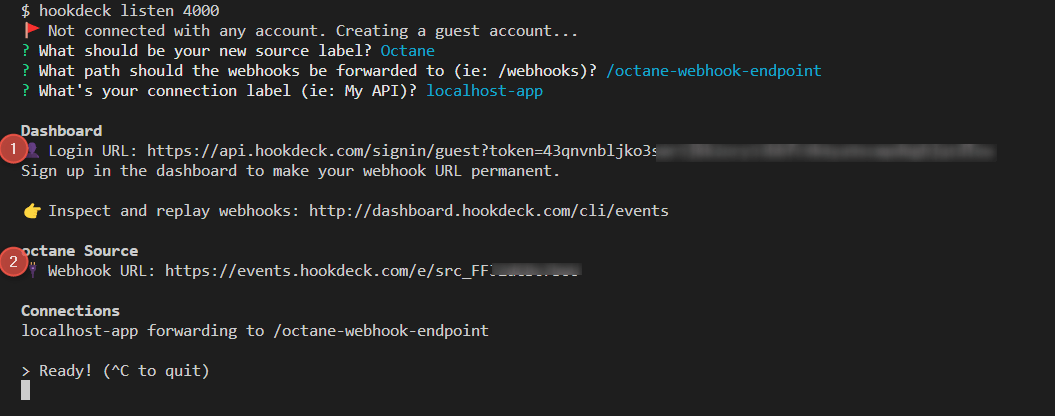
hookdeck listen 4000
- The Hookdeck CLI initiates the creation of a guest account that will be used.
- You get prompted to do some basic setup:
- Create a new source (ex. Octane)
- Set the path to be forwarded to as
/octane-webhook-endpoint - Name the connection label (ex. localhost-app)
- The connection is created and you are given: - A login URL to use for your Hookdeck dashboard - The webhook URL needed
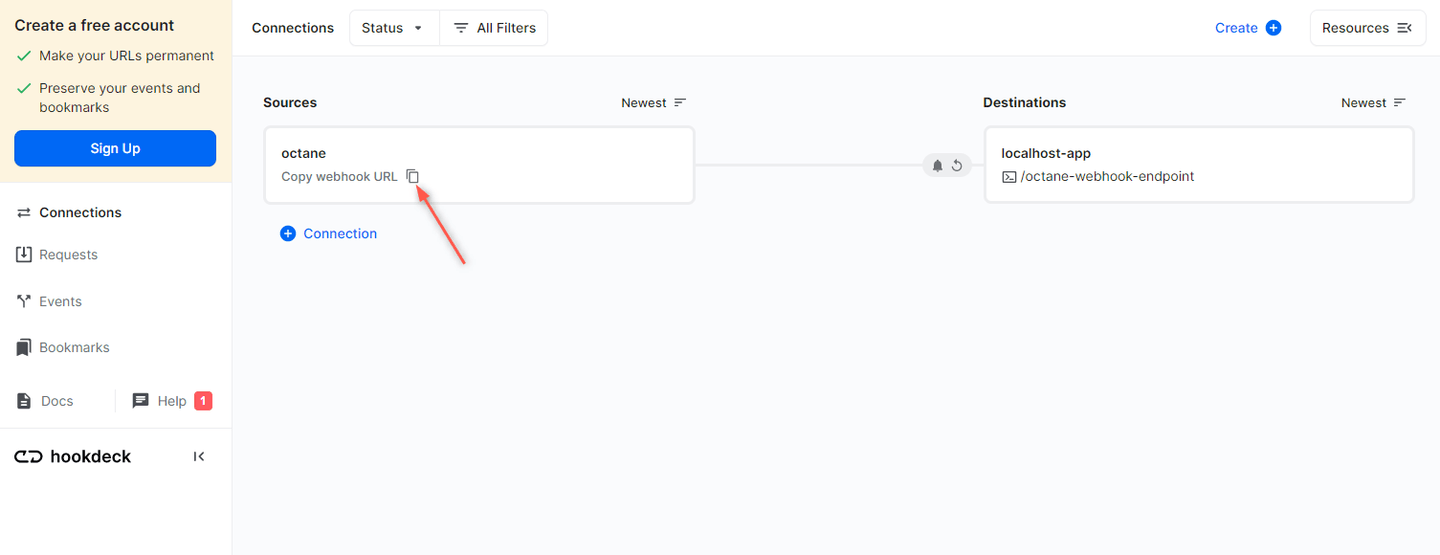
- The same connection can be seen on your Hookdeck online dashboard after following the link.
- Copy the Octane source webhook URL. It will be used later in configuring on the Octane portal.
In this section, I will show you how to configure the Octane webhook URL provided in order to listen for webhook events and then trigger the webhook event from Octane.
Configure Octane webhook URL
To be able to listen to Octane webhook events, we need to configure it with our Octane webhook URL provided by Hookdeck. The steps are outlined below.
- Open up your Octane portal.
- Navigate to the credentials tab under settings.
- Set the webhook URL copied from Hookdeck then Save.
After saving, all Octane events triggered will be received on that endpoint.
Trigger an Octane webhook event
For this guide, we are going to trigger the Octane test_customer webhook event manually by creating a new Customer. This can be done by:
- Navigating to the customer tab on your Octane portal
- Clicking the + icon at the top of the All Customers table, then create a test customer and Save
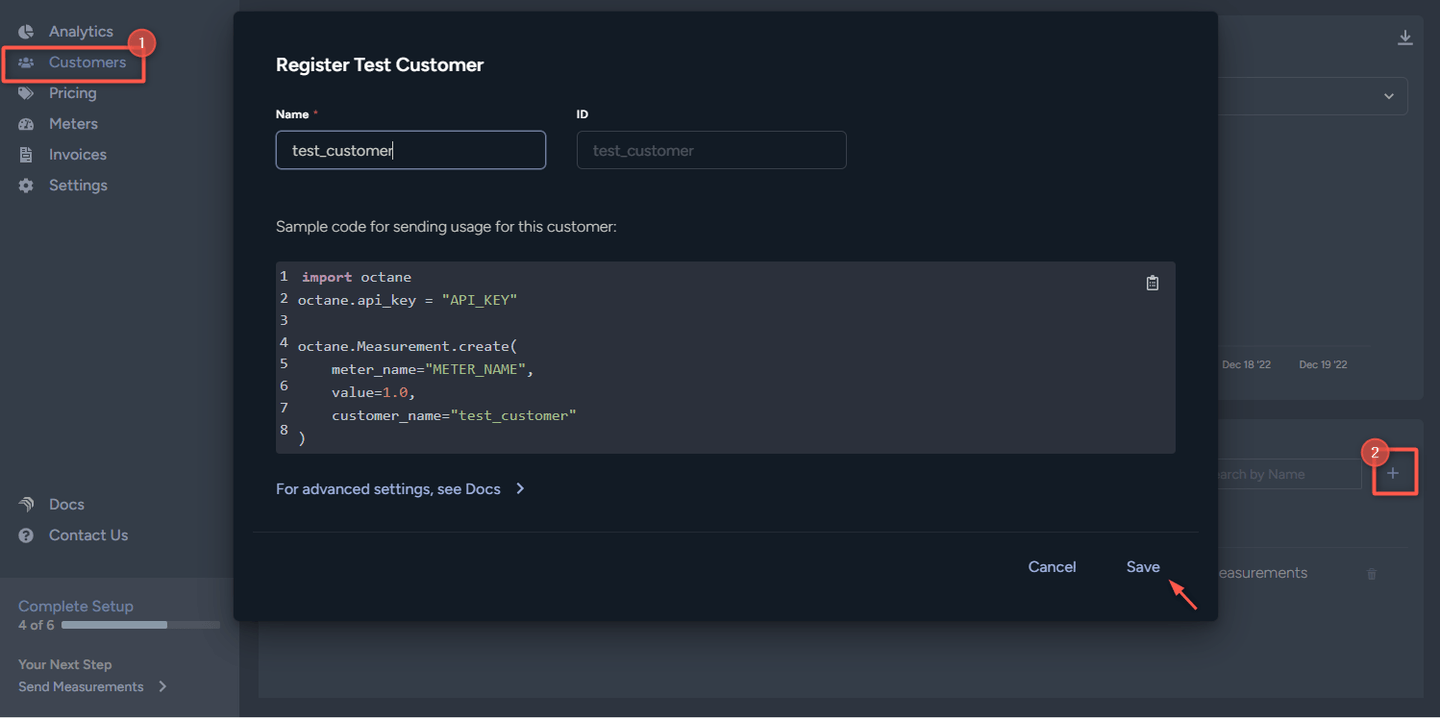
Octane creates the customer and sends a webhook event to the Hookdeck source URL we added in the settings section.
Verify webhook consumption
The Octane webhook event triggered gets relayed through Hookdeck to the local application.
- On your Hookdeck Request dashboard, filter the request sources to Octane and you should see the requests received with a
200status code.
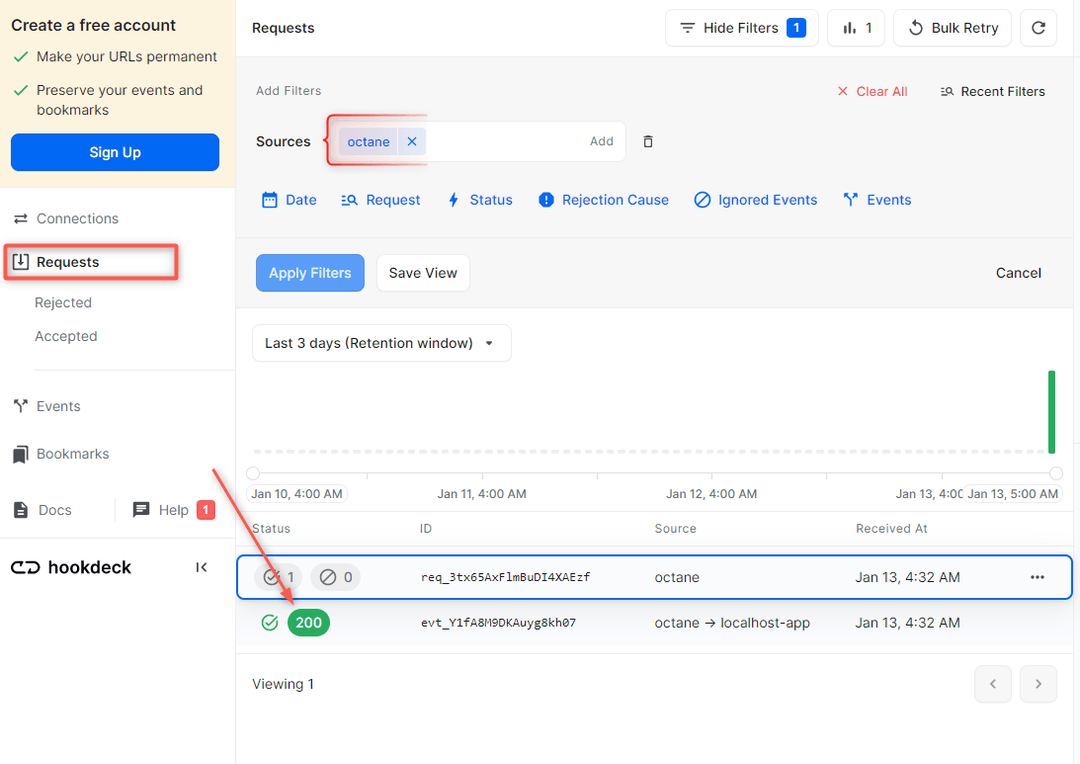
- Back in the terminal of the localhost application, the successful payload from the webhook is received and logged.
Retrying error or failed events
In case there are any failed events that don’t make it to your destination, Hookdeck provides you with the ability to retry any attempts to deliver any failed or error event.
To retry a failed event:
- Navigate to the Events tab on the sidebar of your connection and filter as per your Destination, then hit the Retry across the failed event.
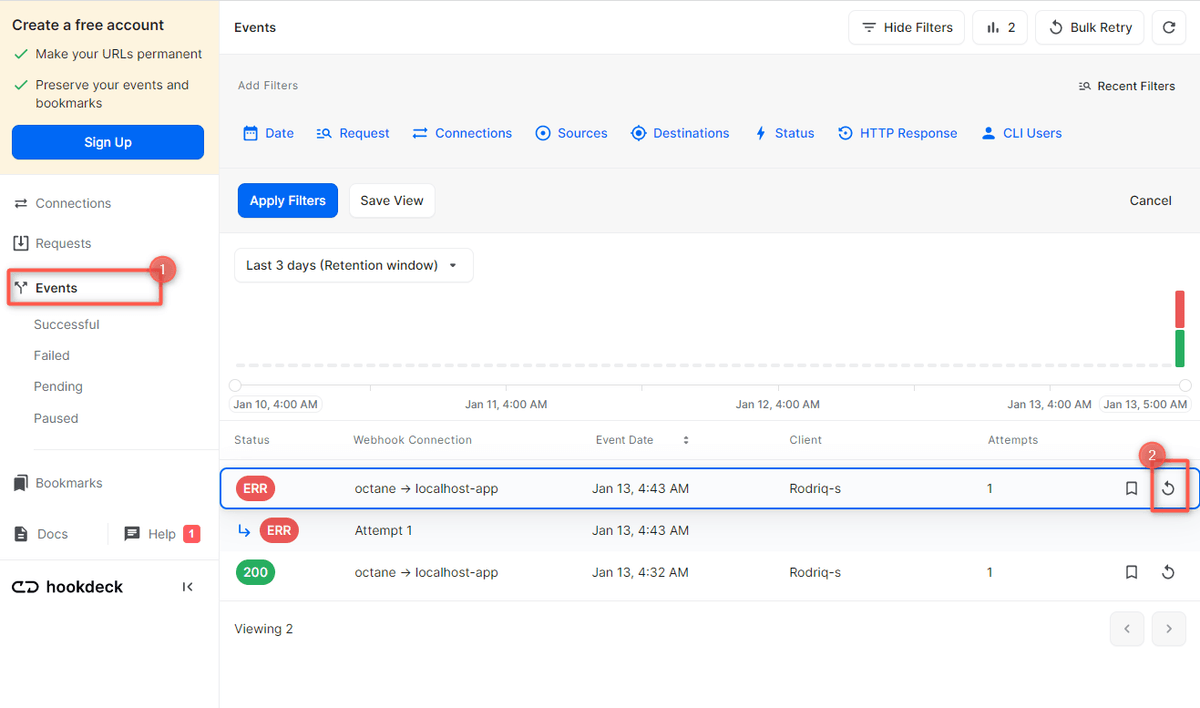
- This will replay the event again from Hookdeck to the local application.
See more details on managing Hookdeck requests and events on the Hookdeck documentation.
In this tutorial, you have learned how to receive Octane webhook events through Hookdeck (a reliable webhook provisioning platform) to an application running on localhost.
Hookdeck can be used safely to consume, monitor, and troubleshoot your Octane webhooks.
