How to Test and Replay Paddle Billing Webhooks Events on localhost with Hookdeck
Paddle Billing is a complete digital product sales and subscription management platform, designed for modern software businesses. It takes care of payments, localization, and subscription management for you, with one unified API that does it all.
Paddle includes comprehensive events for all parts of the subscription lifecycle, with robust tools for creating endpoints, working with webhooks, and testing events.
This guide is for Paddle Billing, which is the latest version of Paddle. It does not work with Paddle Classic.
The Paddle developer portal and sandbox offer a suite of tools for configuring, testing, and integrating Paddle with your solutions.
Hookdeck is a reliable event gateway for managing inbound events, including monitoring and replaying webhooks, and can be integrated with Paddle to provide comprehensive observability of every event as it occurs.
This guide demonstrates how to connect Paddle webhooks through Hookdeck to an application running on localhost. We will cover:
- Setting up a localhost webhook endpoint
- Creating a Hookdeck connection
- Creating a Paddle notification destination
- Testing a Paddle webhook event with a localhost app
Set up a localhost webhook endpoint
For this example, we will use the sample Node.js code from Hookdeck's repository. Feel free to follow up with any application or code you might have.
- Open up your terminal and clone the repository by running
git clone https://github.com/hookdeck/nodejs-webhook-server-example.git
- Change into the cloned directory and install the dependencies
cd nodejs-webhook-server-example
npm install
- Start the server by executing:
npm run dev
The Node.js server starts up on
http://localhost:1337. See the list of endpoints in thesrc/routes.tsfile.We will make use of the
/paddle-webhooks-endpoint.
Create Hookdeck Connection
There are several ways of creating a Hookdeck connection. But for this guide, we're using the Hookdeck CLI without a Hookdeck account, so the CLI will dynamically create a connection.
Create Hookdeck Connection with Hookdeck CLI
- Install the Hookdeck CLI
npm install hookdeck-cli -g
yarn global add hookdeck-cli
brew install hookdeck/hookdeck/hookdeck
-
scoop bucket add hookdeck https://github.com/hookdeck/scoop-hookdeck-cli.git -
scoop install hookdeck
-
Download the latest release's tar.gz file.
-
tar -xvf hookdeck_X.X.X_linux_x86_64.tar.gz -
./hookdeck
- Open up your terminal and expose the localhost port with
hookdeck listen 1337 paddle --path /paddle-webhooks-endpoint
- The Hookdeck CLI initiates the creation of a guest account that will be used
- By passing
paddleyou are naming the source of the webhooks --path /paddle-webhooks-endpointspecifies the path on your local server where the webhook events will be forwarded to- The connection is created and you are given
- A unique URL to authenticate with the Hookdeck console
- The Hookdeck webhook URL needed
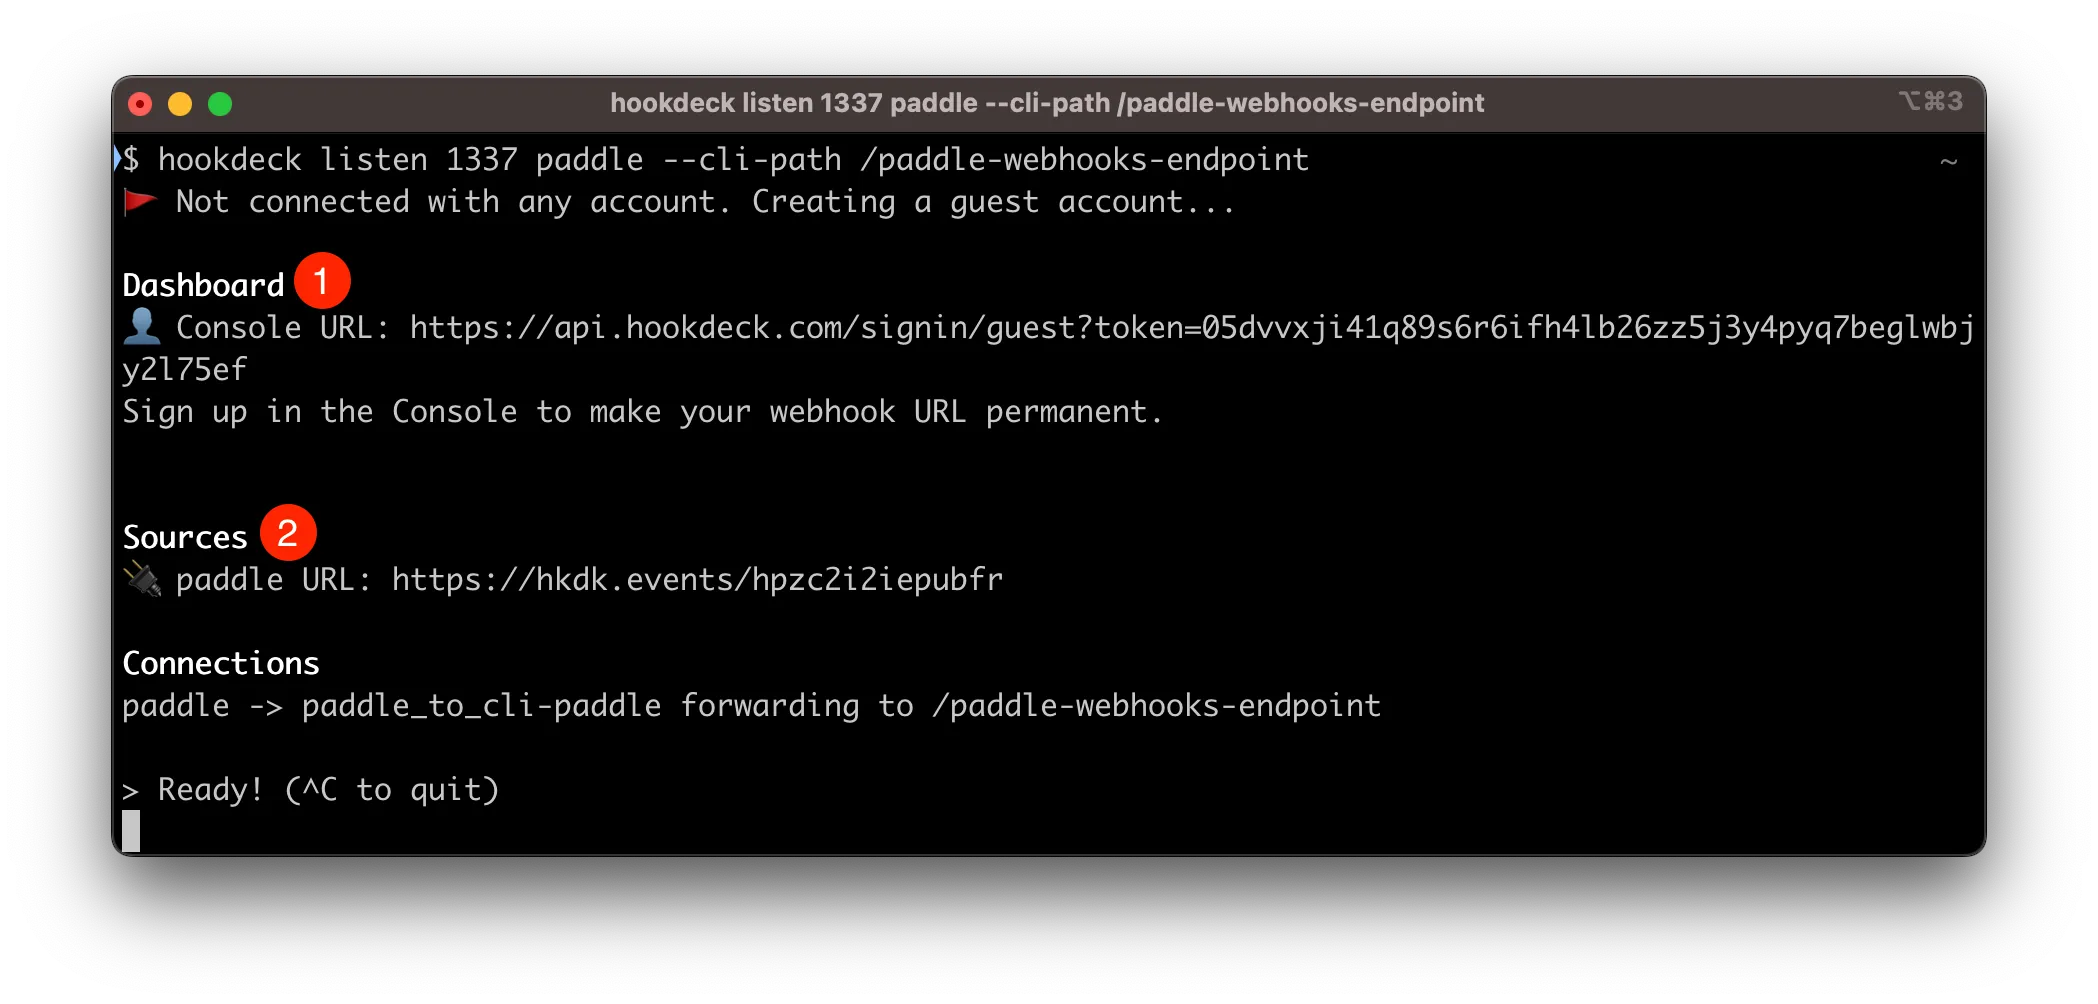
The same connection can be seen on your Hookdeck guest console after following the link. Copy the Paddle Source webhook URL for the next step.
Create a Paddle webhook notification
- Log in or sign up for a Paddle sandbox or live account.
- Navigate to Developer Tools > Notifications on the side panel
- Click on + New destination to create a new webhook destination
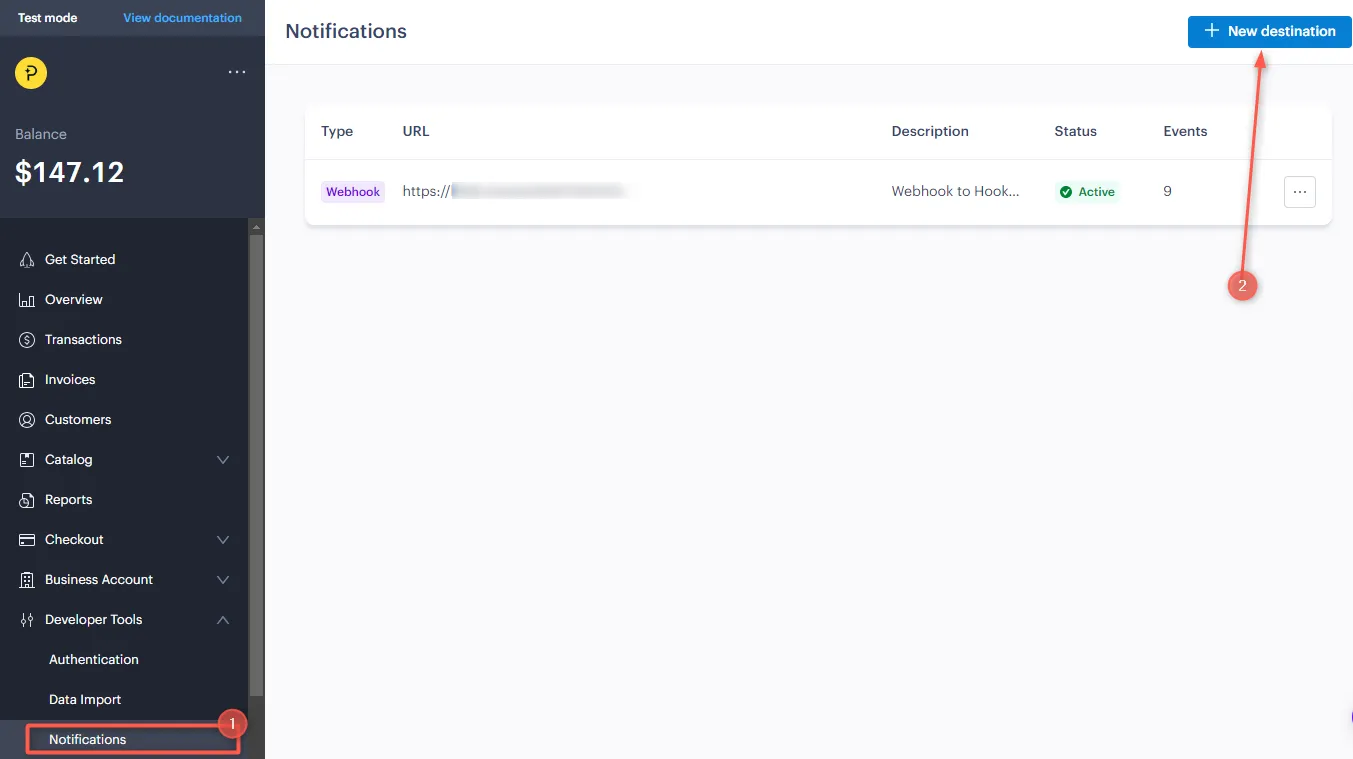
- Fill in the required details and Save destination
- Description: A description for the webhook destination
- URL: The webhook URL copied from Hookdeck to send the events to
- Notification Type: Select the
webhookfrom the dropdown as the notification type - Events: Check the
product.createdbox.
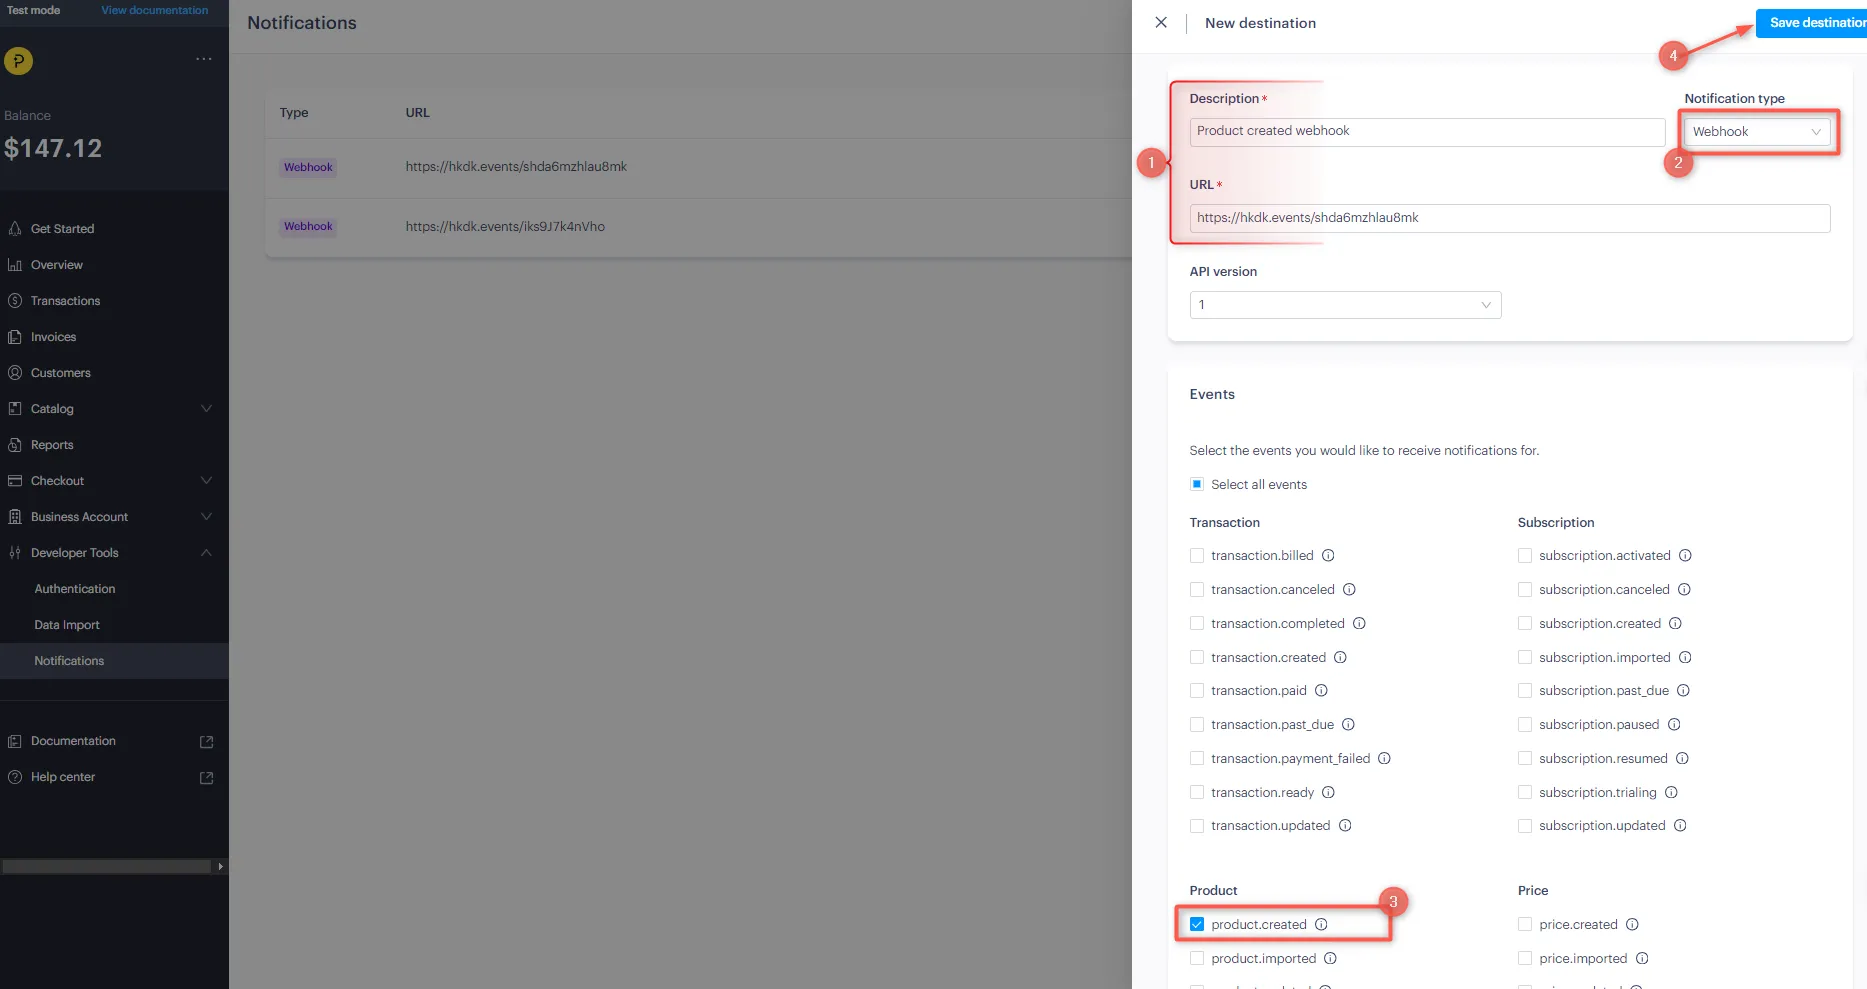
This creates an active webhook listener for the product.created webhook event on Paddle and will be triggered each time a new product is created.
Learn more about how to Create or update notification destinations with Paddle.
Test Paddle webhook events
Paddle provides a Webhook Simulator for testing purposes.
We have successfully set up our local server, created a Hookdeck connection, and configured a Paddle webhook listener. Let us test and trigger a Paddle event and receive it in the localhost application.
Since we created a webhook listener already, let us go ahead and see how it can be triggered in a real-life scenario.
- From your Paddle sandbox dashboard, navigate to Catalog > Products
- Click + Create Product to create a new product
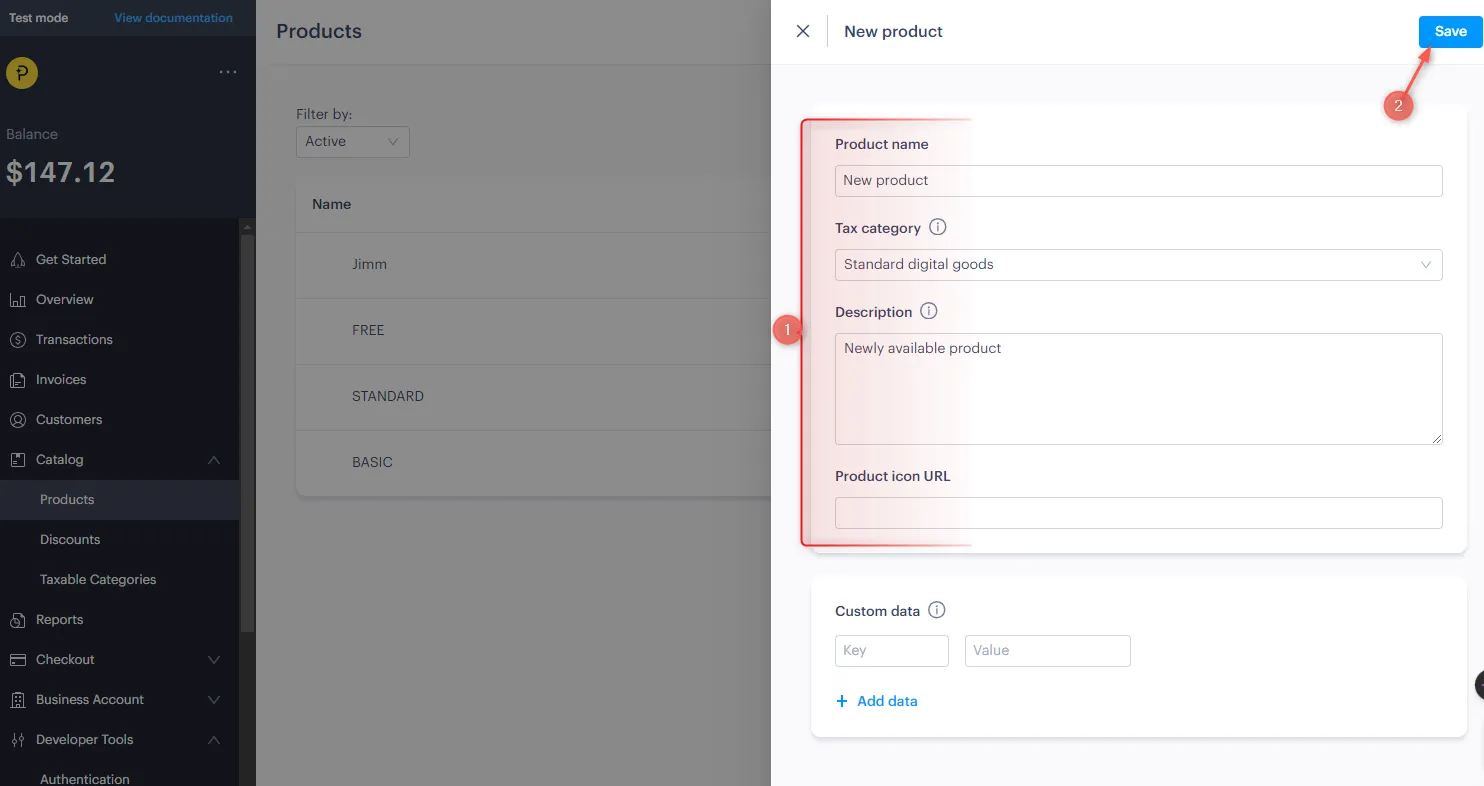
- Configure the details for the product and Save
Learn more about Paddle webhooks by checking the Paddle webhook documentation.
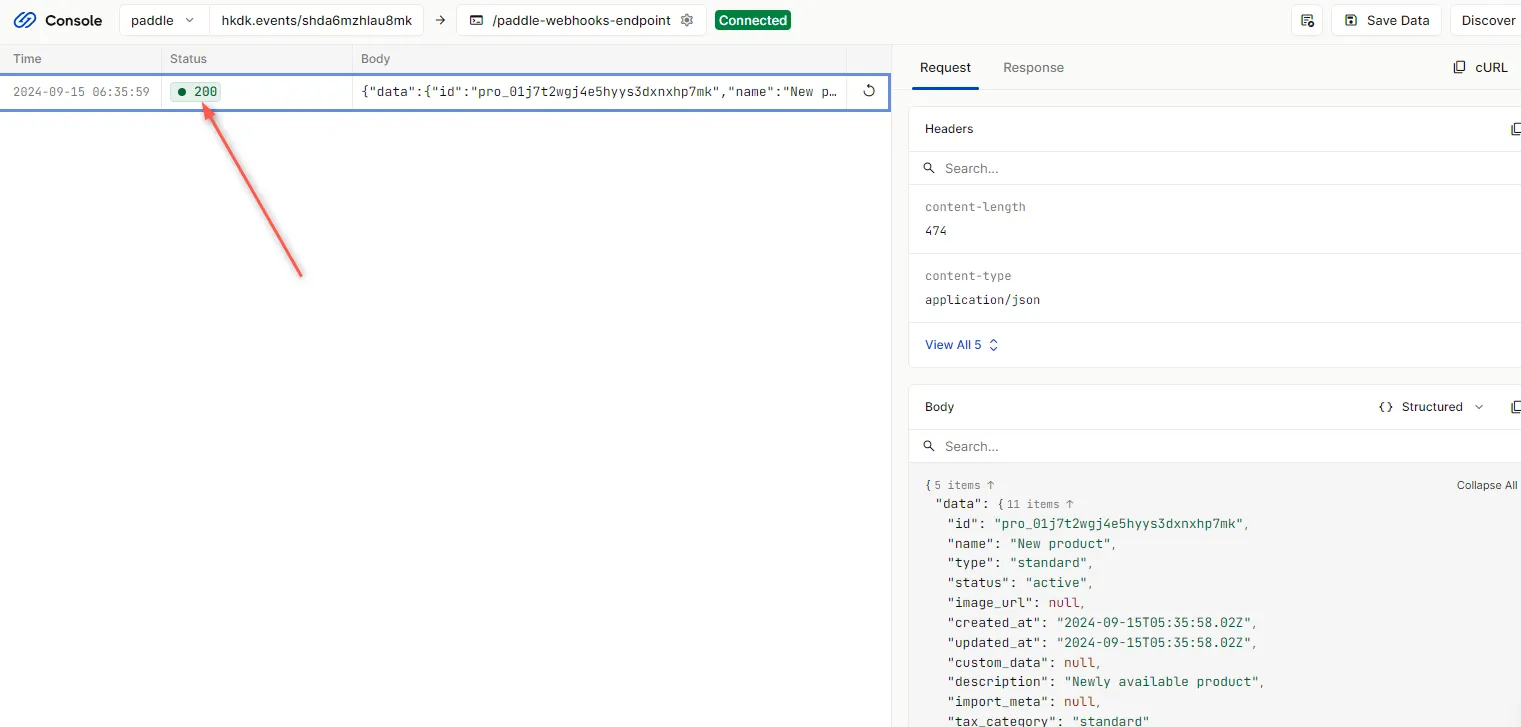
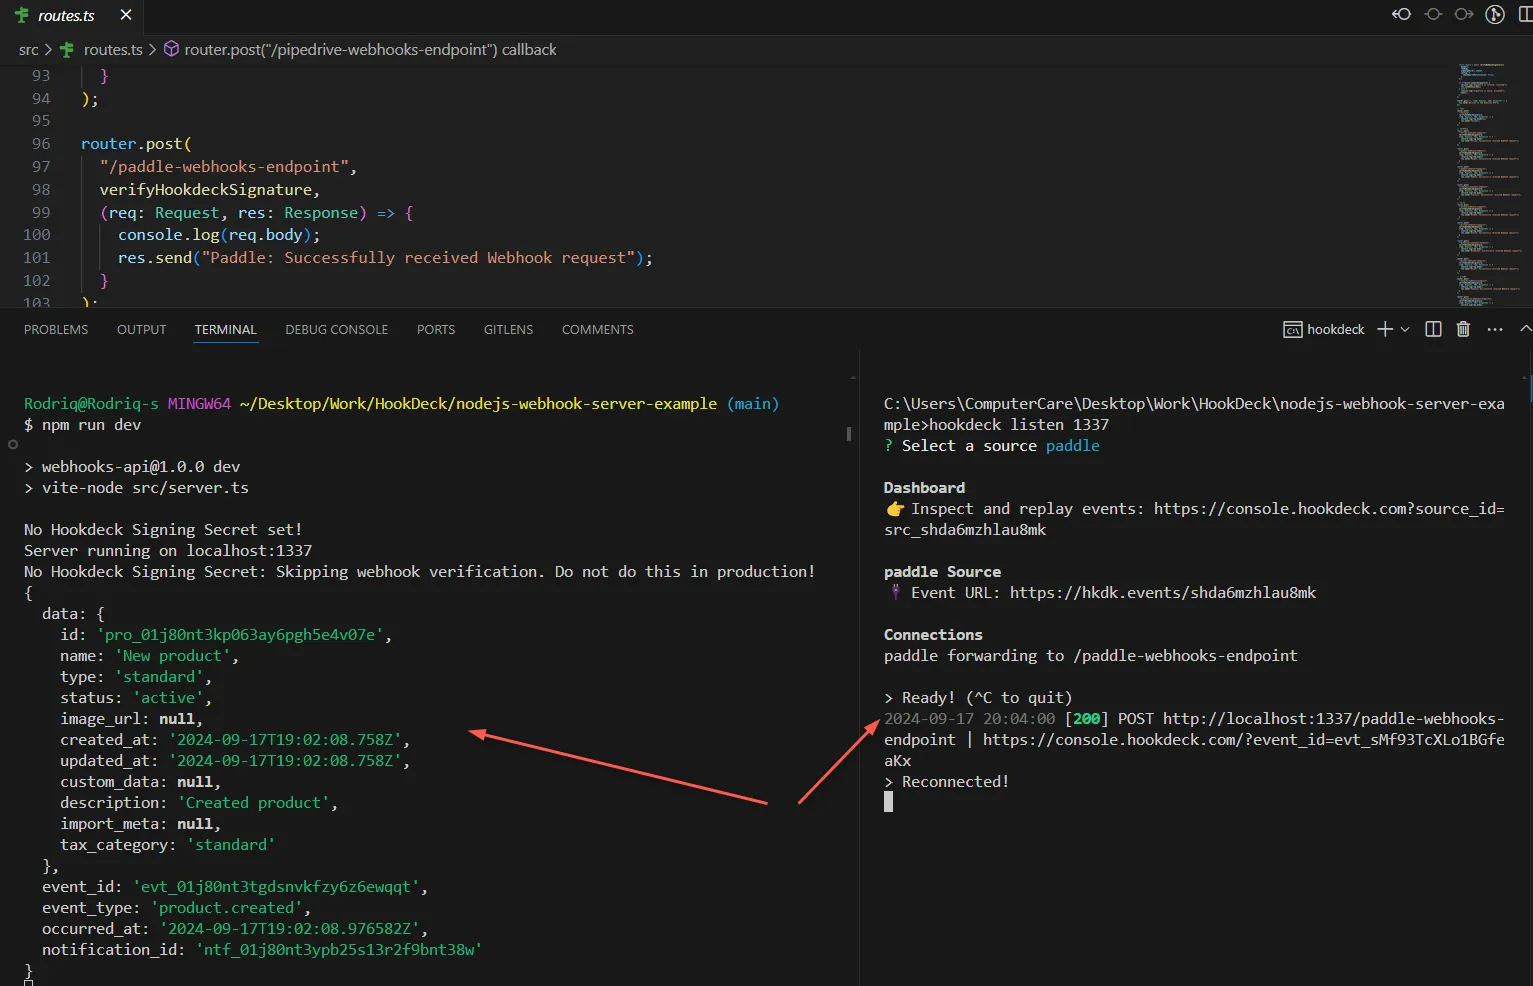
Upon saving the product, a product.created event is triggered and sent to the Hookdeck webhook URL. The event is then relayed to the localhost application. On your Hookdeck console, you should see the requests received with a 200 status code
- Back in the terminal of the localhost application, the successful payload from the webhook is received and logged
Retrying error or failed events
In case there are any failed events that don't make it to your destination for some reason, Hookdeck provides an ability for you to retry the event. This attempts to resend the event to the destination.
To retry a failed event:
- Click on the Retry icon by the right of the failed event
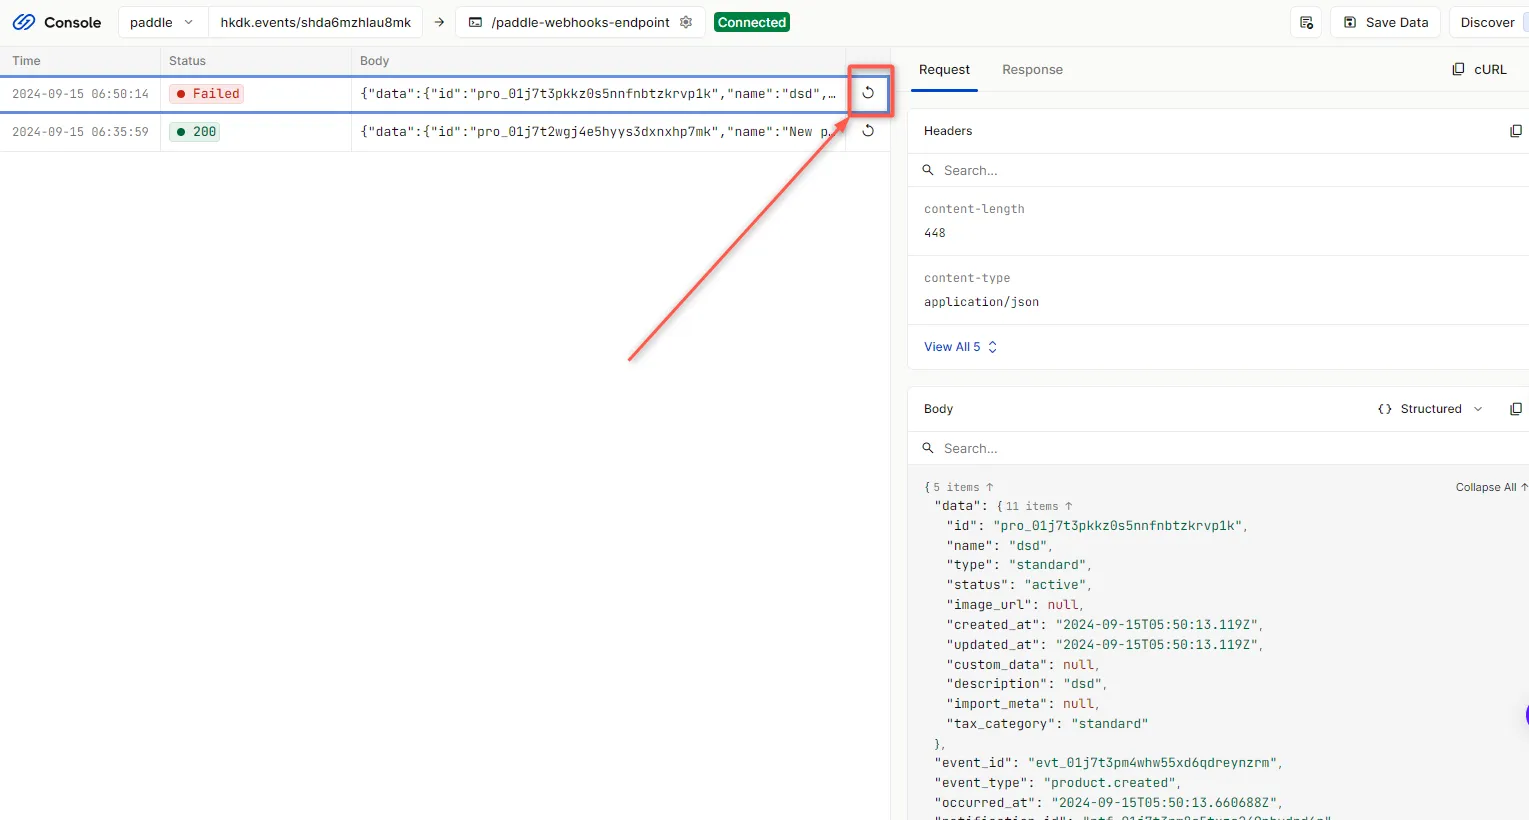
This replays the event again from Hookdeck to the local application
When working with Hookdeck,
A Hookdeck Request is an incoming webhook that Hookdeck receives from an external source. It contains the data that was sent by the external source as is (ex. from Paddle).
A Hookdeck Event is the webhook delivered by Hookdeck including configurations or filters applied to a destination (ex. to localhost app).
For more details on managing Hookdeck requests and events, refer to the Hookdeck documentation.
In this guide, you have learned how to receive Paddle webhook events through Hookdeck to an application running on localhost. For a comprehensive overview, see our guide to Paddle webhooks features and best practices.
Hookdeck can be used to safely consume, monitor, and troubleshoot your Paddle webhooks, ensuring reliable event handling and replay capabilities.
