How to Troubleshoot Okta Event Hooks Tutorial
When setting up and working with Okta Event Hooks (webhooks), a couple of things may not go as expected. Even after doing your best to follow the instructions in the documentation, you may find out that you're not receiving the event hooks on your endpoint or cannot access the payload. You need a guaranteed process to troubleshoot your work with Event Hooks to ensure that you can properly monitor the events, pass any form of authentication check required, and also access the information contained within them.
In this tutorial, we set up a battle-tested process to ensure that you can easily troubleshoot common issues that arise when working with Okta Event Hooks.
Troubleshooting Okta Event Hooks Checklist
To begin the troubleshooting exercise, there are some things you need to have in your tool belt:
- An Okta account with admin access
- The Hookdeck CLI. You can find installation instructions for your operating system here.
- A local development server running on a specified port with an endpoint for retrieving event hooks. A sample is provided in one of the sub-sections below if you don't have one.
- Your text editor/IDE and command line terminal
Troubleshooting Event Hooks using Hookdeck tutorial
Cloning and running a demo API
If you already have a locally running API listening for connections on a specified port, you can skip this section.
However, if you do not have an API to practice with, you can clone a demo API on the Hookdeck GitHub repository by running the following command:
git clone https://github.com/hookdeck/nodejs-webhook-server-example.git
Navigate to the root of the project and install the required dependencies by running the following commands:
cd nodejs-webhook-server-example
npm install
When the installation completes, you can then run the Node.js server with the following command:
npm start
This will boot up the API application and print a message to the screen indicating that the API is now running and listening for connections on port 1337. The endpoint to be used for the webhook requests is /okta-webhooks-endpoint .
Getting a webhook URL
To receive Okta Event Hooks, you need a secure publicly accessible URL. This is your webhook URL which points to an endpoint on your API. It is not possible to use an endpoint on a locally running server as it is not publicly accessible. This is why we need the Hookdeck CLI (as well as the other troubleshooting features it provides).
To generate a publicly accessible webhook URL with the Hookdeck CLI, run the following command (if you're using your server, replace 1337 with the port on which your API is running):
hookdeck listen 1337
This command starts an interactive session where the CLI collects information about the URL you're about to create. Below are the questions and answers you should supply to each question. Ensure to hit the Enter key after each answer.
| Prompt | Answer |
|---|---|
| What source should you select? | Create new source |
| What should your new source label be? | Okta |
| *What path should the webhooks be forwarded to (i.e.: /webhooks) | /okta-webhooks-endpoint (If you're using your own custom server, replace this value with your endpoint) |
| What's the connection label (i.e.: My API)? | My Okta Response Server |
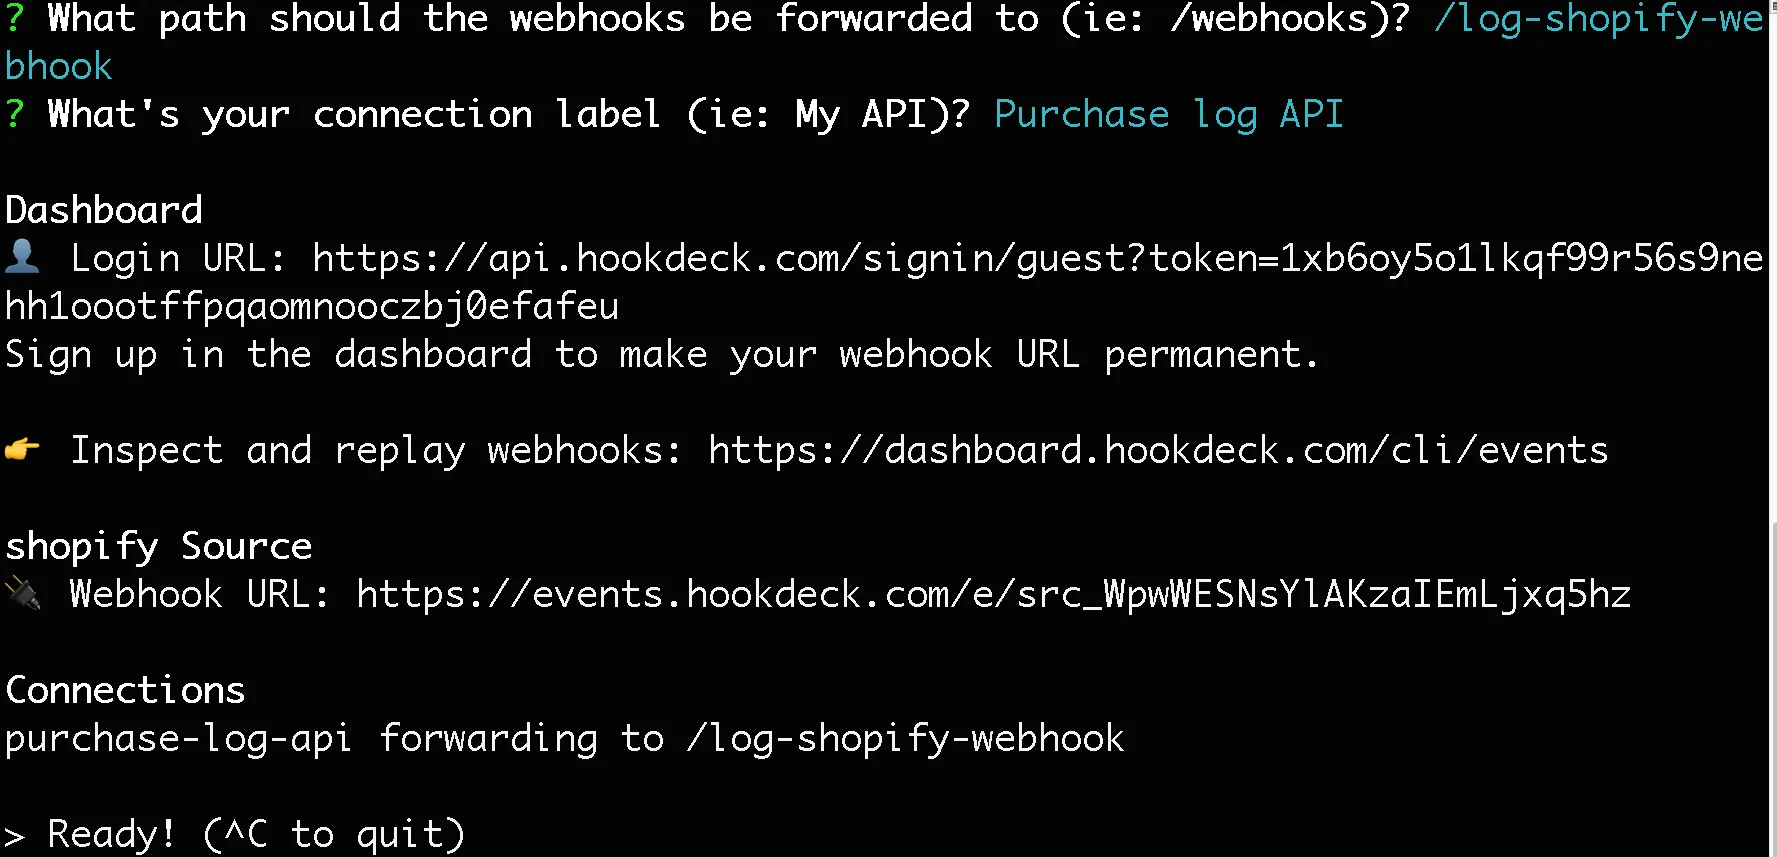
With this information, the CLI will begin the process of generating the URL and once it's done, you will see the URL printed to the screen and the CLI indicating that it is ready to receive requests.
Registering for an Event Hook on Okta
The next step is to register for the Okta Event Hook we will use for our troubleshooting exercise. Log in to your Okta admin page and navigate to Workflows > Event Hooks. On the Event Hooks page, click on the Create new hook button. This will pop up a dialog for you to enter details for the hook to be used. Enter the details as shown below:
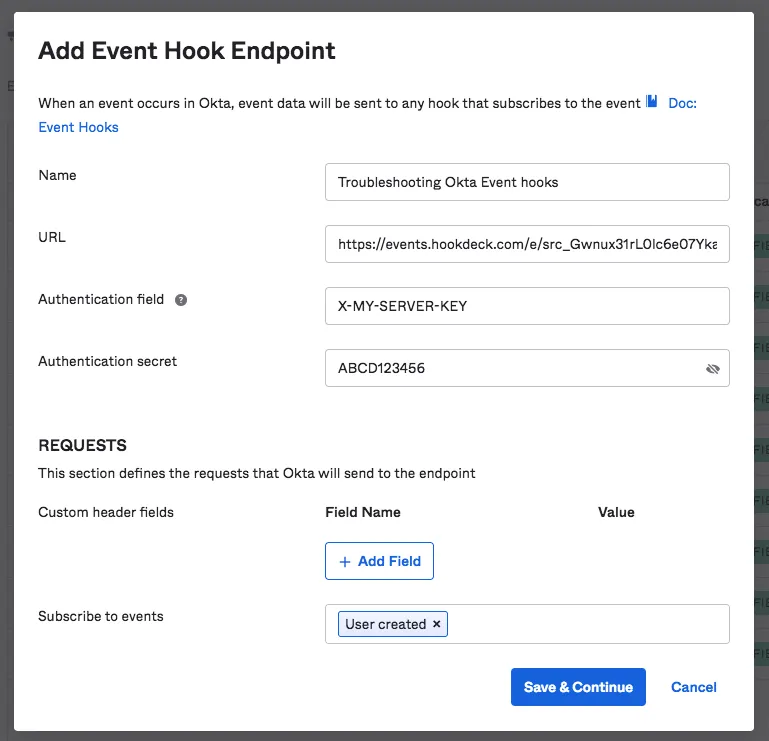
In the Name field, we provide a descriptive name for the event hook we are about to register for. The URL field takes in the webhook URL printed to the Hookdeck CLI.
The Authentication field and Authentication secret fields are optional but because we are inspecting an authentication key in this exercise, enter the X-MY-SERVER-KEY for the header name and a random string ABCD123456 as the value.
Finally, we subscribe to the User created event. Click the Save & Continue button to complete the event hook registration.
A verification dialog pops up because Okta needs to verify the ownership of your endpoint
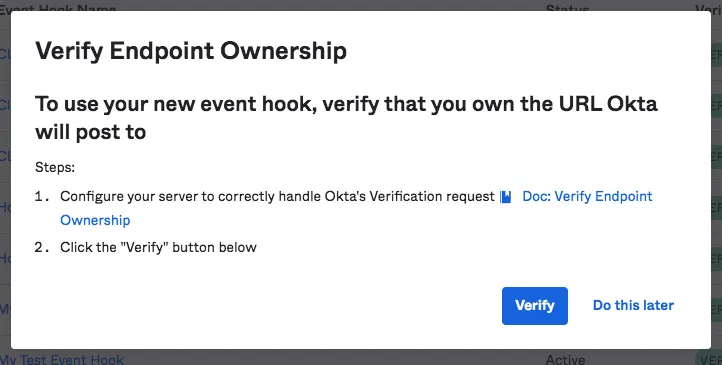
Because we are using a webhook URL from Hookdeck, this is already taken care of. Click Verify to complete the setup.
Confirming Event Hook delivery
The very first and maybe most important thing you want to confirm when troubleshooting your event hooks is that you're receiving them. There is no point debugging your code if you're not receiving your event hooks in the first place.
The Hookdeck CLI helps us confirm that. To test this out, on the Event Hook page you just created, select the User created event on the form as shown below:
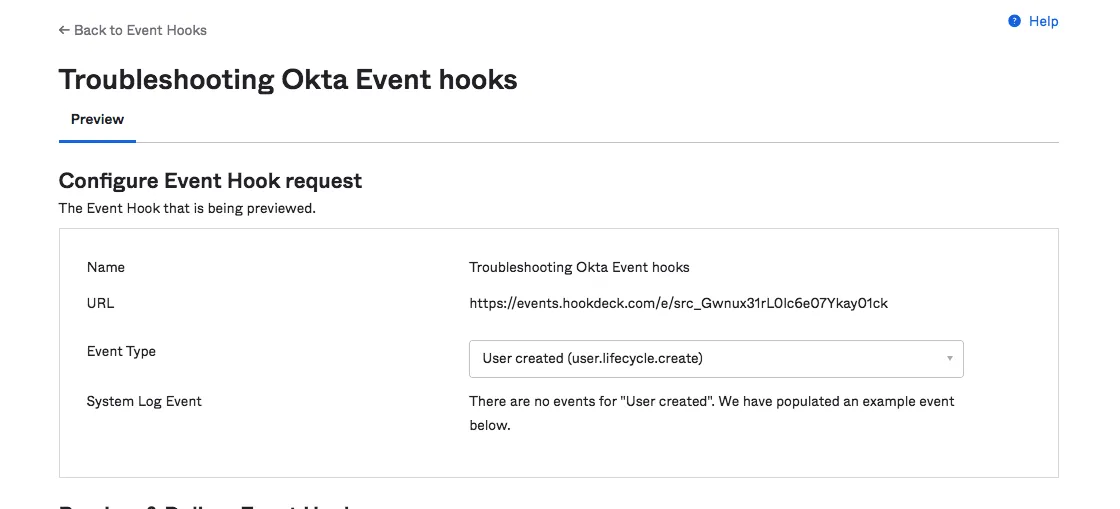
This will immediately load a preview of the request object to be sent to your endpoint in a view below the form. Go ahead and click the Deliver Request button at the bottom of the preview to send a test Event Hook to your webhook URL.
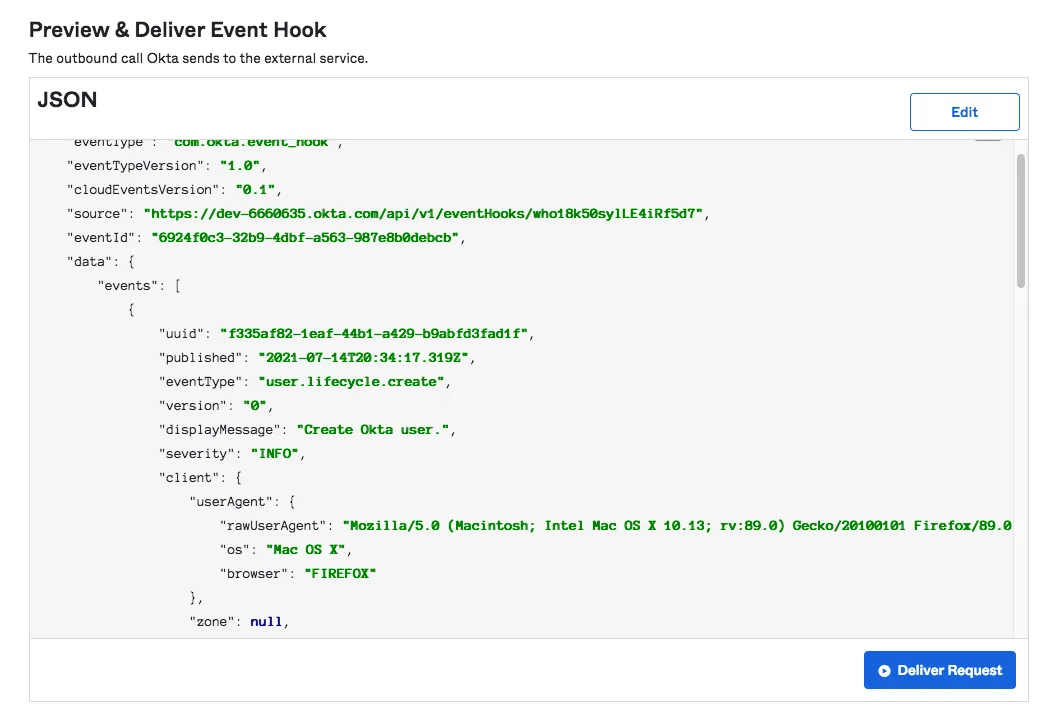
Once you get the delivery success message, check your Hookdeck CLI session. You will see an entry like the one in the image under the Ready! prompt:

This is the Hookdeck CLI confirming that you are indeed receiving your event hooks.
One very confusing (very plausible) scenario is when you are receiving your webhooks, but meanwhile your API cannot access them. This might be due to some authentication issues or your API is down.
No matter what the state of your API is, the Hookdeck CLI will confirm the reception of your event hooks and display an appropriate status code for the delivery.
We also get information about the request method used and the endpoint on which our Event Hook requests are landing.
For example, in the above confirmation, we are successfully receiving our event hooks and the API is also receiving them successfully at the specified endpoint thus, a 200 status code is displayed.
If we were receiving the event hooks but the API wasn't running, an error status code would be displayed in red. If we are not receiving the event hooks at all, nothing is recorded in the CLI session.
Troubleshooting authentication
Hookdeck already takes care of the one-time verification performed by Okta to validate your endpoint. However, if you include a custom authentication header just like we did above when registering for the event hook, you need to ensure that you're receiving the authentication secret specified in the header.
Don't worry, the Hookdeck event page provides a way for us to view the headers received in the Event Hook request.
If you're using a guest account (an unauthenticated Hookdeck CLI session) copy the Login URL displayed on the CLI and load it in your browser to authenticate your session on the browser.
From the Event Hook entry that was recorded when you sent the test event hook, copy the event URL (the last item in the entry).
Load this URL in your browser to view the request breakdown for the event hook received. On this page, you can view the headers received in your request and verify that you're receiving the authentication header as shown below in the Headers section:

Now that you've confirmed that you have received the authentication header in your request, you also want to confirm that you can access it in code. Refactor your endpoint to print the header to the console. For the demo API, the code will look like this:
router.post("/okta-webhooks-endpoint", function (req, res) {
  console.log(req.headers["x-my-server-key"]);
  res.send("Okta Event hook Successfully received");
});
Restart the local server and resend the event hook from the Okta dashboard. You will see your authentication secret printed to the terminal window where your API is running like below:
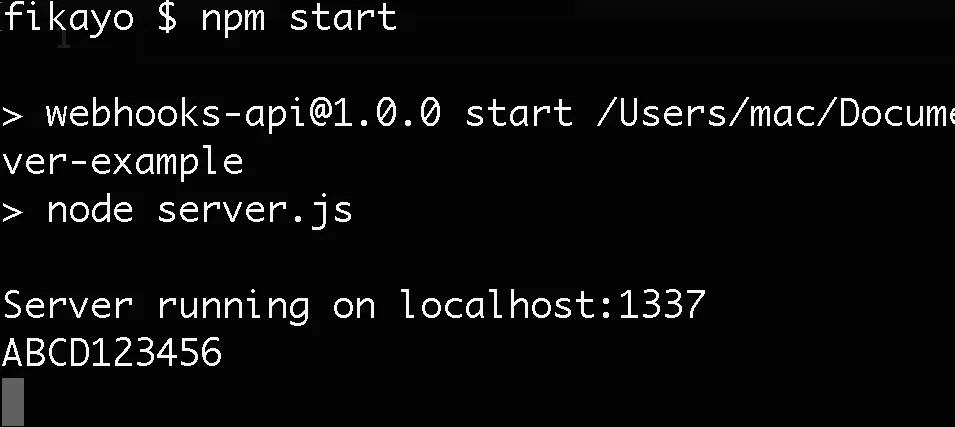
If you're not getting an output, this means you have a bug in your code that is not allowing you to access the authentication header. The Hookdeck event page already confirms to you that you're receiving it, now you only need to figure out a way to access it in code.
Inspecting the payload
Another item of great importance to anyone working with Okta Event Hooks is the information contained in the payload. Just like the authentication check above, you also want to check the event page for your payload first to confirm that you're receiving it.
To do that, go to the Body section on the page and expand the JSON object:
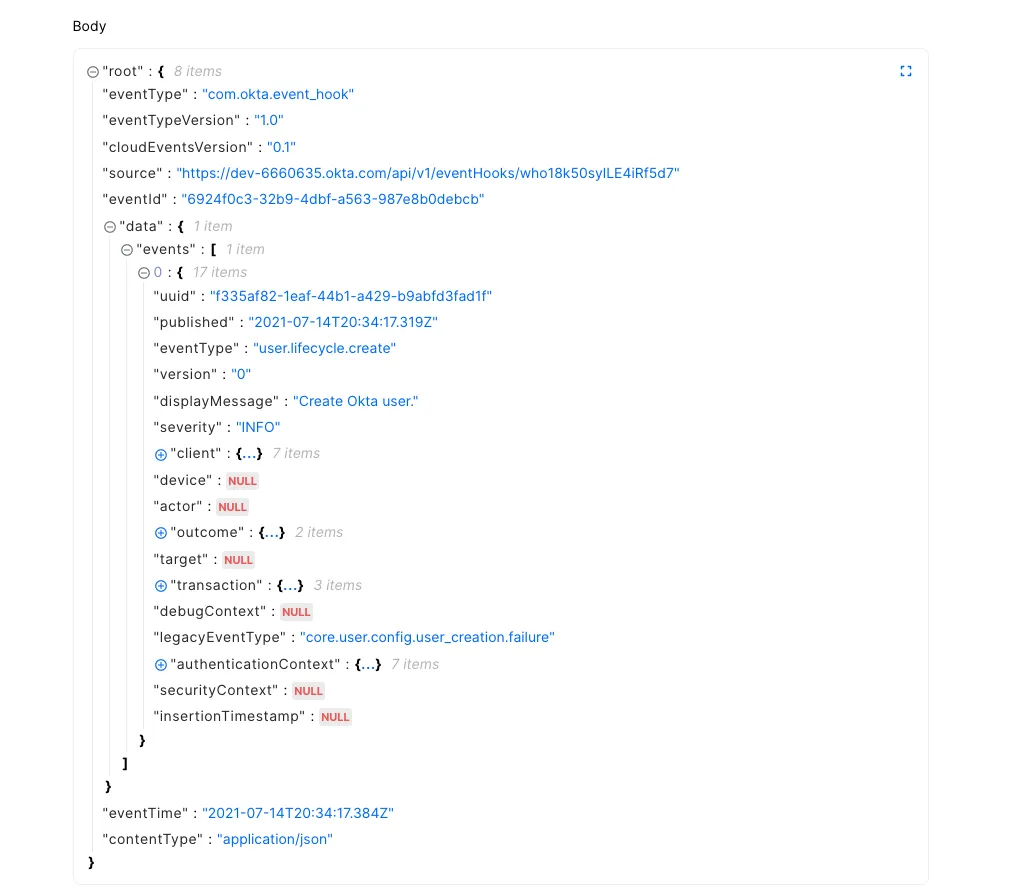
Great, now you can confirm that you're receiving the payload as expected in the events array of the data property. Next, edit your code to print out the payload to the console. For the demo API, the code will go as follows:
router.post("/okta-webhooks-endpoint", function (req, res) {
  console.log(req.body);
  res.send("Okta Event hook Successfully received");
});
Restart the API and resend the event hook again from the Okta dashboard. You will see a printout of the JSON payload in your console like below:
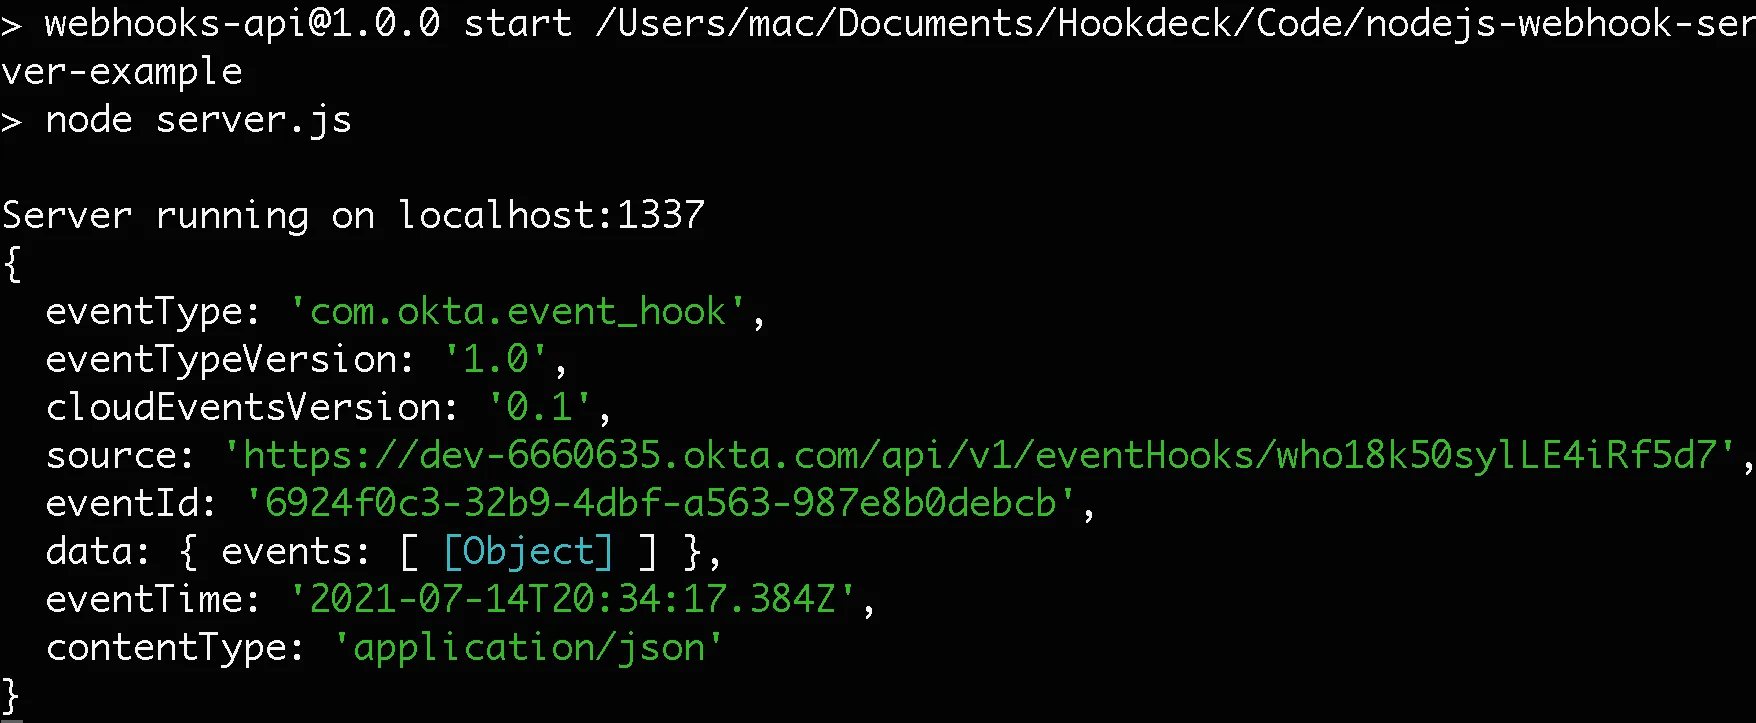
This confirms that you can access your payload in code. If you don't get a printout, there is a bug in your codebase that is not allowing you access to the payload.
Okta payloads are of the application/json content type, so you might want to look up documentation on how to access request payloads of this type in your programming language.
Retrying Event Hooks
So far, each time we need to rerun a test on the event hook, we have to go back to the Okta dashboard to trigger the test event. This can quickly become cumbersome when debugging code. To avoid multiple frustrating trips back to the Okta dashboard just to resend Event Hooks, Hookdeck provides you with a Retry button on the event page just at the top right corner:
To resend the event hook, simply click this button and another attempt will be registered for the event. To view details of each attempt, click on the Events link on the side menu of the event page. This will take you to the page where you can see all your events. You can click an event to expand it and see all the attempts made:

To view details of an attempt, click on the attempt to display the details on the right-hand side of the screen like below:
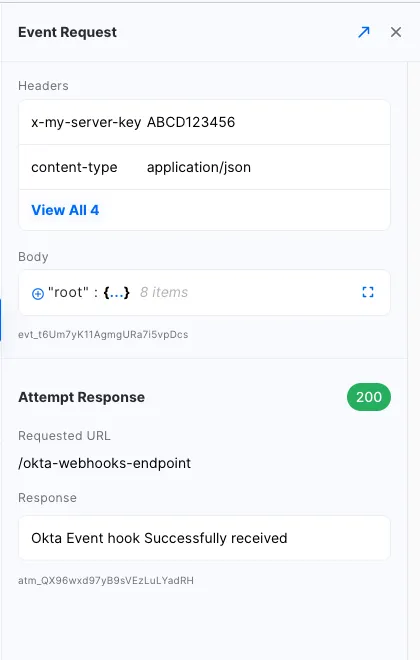
Here you can view the same details you have access to on the event page such as headers, timestamps, payload, and status code.
Conclusion
Troubleshooting can be a very laborious activity and it seems to be inevitable in every development process. Having the right tools to properly and easily debug makes the process a lot less of a pain.
In this tutorial, you have learned and demonstrated how to use the Hookdeck CLI to debug your Okta Event Hooks to ensure you're receiving all the information you need and responding appropriately.
Happy coding!
