![]() Fikayo Adepoju Oreoluwa
Fikayo Adepoju Oreoluwa
Tutorial: How to Configure Discord Webhooks Using the API
In a previous article, we used the Discord web interface to set up a webhook on a Discord server. This webhook received commit updates from GitHub and posted the information as a message to the channel it was assigned.
In this tutorial, we implement the same setup; however, this time we will be using the Discord API to set up our webhook. The Discord API offers more flexibility for integrating with Discord by allowing developers to interact with Discord within automated scripts and workflows.
If you're still new to Discord webhooks and would like to learn all about them and how they operate, read this article before you proceed.
Let's get started.
Setup for receiving GitHub commit updates in Discord channels
Before we get into the implementation of our integration of GitHub and Discord, let's go through the requirements and steps that will be taken to achieve the integration.
To begin, the following accounts are required:
- A Discord account you own
- A GitHub account with a repository to experiment with
- A Hookdeck account (you can sign up for a free account here)
- An HTTP client tool (I will be using Postman for this tutorial)
Now that you have these in place, here are the steps you will take to create the communication flow between GitHub and Discord using webhooks created with the Discord API:
- Create a Discord server and set up a channel to receive the commit updates from GitHub
- Create a Discord application and add a bot to it with required permissions for creating webhooks
- Create a Discord webhook using the Discord API by authenticating with the Bot token
- Create a Hookdeck connection to ingest your webhooks
- Create a GitHub webhook using the webhook URL from Hookdeck
- Test your connection
Let's get right into it.
Creating a Discord server and channel
The first step is to create a Discord server and add a channel to it. To create a server, click on the plus (+) button on the side menu of your Discord interface. Then follow the server creation wizard (Create my own → For me and my friends) and enter a name for your server like below:
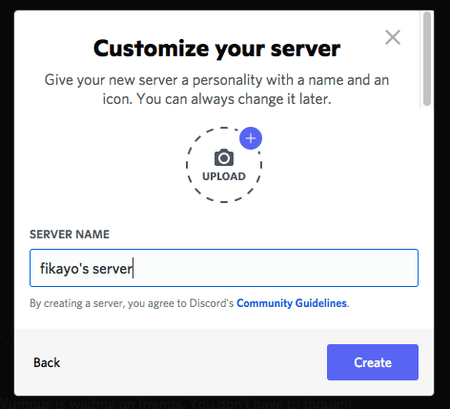
Click the Create button to complete the process.
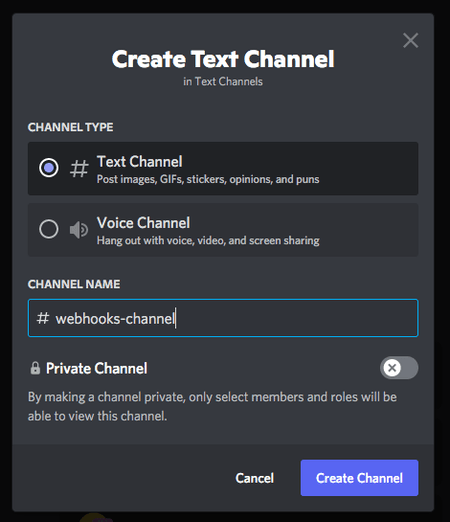
Next, add a channel to your server by clicking the + icon next to the TEXT CHANNELS label on the server menu. When a dialog pops up to enter a name for your channel, enter the value webhooks-channel like below, and click the Create Channel button.
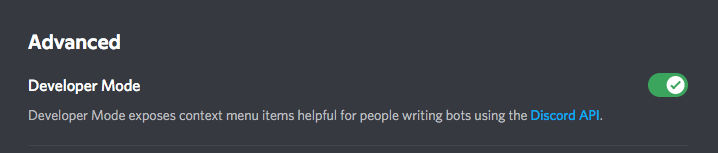
Now that you have created the channel, you need the channel ID. The channel ID can only be retrieved in developer mode, so you must click on the User Settings cog icon on the lower-left corner of your screen and click Advanced on the side menu. Here, you can turn on developer mode as shown below:
With developer mode on, you can now return to your Discord server and right-click on the webhooks-channel channel to copy the channel ID (click on Copy ID on the context menu).
Creating a Discord bot
The next step is to create a Discord application and add a Discord bot to the application. A Discord Bot (or a Discord bot account) is a special type of Discord user account dedicated to automation. Bot accounts have full access to all API routes without using bearer tokens, instead using a Bot token.
To create a Discord application, go to the applications page and click the New Application button. Enter a name for your app like below:
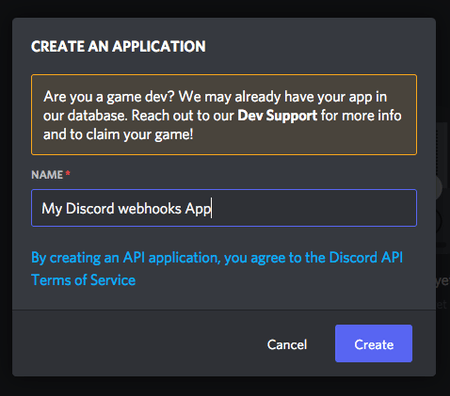
Click Create to complete the app creation process.
Once the application is created, go to OAuth2 → General to copy the client ID. This ID will be required later on, so store it in a place where you can easily retrieve it.
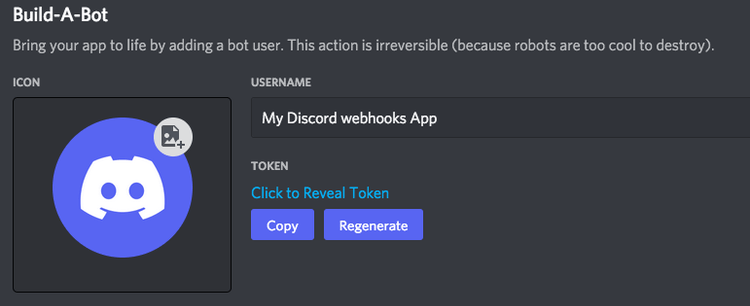
Next, you need to add a bot to the application. Click Bot on the application menu and then click the Add Bot button (click Yes, do it! on the confirmation prompt). On the bot page, copy the bot token as shown below:
Next, scroll down to the Bot Permissions section and select Manage Webhooks like below:
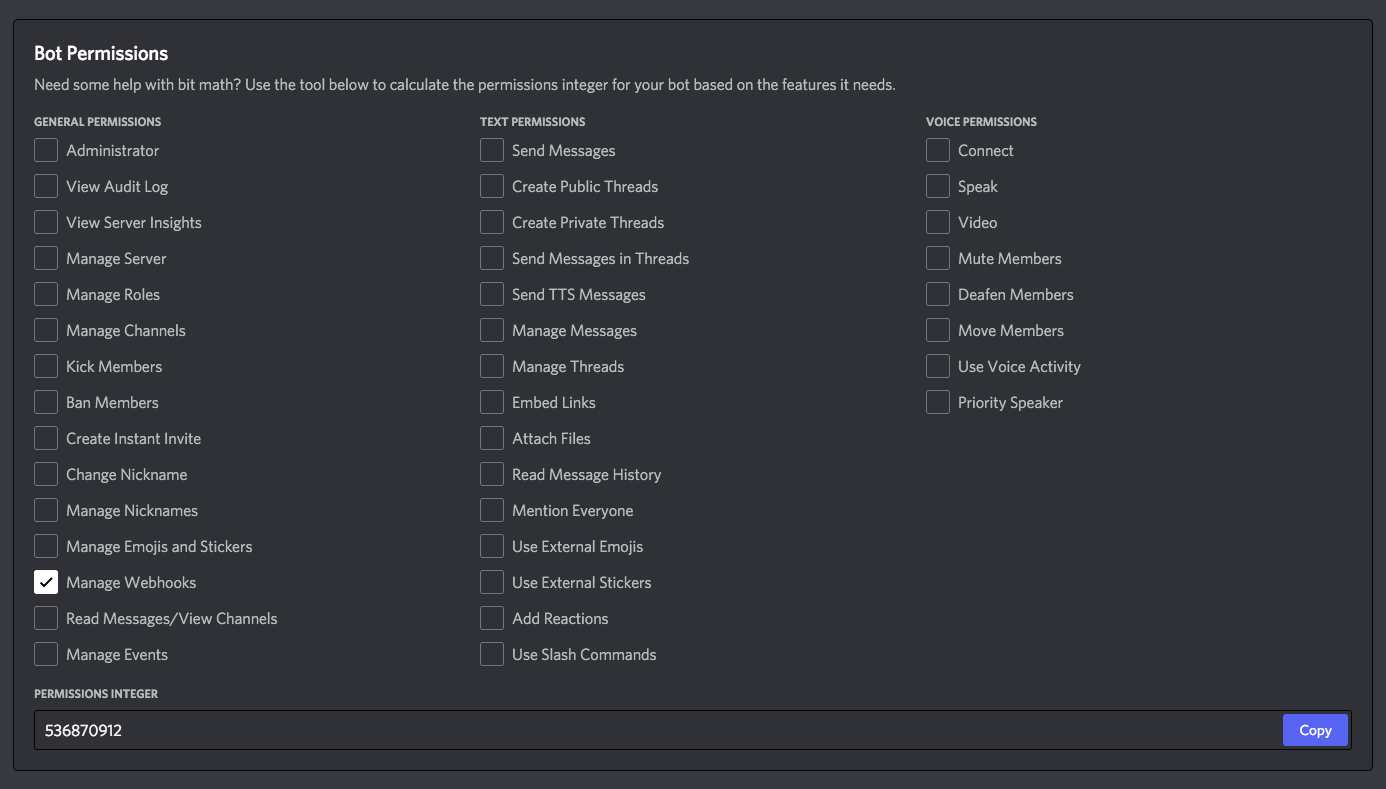
This permission is required for you to create webhooks using the Discord API. Click the Copy button beside the PERMISSIONS INTEGER field. This permission integer is required to authenticate the bot.
To authenticate the bot to have access to the Discord API, enter the following URL in your browser (ensure to replace the client_id and permissions_integer with your values):
https://discord.com/api/oauth2/authorize?client_id={{client_id}}&scope=bot&permissions={{permissions_integer}}
You can find more details about the bot authorization flow here. This URL will take you through the authorization process, where you will authorize the bot with the required permissions as shown below:
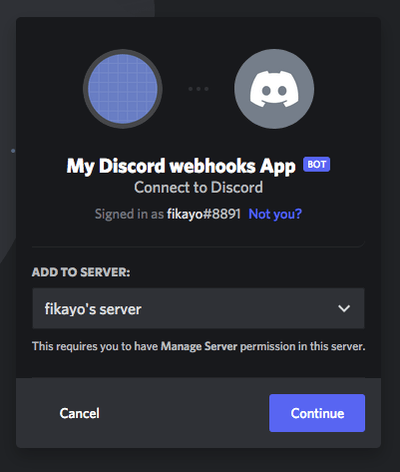
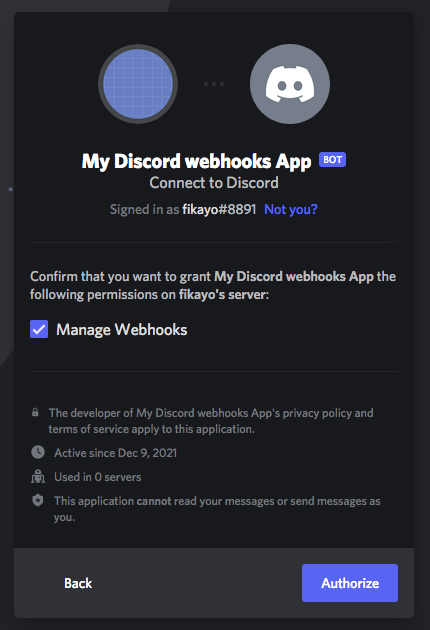
A robot check might also be required, but once you pass that, you will get a message that your bot is now authorized.
Creating a Discord webhook using the Discord API
Now let's create a Discord webhook using the Discord API. Enter the Discord webhooks API address shown below as your endpoint address:
https://discordapp.com/api/channels/{{channel_id}}/webhooks
Remember to replace channel_id with your channel ID.
Select the POST request method and add the Authorization header using the format below:
Authorization: Bot {{bot_token}}
bot_token is the token you copied from your Discord bot page.
The final item to add is the request body. Using the content-type of application/json, send the following request body:
{
  "name": "my test webhook"
}
The name property is the name you wish to give your Discord webhook, and it is the only compulsory property. Check here for more details on creating webhooks using the API.
Now send the request and you will get a successful response, as shown below:
 We have now successfully created a webhook for the
 webhooks-channel channel using the API.
One interesting thing I noticed the first time I created a webhook using the Discord API was that there was no webhook URL returned. According to the Discord webhook object definition, a webhook URL should be returned. However, I noticed that the webhook ID and webhook token were returned (id and token fields in the response).
A Discord webhook URL takes the format:
https://discord.com/api/webhooks/{{webhook_id}}/{{webhook_token}}
Thus, you can easily construct your webhook URL using details from the API response.
Setting up a connection in Hookdeck
The next step is to create a webhook connection in Hookdeck. A Hookdeck connection helps ingest the webhook requests coming from GitHub, and asynchronously sends them to Discord to ensure that no webhooks are dropped in the case of a spike in webhook traffic. This is considered a best practice for webhooks in production. Check out this article for more best practices for webhooks in production environments.
To create a connection on Hookdeck, go to Connections on your dashboard and click the Create button. Fill in the connection form fields as listed below.
- Source Name:
my-github-repository - Destination Name:
my-discord-channel - Destination URL: Your Discord Webhook URL
- Ruleset:
my-discord-ruleset
The filled form is shown below as a reference.
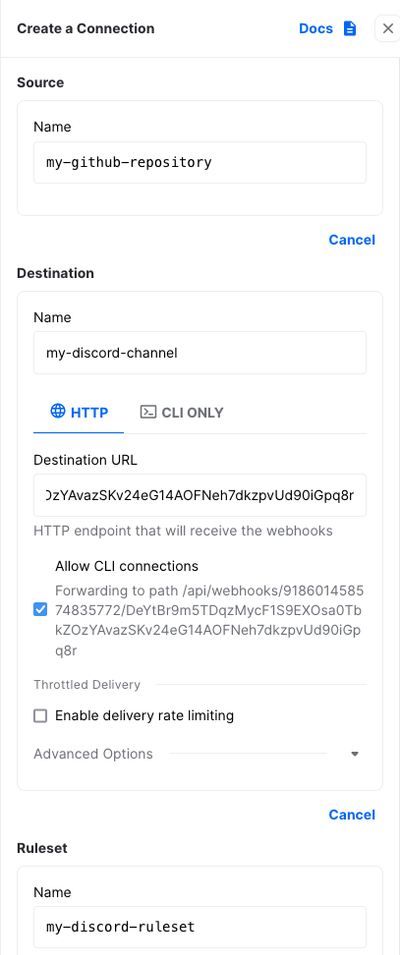
Click the Save button to create your connection.
Your connection is now displayed in the list of connections, like below:

Click the Copy webhook URL link on the connection source to get the Hookdeck webhook URL, as shown below:
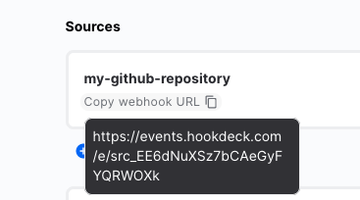
This is the webhook URL you will need to set up your GitHub webhook.
Setting up your GitHub repository to send commits to Discord
The next step is to set up a webhook on your GitHub repository. This webhook will be triggered anytime the push event is fired. A push event is fired when a new commit is made to the GitHub repository.
To set up the GitHub webhook, navigate to the repository you wish to use for this tutorial, then go to Settings → Webhooks and click the Add Webhook button on the Webhooks page. Fill the GitHub webhook form as follows:
- Payload URL: The webhook URL copied from Hookdeck with
/githubappended to it, i.e.https://[MY-HOOKDECK-URL]/github - Content-type:
application/json - Secret: Leave this blank
Leave the remaining options on the form in their default state. A filled version of the webhook form is shown below.
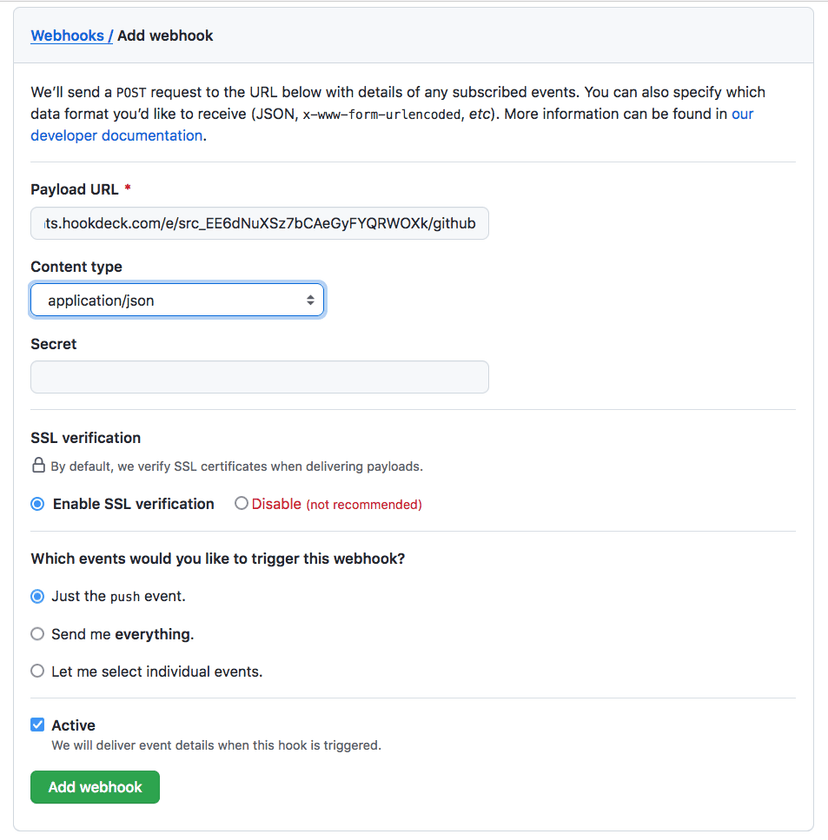
Do note once again to append /github to your Hookdeck, as this will ensure that Discord understands how to parse the payload sent by GitHub. This may not be applicable to all applications you want to integrate with Discord webhooks. To find information about the format for Discord webhook messages, check this guide. You can also find more details about GitHub's integration with Discord here.
Click the Add webhook button to complete the GitHub webhook creation process. GitHub will automatically trigger a ping webhook request when a new webhook is created. You can ignore this ping request and move on to the next step.
Testing your Discord webhook notifications
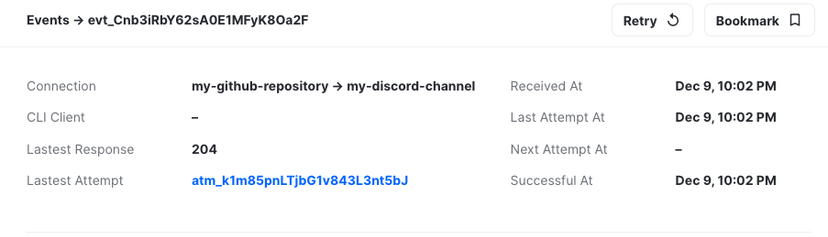
With the connection between Discord and GitHub established through Hookdeck, time to test the communication flow. Push a new update to your GitHub repository. Once pushed, check the Connections page on your Hookdeck dashboard, where you will see an event similar to the one below:

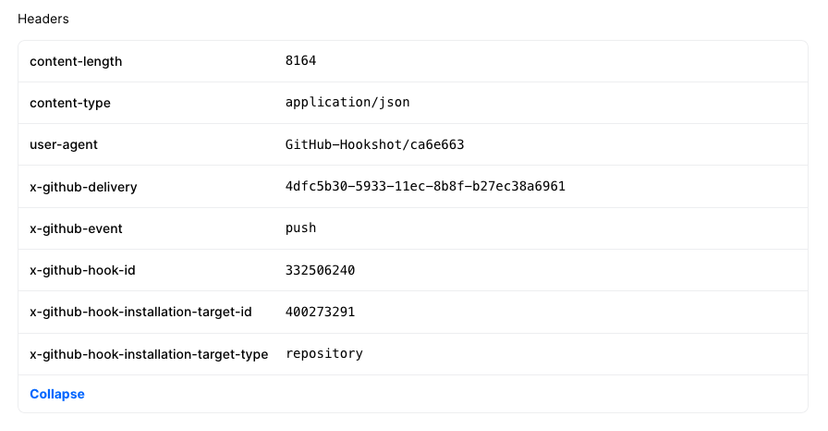
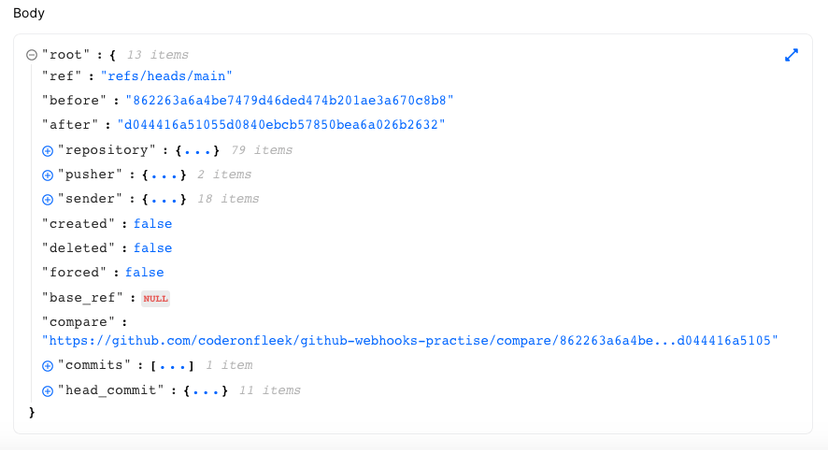
Clicking on the event will pull up the event details on a right-hand-side screen. However, to view the complete event details, you must click the arrow icon on the top right. On the full event page, you can view the webhook metadata, headers, and body as shown below:
Metadata
Headers
Body
Hookdeck gives you the ability to inspect your webhooks down to the last detail.
Let's now confirm that the GitHub commit information is being sent to the Discord channel that was created. Return to your Discord account and click the webhooks-channel channel to view the messages in it. You will see a new GitHub message similar to the one shown below:
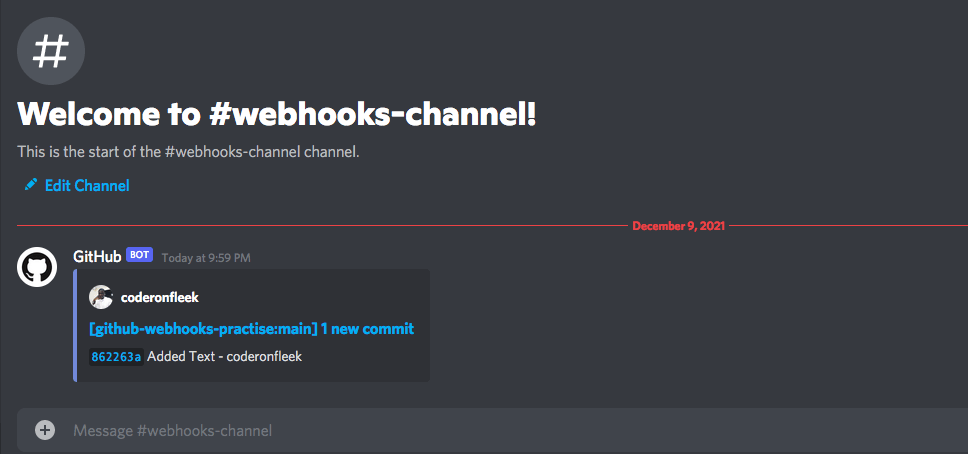
Sleek, isn't it?
Conclusion
APIs provide flexible ways for developers to integrate with SaaS platforms. To learn about security considerations, check out our guide to Discord webhooks features and best practices. Using the Discord webhooks API, you can programmatically control how your webhooks are managed and also involve them in your automation workflows.
In this tutorial, you have learned how to use the Discord webhook API to create webhooks. The API also contains a bunch of endpoints for retrieving, editing, and deleting your webhooks. I encourage you to visit the documentation and play around with more endpoints, as well as other configuration options the API offers.
Happy coding!
