CircleCI Webhooks Tutorial
Webhooks on CircleCI are a push model of communication for sharing information about events taking place on the platform to external clients. Clients register an endpoint on a CircleCI project for receiving notifications when a subscribed event takes place. When this event takes place, a webhook request (an HTTPS request) is sent to the endpoint with a payload of information about the event that occurred. This allows external clients to receive information in real-time about events they subscribed for.
If you are curious to learn more about how CircleCI webhooks work, you can read our Getting Started article.
In this article, we will do some practical work with CircleCI webhooks to further our knowledge of the technology. Follow along as we send workflow information for a CircleCI project to an API that will log a subset of the information, including the status of the workflow.
Let's get started.
Tutorial: How to set up CircleCI webhooks
Workflows logging system project
As described earlier, I will demonstrate the use of CircleCI webhooks by creating a webhook that sends workflow information for a CircleCI project to an API that logs the information.
Below is a summary of steps to achieve this setup.
- Clone the workflow logger API. This is a Node.js project, thus you need to have Node.js installed on your system (version 12 or greater is fine).
- Generate a webhook URL that will be used to create a webhook on CircleCI.
- Set up a webhook on CircleCI.
- Trigger a build to receive and inspect your webhook.
- View the webhook logged by the API.
Now that you're up to speed, let's begin the project.
Clone the workflow logger API
CircleCI webhooks need to be sent to an endpoint on your API or the API of a third-party client you want to integrate with (e.g Zendesk). This endpoint must also use the POST method as CircleCI webhooks are sent as POST requests.
If you already have a server running with a POST endpoint to receive the webhook request and you prefer to use that for this demonstration, you can skip this section. All you need to do is to take note of the port that your local API is running and the endpoint to receive webhooks. Substitute these values as you follow this exercise.
For this demo, a Node.js sample API for logging CircleCI webhooks is available on the Hookdeck GitHub repository. Follow the instructions below to set it up.
Clone the repository by running the following command:
git clone --single-branch --branch circleci-webhooks https://github.com/hookdeck/nodejs-webhook-server-example.git
Navigate to the root of the project and install the required dependencies by running the following commands:
cd nodejs-webhook-server-example
npm install
When the installation completes, you can then run the Node.js server with the following command:
npm start
This will boot up the API application and print a message to the screen indicating that the API is now running and listening for connections on port 1337.
We are using two endpoints in this project.
/log-circleci-webhook: This is the endpoint that will be receiving the CircleCI webhook and logging it into an in-memory database. It logs a simple object containing a subset of the information from the webhook payload./fetch-webhooks-logs: This endpoint can be called to retrieve a collection of the logged webhook data.
Generate a webhook URL for CircleCI
A locally running server cannot receive CircleCI webhooks; a publicly accessible endpoint is required and this is where the Hookdeck CLI comes in. The Hookdeck CLI is built specifically for working with webhooks, and helps tunnel external HTTP requests into your local development environment by providing you with a publicly accessible HTTPS URL. You can also inspect the headers and payloads of your webhooks, as you will see later on in this tutorial.
Visit Hookdeck's CLI documentation to install and set up the tool on your operating system. For macOS users, you can run the following command to install the CLI tool:
brew install hookdeck/hookdeck/hookdeck
If you're using the Windows operating system, use the following command to install the CLI tool:
scoop bucket add hookdeck <https://github.com/hookdeck/scoop-hookdeck-cli.git>
scoop install hookdeck
Once the setup process is complete, the next step is to use the CLI to generate a webhook URL that points to the running API application. To do this, run the following command (note: replace the port 1337 value with the port number on which your API is running if you're not using the sample project):
hookdeck listen 1337
This command starts an interactive session where the CLI collects information about the endpoint you're about to create. Below are the questions and the answers you should supply to each question. Ensure to hit the Enter key after each answer.
| Prompt | Answer |
|---|---|
| What source should you select? | Create new source |
| What should your new source label be? | CircleCI |
| What path should the webhooks be forwarded to (i.e.: /webhooks) | /log-circleci-webhook (if you're using your own custom server, replace this value with your endpoint) |
| What's the connection label (i.e.: My API)? | My CircleCI Webhook Logger |
With this information, the CLI will begin the process of generating the URL and once it's done, you will see the URL printed to the screen and the CLI indicating that it is ready to receive requests.
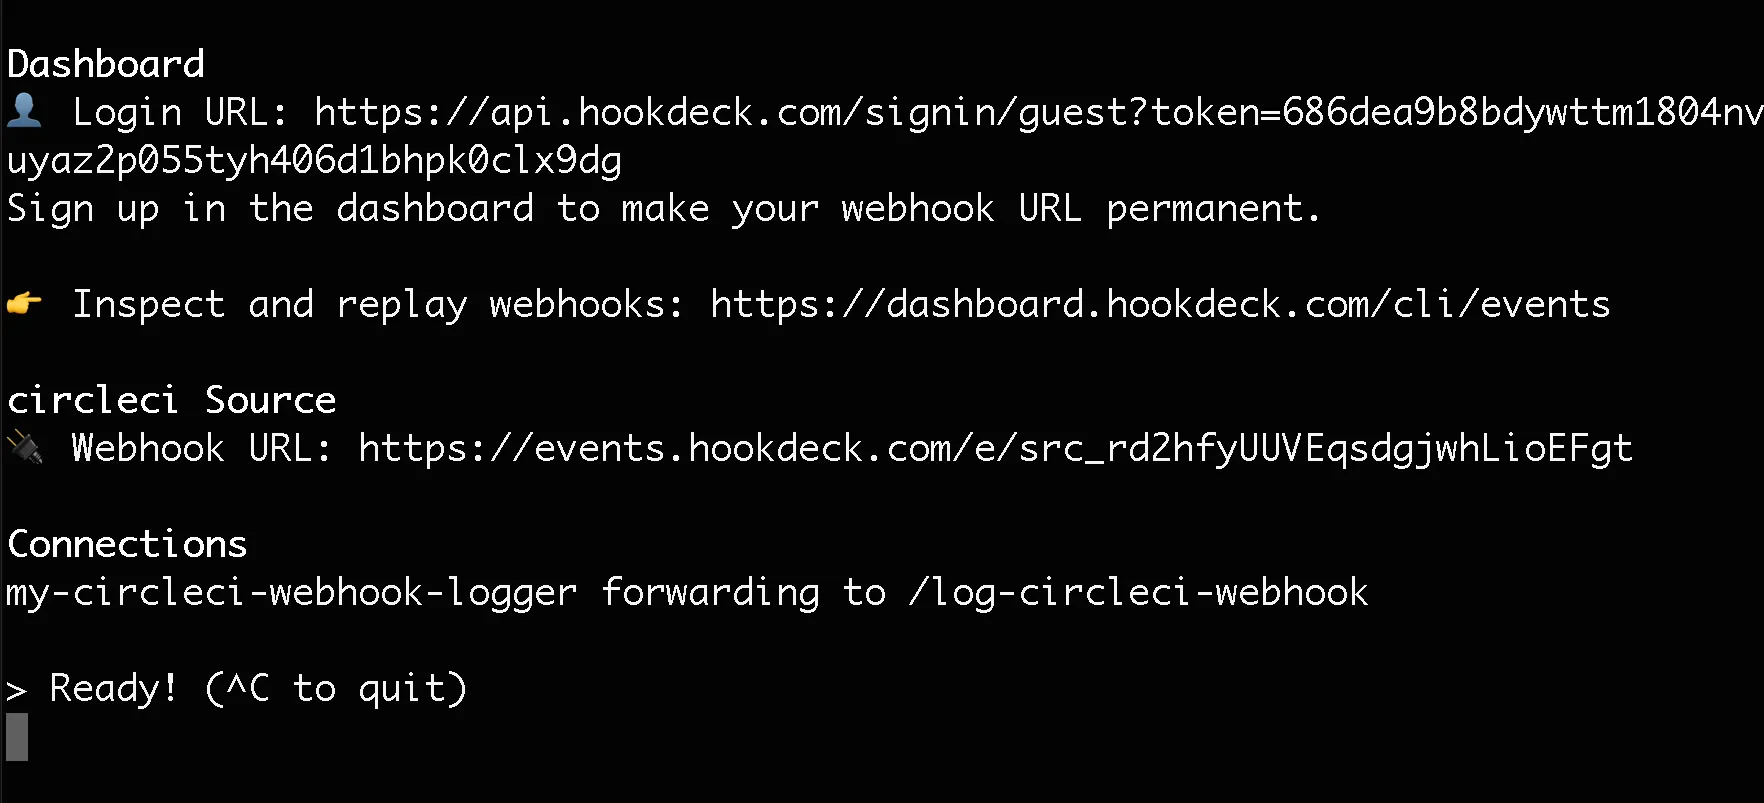
Note: You will need to use the guest Login URL link in the console to access the dashboard. Copy and paste this into your browser to begin a guest login session.
Set up a webhook on CircleCI
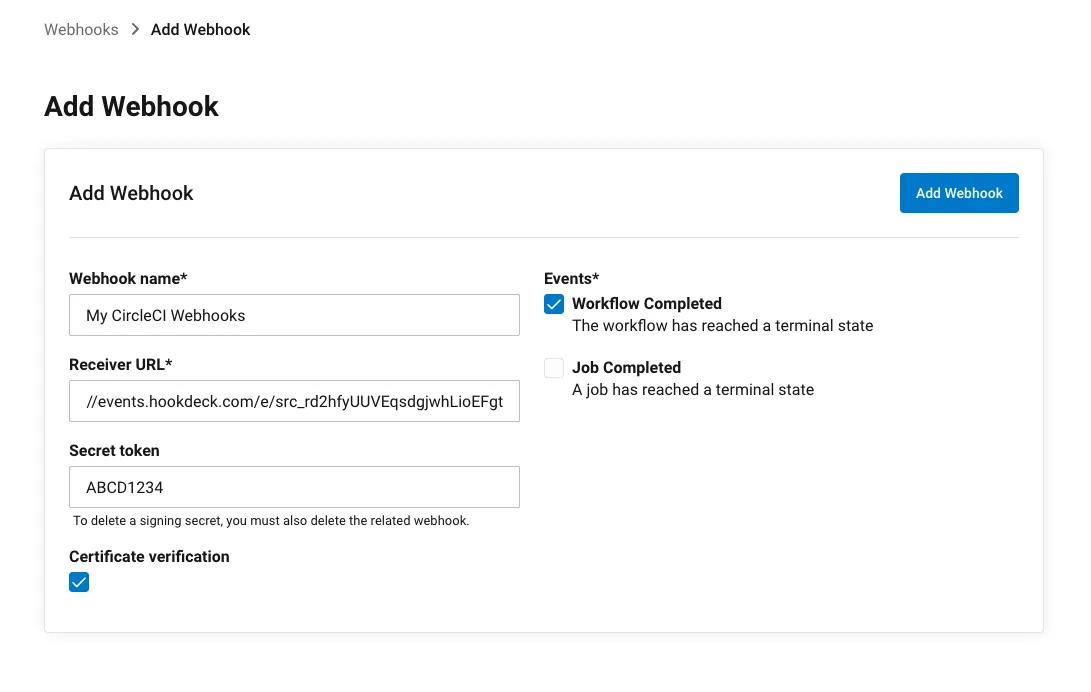
With your webhook URL in hand, you can now set up a webhook on CircleCI. Go to any of your CircleCI projects and navigate to Project Settings > Webhooks. On the Webhooks page, click the Add Webhook button.
This will display a webhook form for you to create your webhook. Fill the form fields as listed below.
- Webhook name: This is a descriptive name for your webhook. For this demo you can enter something simple like My CircleCI Webhook.
- Receiver URL: This is your webhook URL. Paste the webhook URL from the Hookdeck CLI output here.
- Secret token: This is a security feature that allows you to verify your webhook source (more on this later). Enter the value ABCD1234 here.
- Certificate verification: If checked, this ensures that the SSL certificate on your API is verified to be authentic and up to date. Check this box.
- Events: Check the Workflow Completed event.
See below an example of the filled form:
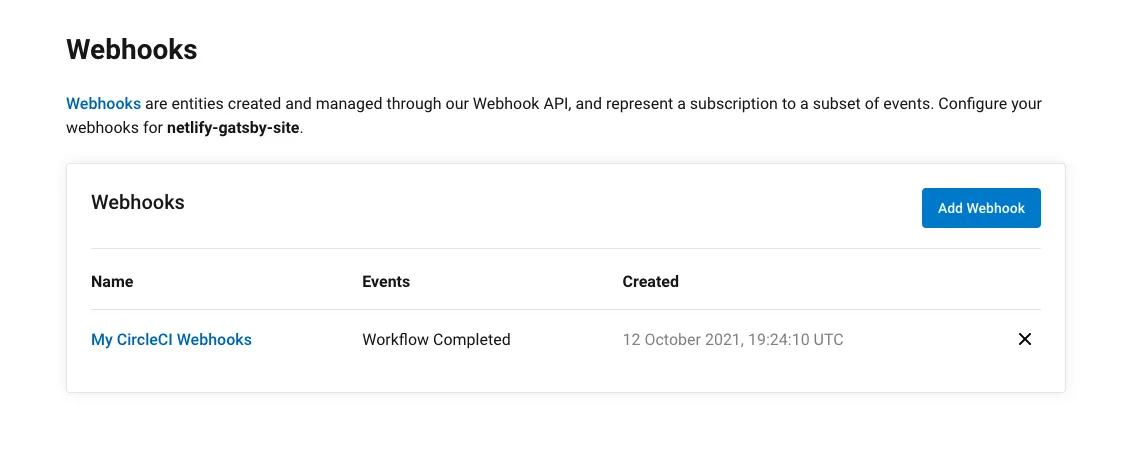
Click the Add Webhook button to create your webhook. Once created, you will see it displayed in the list of webhooks, like this:
Receive and inspect your webhook
Now that you have created your webhook and you have the Hookdeck CLI running and waiting for webhook requests, it's time to trigger a webhook on CircleCI.
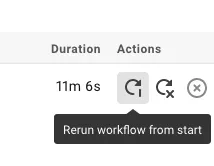
Since we subscribed for the Webhook Completed event, there are two ways you can trigger a webhook on your CircleCI project. One option is to push a new update to the repository connected to your CircleCI project to trigger the workflow to run, and once the workflow is complete, a webhook is fired. You can also go to the workflow and click the Rerun workflow from start button shown below on the Pipelines page.
Once your workflow completes, a webhook entry will be captured on your Hookdeck CLI session as shown below:

As seen, the status of the request is 201, indicating that a new resource has been created on the logger API.
To view details of the webhook, copy the event URL, which is the last item on the logged webhook in the CLI. Load this URL in your browser and you will see a screen similar to the one below:
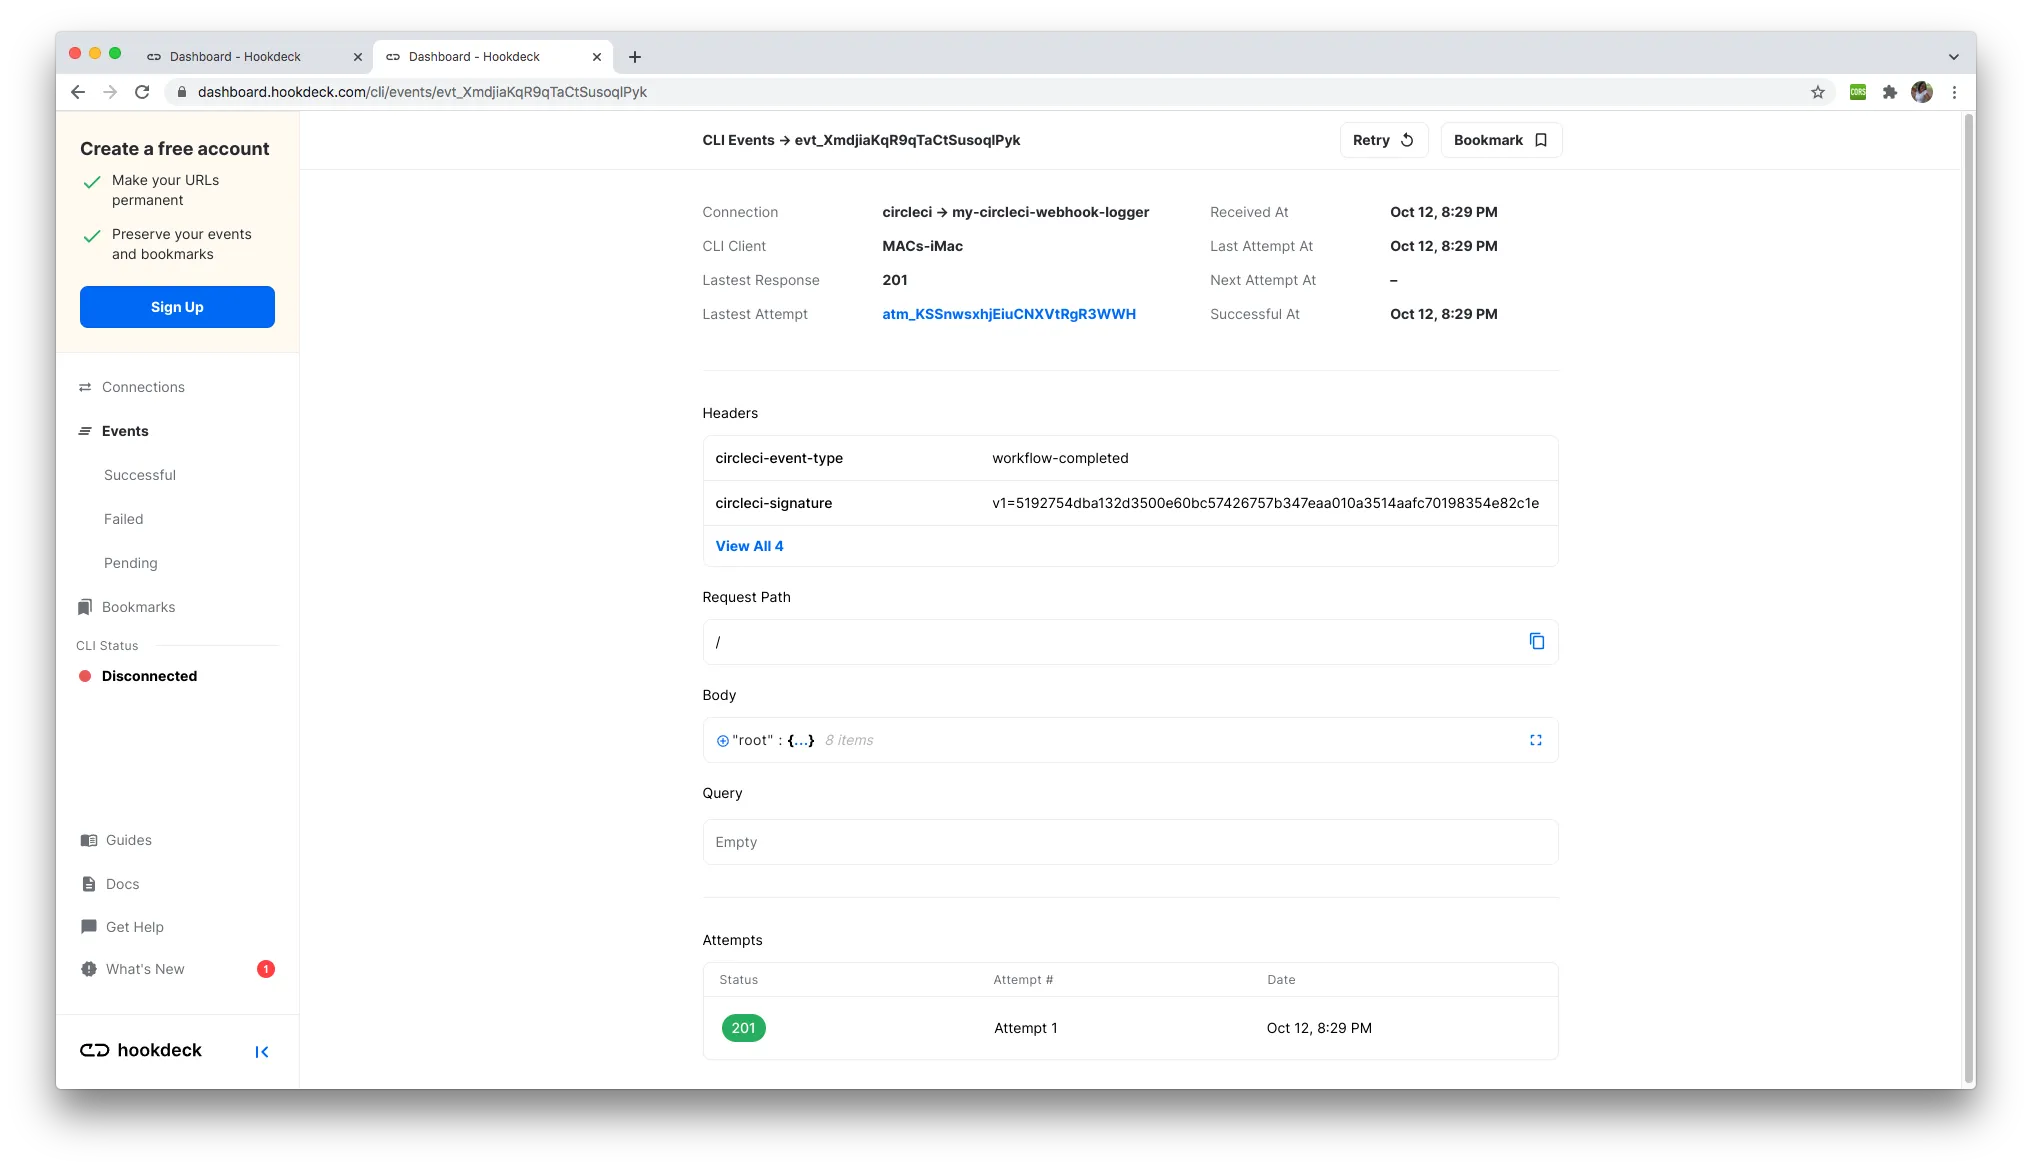
Here, you can view the webhook headers under the Headers section as shown below:
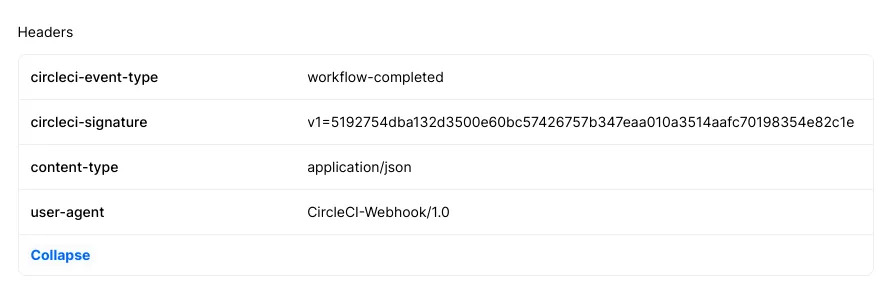
Notice the circleci-signature header. This is the signature for the encrypted payload that uses the secret token supplied when creating the webhook on CircleCI. We'll learn how to validate the webhook source using this signature in a later section.
You can also view the webhook payload in the Body section of the event page:
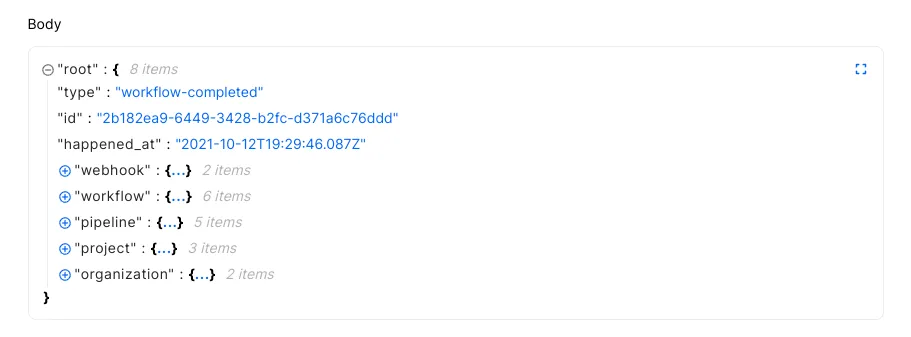
Information about the webhook, workflow, pipeline, CircleCI project and CircleCI organization are contained in nested objects.
Inspect the workflow log
Time to see the logged webhook and the information the API has been able to capture. Visit the endpoint /fetch-webhooks-logs, where you will see your webhook log object, which should look similar to this:
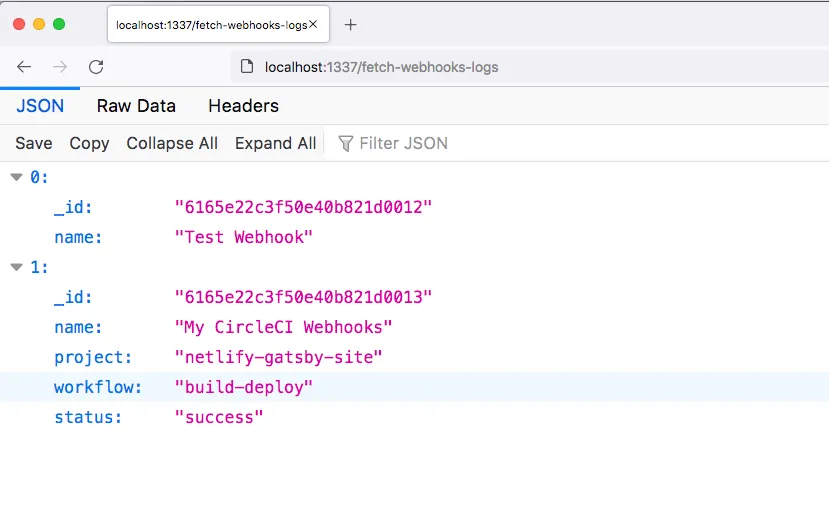
As seen above, we are logging the name of the webhook, the name of the project, workflow name, and the status of the workflow. You can ignore the first entry as this is simply a test entry so that the application database does not start empty.
How to verify CircleCI webhook secret
Your webhook URL is a publicly accessible endpoint and as such, it can receive requests from anyone. This situation makes your endpoint vulnerable, as ill-intentioned individuals or bots can easily spoof requests imitating CircleCI to dump irrelevant data into your system or manipulate your application.
You should verify the requests hitting your webhook URL to ascertain that they are from CircleCI. CircleCI helps you achieve this using the secret token entered when setting up the webhook.
CircleCI uses this token to create a hash signature with each payload. This hash signature is included with the headers of each request as circleci-signature.
With this signature, you can validate your payloads. CircleCI uses the HMAC algorithm to compute the hash, and it is the same algorithm you will use to implement the validation on your server.
At the moment, our project is not enforcing this check but the code can be found commented out, as shown below:
//Validate payload
/* function validatePayload(req, res, next) {

    if(req.method == "POST"){
        if (!req.rawBody) {
            return next('Request body empty')
        }

        const sig = Buffer.from(req.get(sigHeaderName) || '', 'utf8')
        const hmac = crypto.createHmac(sigHashAlg, secret)
        const digest = Buffer.from('v1=' + hmac.update(req.rawBody).digest('hex'), 'utf8');

        if (sig.length !== digest.length || !crypto.timingSafeEqual(digest, sig)) {
            return next(`Request body digest (${digest}) did not match ${sigHeaderName} (${sig})`)
        }
    }

    return next()

}
app.use(validatePayload); */
From lines 10 to 12, you can see the validation variables defined:
const sigHeaderName = "circleci-signature";
const sigHashAlg = "sha256";
const secret = "ABCD123";
The secret variable is the key we set when creating our webhook. In a production environment, these values should be kept in environment variables.
You can uncomment the payload validation middleware to ensure that your webhook payload is validated against the API secret set.
This secret variable is currently wrong (ABCD123 instead of ABCD1234) and does not match the one entered in the webhook form. If you trigger a webhook, the verification will fail and you will get this message displayed on your event page:
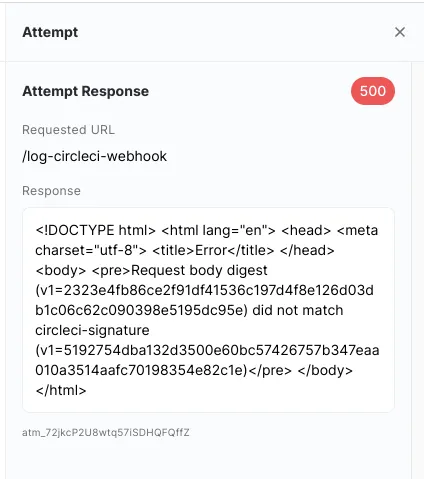
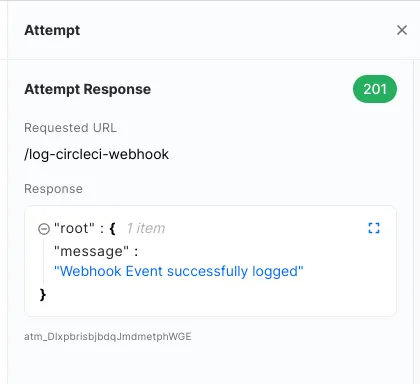
This message indicates that the signature computed from the payload using the wrong secret token did not match the one sent by CircleCI. Fix the issue by correcting the secret token, then restart your server and retry the webhook once again. You can easily retry a webhook on your event page by using the retry button at the top-right hand corner of the page.
You should now pass the verification test and get this successful API message:
Other use cases for CircleCI webhooks
This demo is a very simplified use case for implementing CircleCI webhooks. There are more powerful use cases for CircleCI webhooks that help you perform tasks like responsive automation, workflow status messaging, analytics, and more.
See the list below for some production-level use cases for CircleCI webhooks:
- Triggering notification systems to alert team members when workflows/jobs complete
- Sending information to team collaboration platforms like Slack and Microsoft teams
- Sending data to incident Management tools like Zendesk or Pagerduty
- Using the webhook data for Analysis on tools like Grafana or Airtable
- Building your own custom plugins and integrations with custom software
This is not an exhaustive list of what you can do with CircleCI webhooks.
Conclusion
CircleCI webhooks offer a real-time connection with the platform to get instant notifications and information on events taking place. In this tutorial, we have demonstrated how CircleCI webhooks are useful in logging information about your build workflows.
If any part of your setup is not working as expected, I advise you to go through the instructions once again to see if there is anything you may have missed. In our next article, we will be going through a list of best practices for deploying your CircleCI webhooks in a production environment.
Happy coding!
